Leatherwork
®
Guidebook | 2827 | Sailrite�com
Troubleshooting the Leatherwork
UsethisnextsectionasaguidetobetterunderstandyourLeatherworkandtohelpne-
tune and resolve common sewing machine problems�
A
33
Replacing Take-Up Spring
If you are getting inconsistent stitch tension or if your thread looks loose and sloppy near the tension
assembly under operation, check your take-up spring (J).Ifthewirehookhasbrokenoff,you’llneed
to replace the take-up spring� To do this, disassemble the Upper Tension Assembly� Keep track of
how the parts are removed as they will be replaced in the same manner (34)�
1� Pull the cover knob (C) straight off (wiggle a
bit if needed)�
2� Unscrew and remove the threaded
knob (D)�
3� Remove the big spring (E), the spring
holder (F), the two tension disks (G and H),
and the keyway washer with pip (I)�
4� Remove the old take-up spring (J) by
pulling it straight out�
5� Slide the new take-up spring over the core
post (K) so that the pip on the back faces
in toward the machine and the straight arm
of the spring faces down (approximately at
a6o’clockposition).Pushthespringinall
the way�
6� Spin the arm of the spring clockwise past
the slot in the plastic core�
7� While holding the spring arm in place, slide
the keyway washer (I) back onto the core
with the pip facing in, so the take-up spring
arm rests on the metal pip of the washer�
8� Replacethersttensiondisk(H) with the
convex side facing out� Add the second
tension disk (G) with the concave side
facing out�
9� Replace the spring holder (F) with the
concave side facing out and the spring (E)�
Screw the threaded knob (D) back on the
post and add the cover knob (C)�
34
L K J I H G F E D C
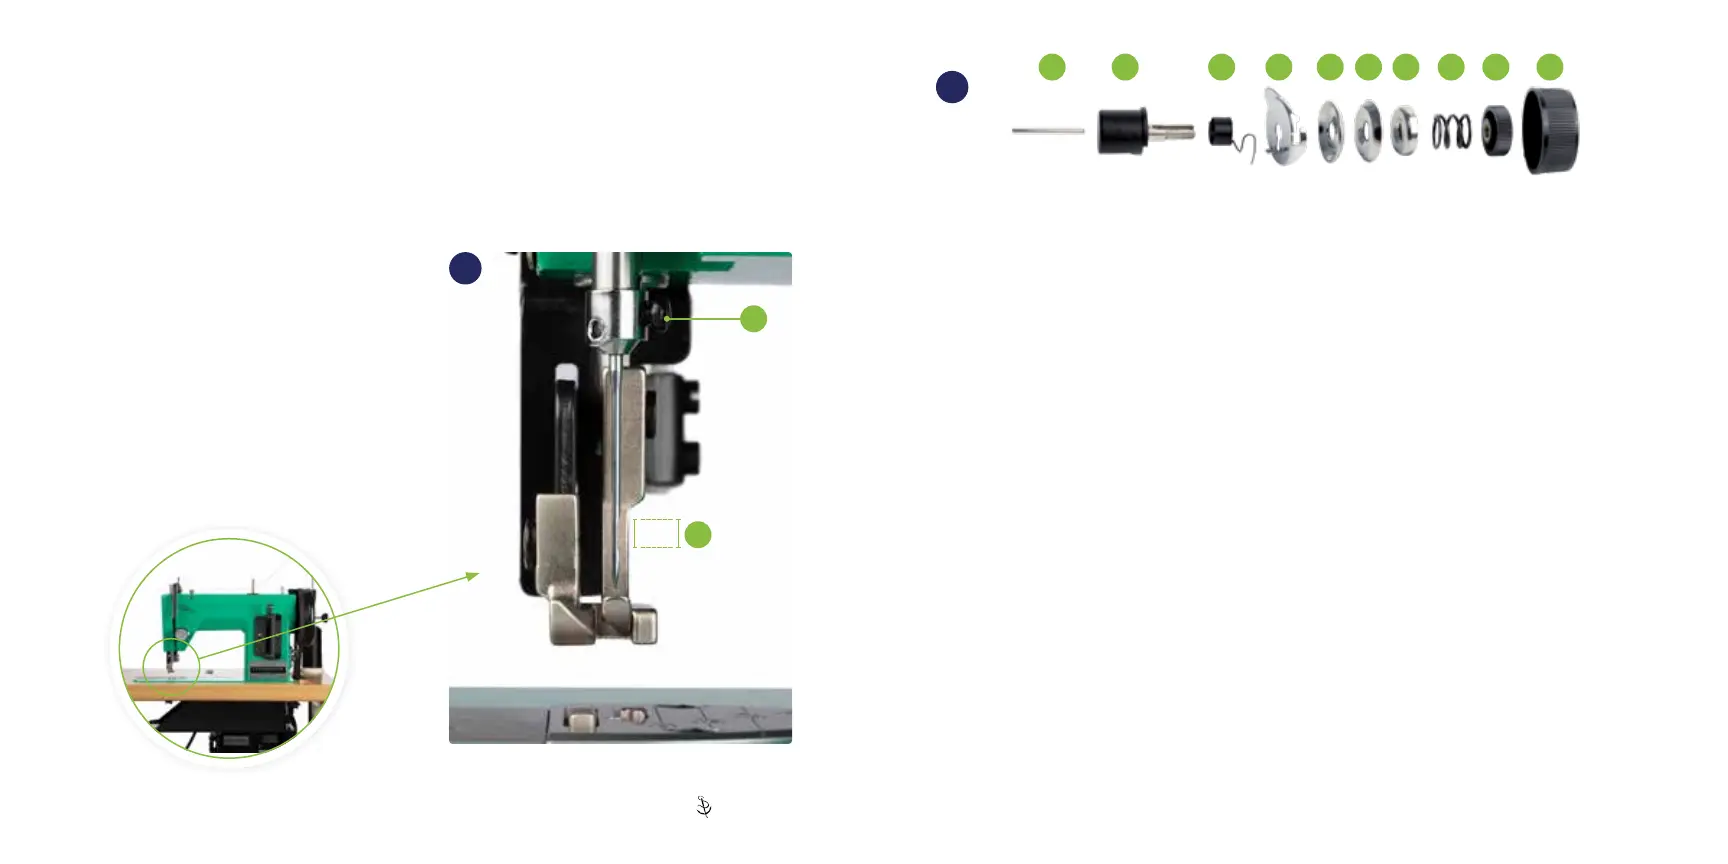
Proper Needle Orientation
& Installation
When installing a new needle, make sure the
needle is inserted in the correct direction� With
the front of the machine facing you, the scarf or
carved-out area (A) of the needle should face to
the right� Push the needle all the way up into the
needle bar, then tighten the needle screw (B)�
B