13 | Sailrite�com Leatherwork
®
Guidebook | 14
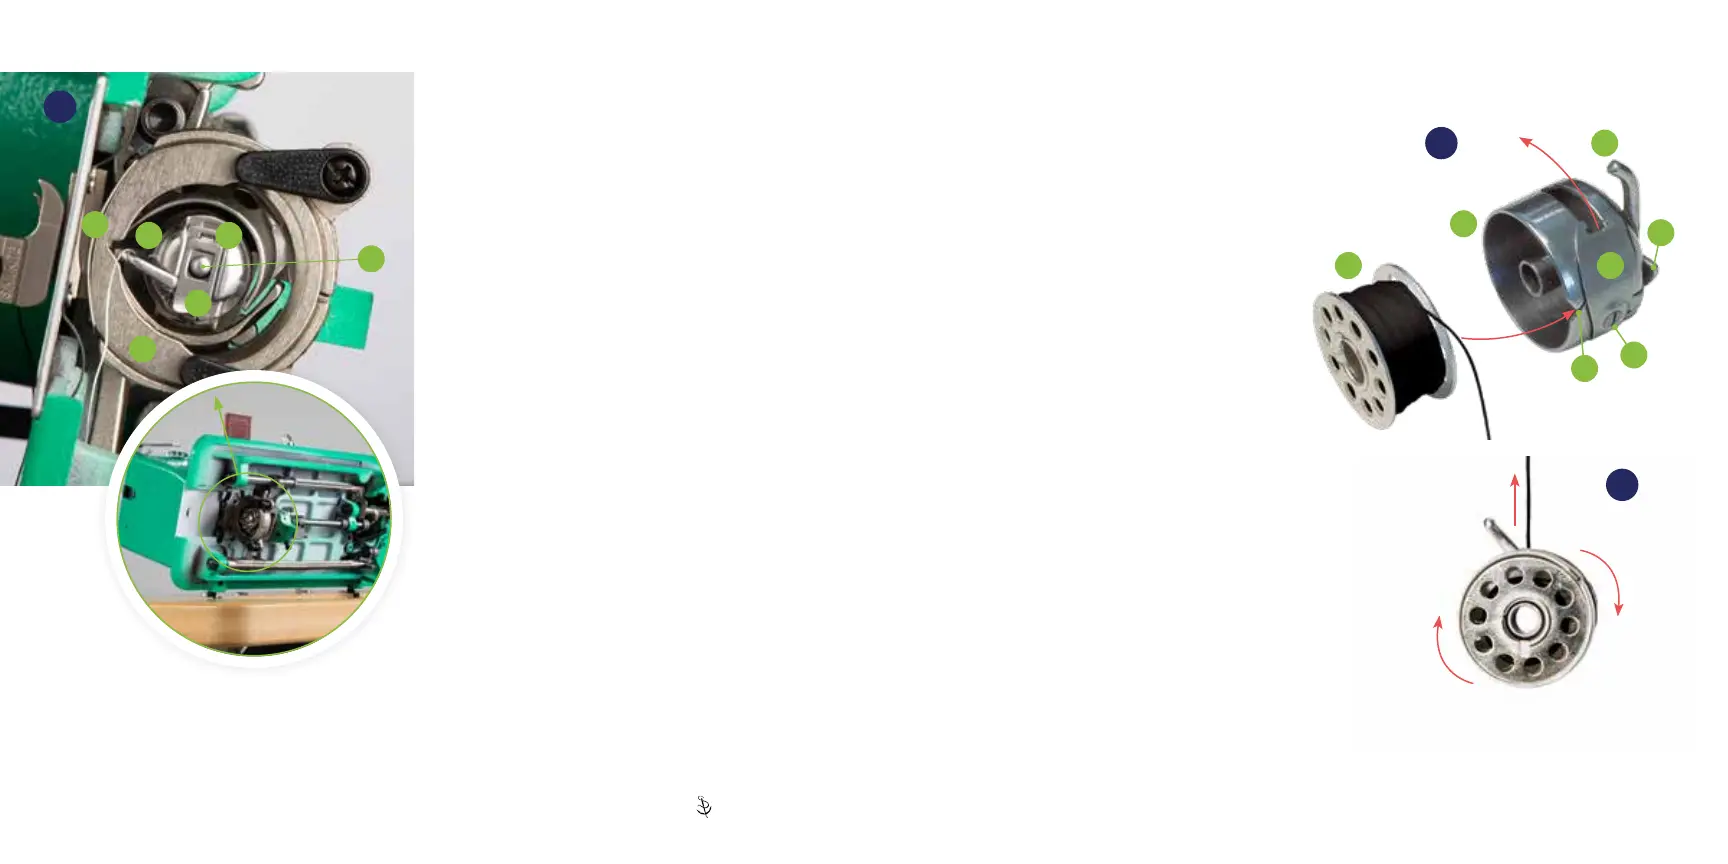
Removing & Installing
Bobbin Case
The bobbin case (B) is located
on the underside of the machine
beneath the presser foot (11)�
Removing — Lift the spring-loaded lever (E)
and pull the bobbin case out� With the lever held
open, the bobbin is captive in the bobbin case�
Release the lever and the bobbin will fall out�
Installing — Pull and hold the spring-loaded
lever outward to keep the bobbin from falling
out and push the case onto the axle of the gib
hook (F).Thengerofthebobbincase(G)
shouldtintotheretainingring’snotch(H)�
If the lever (E) is held up until the bobbin
case is completely installed, the lever, when
released, will lock onto the axle and there will
be no clicking sound� If the lever is released
before the bobbin case is pushed completely
in place, there is a clicking sound when the
caseispushedallthewayon.Thengerof
the bobbin case will drop into the notch in the
hook’sretainingring(H)� Bobbin thread should
loosely dangle�
BG
H
E
I
11
Installing Bobbin
in Bobbin Case
1� Insert a threaded bobbin (A) into the bobbin
case (B) as shown in image (12)�
2� Hold the tail of the thread while pushing the
bobbin into the bobbin case�
3� Pull the thread through the slit (C) in the
edge of the bobbin case�
4� Continue pulling the thread under the
tension plate (D)�
5� Snap thread into position under tension
plate and pull out about 12 to 18 inches of
thread, checking for consistent tension�
6� Holding the case with a view of the bobbin,
the bobbin should turn clockwise when pulling
on the thread tail (13)� If it is not, take the
bobbinoutandipitover.
A Bobbin
B Bobbin Case
C Slit
D Tension Plate
E Spring-Loaded Lever
G Finger
I Tension Adjustment Screw
12
A
B
D
G
C
I
E
13
F