EB 8048-2 EN 9-7
Servicing
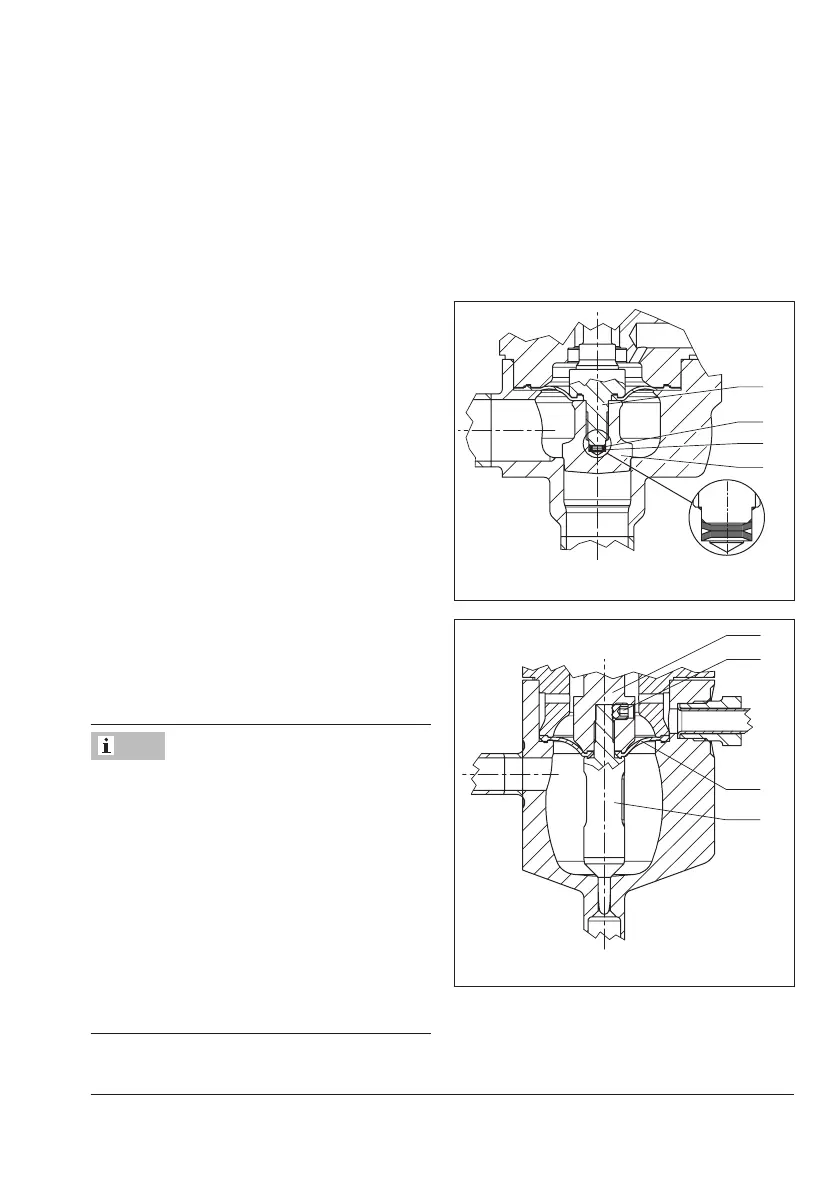
18. For micro-ow valve version: secure
plug (2) with threaded pin (6.1) (see
Fig.9-4).
19. Check the concentricity of the plug (see
section9.7).
20. Clean the ange area that will be locat-
ed above the diaphragm with detergent
and a brush. Rinse it with water and ap-
ply a non-damaging mild sanitizer.
21. Push the plug (2) together with plug stem
(3) and diaphragm (24) into the stan-
dard yoke (20).
22. Place the standard yoke (20) together
with the plug stem (3), plug (2) and dia-
phragm (24) onto the body (1).
23. Apply a suitable lubricant to the bolts
(34).
24. Tighten the screws (34) on the standard
yoke (20) gradually in a crisscross pat-
tern until the valve bonnet touches the
body ange.
Greater deformation forces are required for
new diaphragms (in comparison to already
installed diaphragms). We recommend
shaping the new diaphragms beforehand us-
ing conventional hex screws:
− Tighten the conventional hex screws as de-
scribed in step 24.
− Replace the conventional hex screws with
the existing screws (34).
− Tighten the screws (34) as described in
step 24.
25. Mount actuator. See associated actuator
documentation and the 'Installation' sec-
tion.
26. Adjust lower or upper signal bench
range. See associated actuator docu-
mentation.
3
6.
6.
2
Fig.9-3: X shape of washers
6.
2
24
Fig.9-4: Threaded pin on the plug stem/plug
Note