ENG - 20
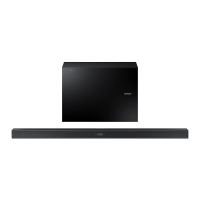
3. Press and hold the Up button on the Soundbar remote control for 5 seconds or press the ID SET
button on the bottom of the Soundbar.
• The ID SET message appears on the display of the Soundbar for a moment, and then it
disappears.
• The Soundbar will automatically power on when ID SET is complete.
ID SET
DIGITAL AUDIO IN
(OPTICAL)
SERVICE
DC 19V
NETWORK ID SET
DIGITAL AUDIO IN
(OPTICAL)
SERVICE
NETWORK ID SET
HDMI TO TV
(eARC/ARC)
DIGITAL AUDIO IN
(OPTICAL)
SERVICE
DC 19V
DIGITAL AUDIO IN
(OPTICAL)
SERVICE
DC 19V
DIGITAL AUDIO IN
(OPTICAL)
SERVICE
DC 19V
HDMI
NETWORK ID SET
DIGITAL AUDIO IN
(OPTICAL)
SERVICE
NETWORK ID SET
DIGITAL AUDIO IN
(OPTICAL)
SERVICE
DC 19V
DIGITAL AUDIO IN
(OPTICAL)
SERVICE
DC 19V
PAIR
5 Sec
OR
Bottom of the Soundbar Main Unit
CAUTION
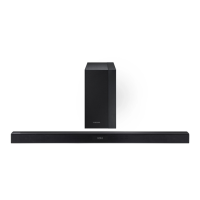
• If your Soundbar was playing music when it connects to the SWA-9000S, you may hear some
stuttering from the woofer as the connection nalizes.
4. Check if the LINK LED is solid blue (connection complete).
STANDBY
LINK
Blue is On
The LINK LED indicator stops blinking and
glows a solid blue when a connection is
established between the Soundbar and the
Wireless Receiver Module.
5. If the SWA-9000S is not connected, repeat the procedure from Step 2.
 Loading...