• SAMSUNG Electronics
is not responsible for any damages to the product or harm to customers
when the installation is done by the customer.
• This product is for installing on cement walls. The product may not stay in place when installed
on plaster or wood.
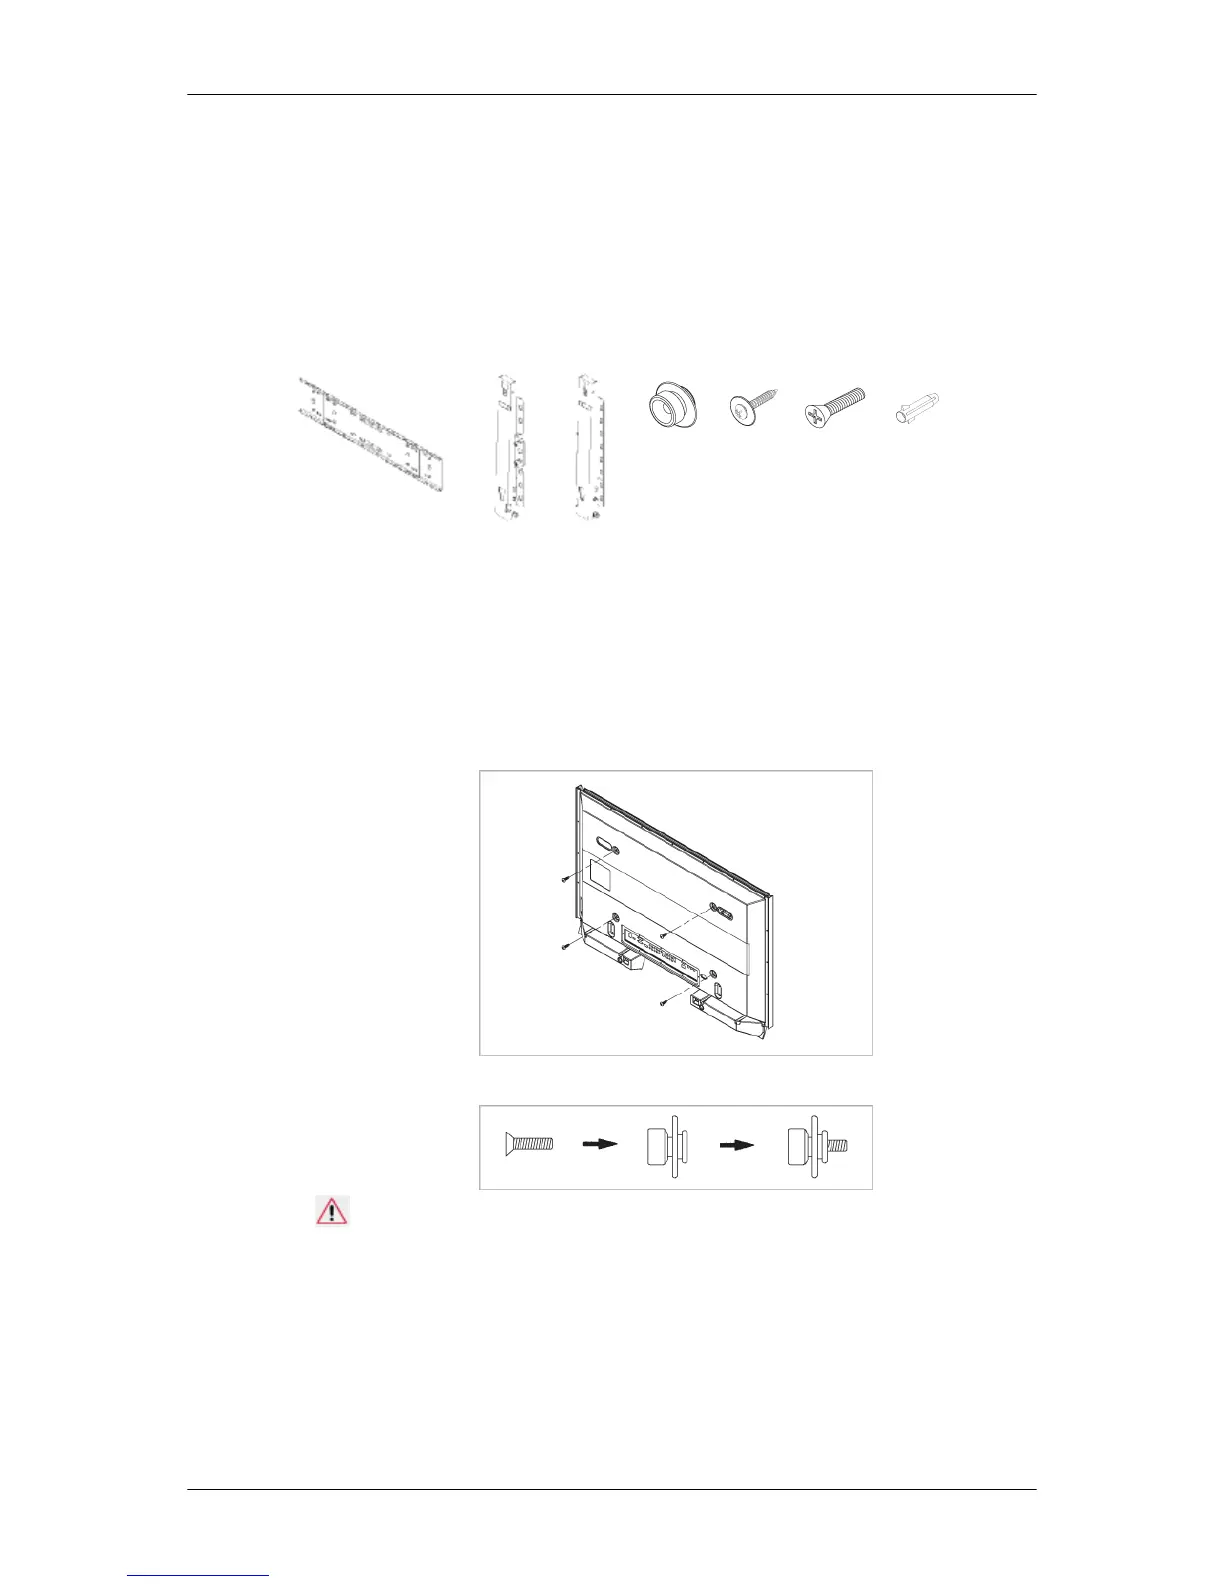
Components
Only use the components and accessories shipped with the product.
Wall Bracket(1) Hinge(Left 1, Right
1)
Plastic
Hanger
(4)
Screw
(A)(11)
Screw(B)
(4)
Anchor
(11)
To mount the product on the wall bracket
The shape
of the product may vary depending on the model. (The assemblies of the plastic hanger and
the screw are the same)
1. Remove the 4 screws on the back of the product.
2. Insert the screw B into the plastic hanger.
Notice
• Mount the
product on the wall bracket and make sure it is properly fixed to the left and right
plastic hangers.
• Be careful when installing the product on the bracket as fingers can be caught in the holes.
• Make sure the wall bracket is securely fixed to the wall, or the product may not stay in place
after installation.
3. Tighten the 4 screws in step 2 (plastic hanger + screw B)to the rear holes of the product.
Introduction