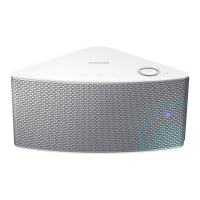
A
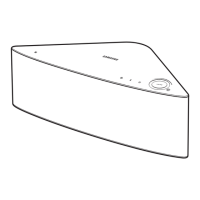
Rear Panel
1
SPK ADD button
(Speaker Add)
Press this button to add an M3 to your network.
2
WPS/Wi-Fi SETUP
button
Press this button to connect your M3 to your network using WPS or Wi-Fi setup.
3
Wall Mount
You can purchase a wall-mount to hang your M3 on the wall.
(For more information, please refer to page 12.)
Press here
4
SERVICE
For service only. Lets service technicians update the firmware of the M3.
5
ETHERNET
Lets you connect the M3 to your network using a LAN cable.
6
POWER
Connection for the M3's power cord.
NOTES
9
SPK ADD Button: Press for 1 second to pair your M3 with a HUB.
9
WPS / Wi-Fi SETUP Button:
- Press for 1 second to connect the M3 to your wireless router using WPS.
- Press and hold down for more than 5 seconds until you hear a fast, 3 note beep to connect the M3 to
your network through your smart device using the Wi-Fi Setup method.
9
4
SPK ADD
Wi-Fi SETUP
WPS
SERVICE
SPK ADD
Wi-Fi SETUP
WPS
SERVICE
ETHERNET
POWER
ETHERNET
POWER
q
w
r
e
t
y
 Loading...