Do you have a question about the Samwon Tech SU-105DA-N and is the answer not in the manual?
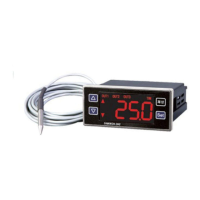
Overview of controller display elements and key buttons for operation.
Instructions for changing the main output set value and details on terminal connections.
Details on functions like Heater/Cooler control, delay timers, defrost, and limit settings.
Guidance on sensor connection, extension, noise prevention, and temperature compensation.
Explanation of how to use lock functions to prevent unauthorized changes to set values.
Installer settings for the main output, including control modes and delay timers.
Settings for the alarm output, covering temperature, range, and delay parameters.
Settings for timer output, including defrost operation and manual defrost times.
Procedure to access and restore factory default settings for various functions.
How to set the auxiliary output (OUT2) as an alarm output and its parameters.
Instructions for setting the auxiliary output as a periodic timer (t1 or t2).
Details on setting the ON and OFF times for the periodic timer operation.
Configuration for refrigerator control (COMP) and defrost (OUT2) functions.
Settings to prevent temperature rise during defrost and its impact on operation.
Instructions for initiating manual defrost and stopping ongoing defrost cycles.
Detailed specifications including power, sensor, output, and environmental parameters.
| Operating Temperature | -10 to 50°C |
|---|---|
| Weight | Approx. 150g |
| Input Type | Thermocouple: K, J, R, S, B, E, T, N; RTD: Pt100, JPt100; Analog: 0-10V, 0-20mA, 4-20mA |
| Output Type | Relay, SSR, 4-20mA, 0-10V |
| Control Mode | PID, ON/OFF |
| Power Supply | 100-240VAC, 50/60Hz |
| Display | Dual 4-digit LED |
| Size | 1/16 DIN |
| Storage Temperature | -20~60°C |