9
1½” Male Adapter
(slip x MPT)
or
2” Female
Adapter
(slip x FPT)
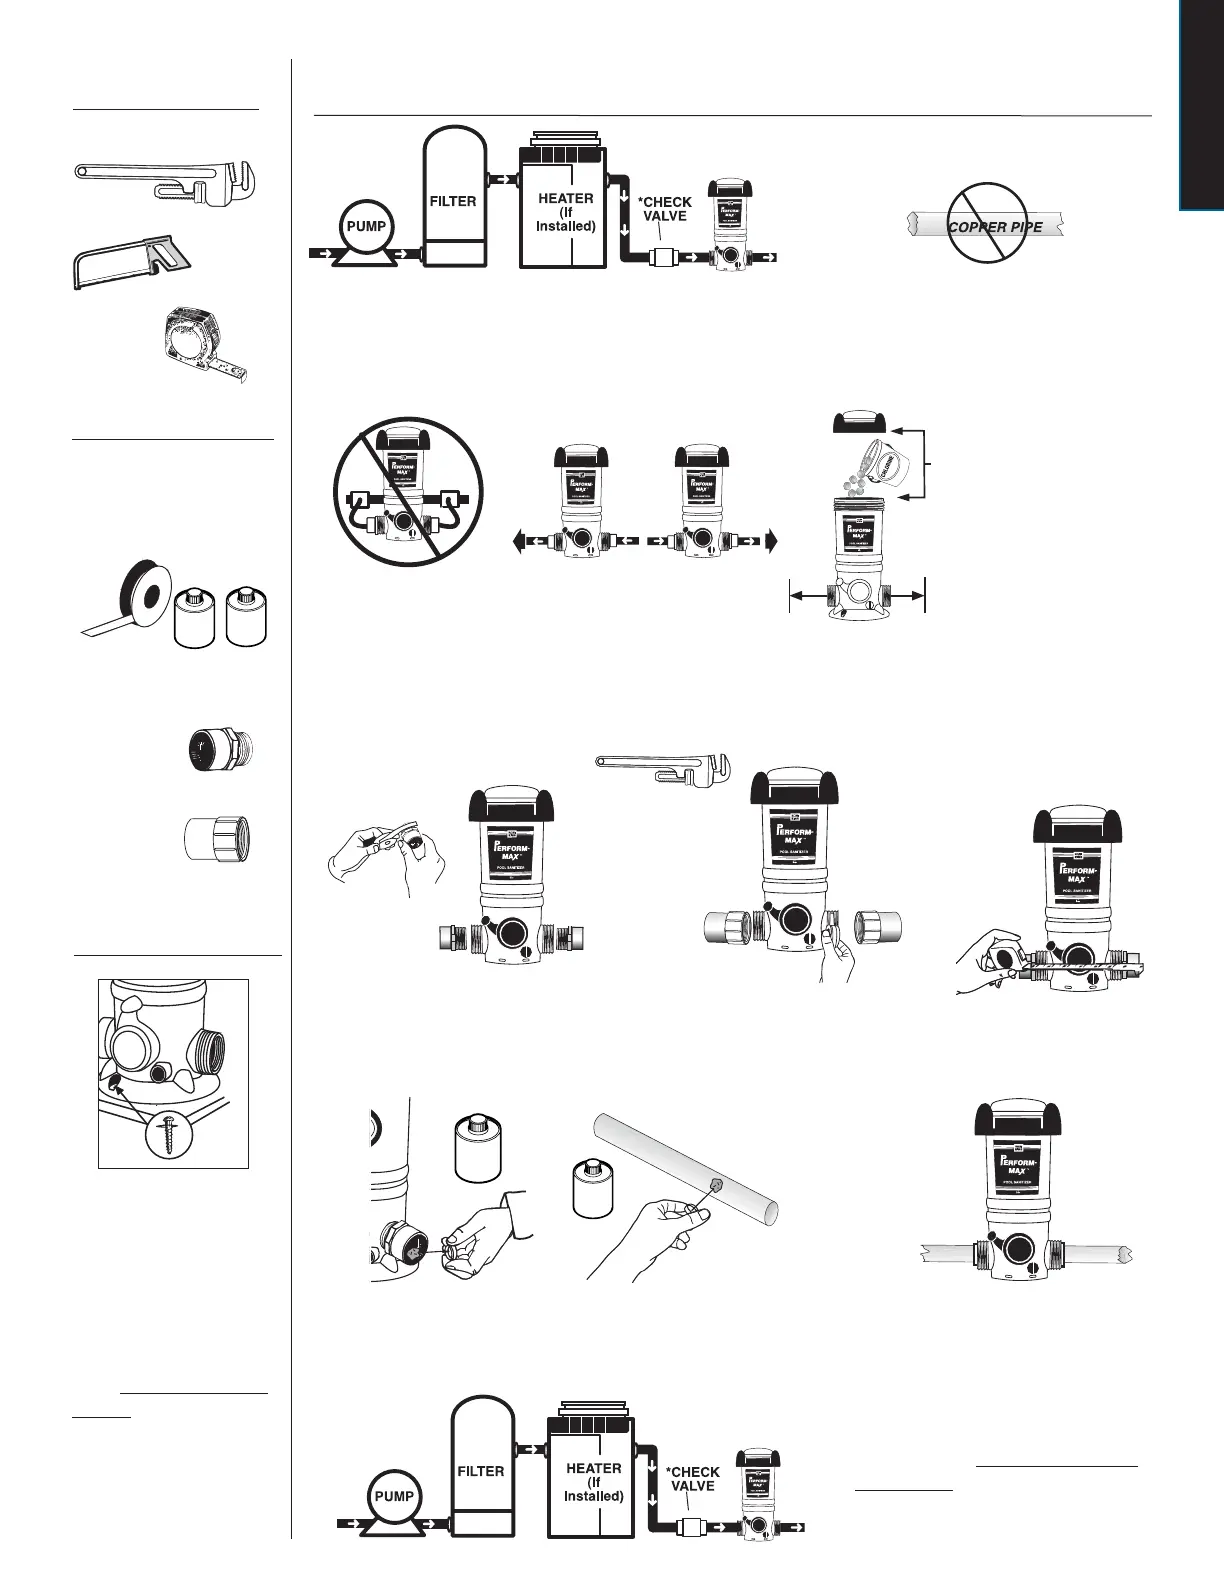
Hard-Plumbed Installation - Model 920
Do NOT install
Perform-Max Feeder
off-line.
Following Primer directions, brush Primer on the inside of the
adapters and to ends of pipe. Repeat this process with PVC
cement following directions on that product.
Measure the distance
between the outside
adapters and cut out a
section of pipe 3” less
than that dimension.
Allow a minimum of
12” above and on
each side of Perform-
Max Feeder to
ensure room for easy
chemical re lling.
Insert PVC pipe into adapters with
a twisting action. Hold in place 5 to
10 seconds to bond.
TOOLS NEEDED
Hacksaw
MATERIALS NEEDED
Tape
Measure
SECURE SYSTEM
To prevent damage to heaters or
lters, install a corrosion resistant
check valve which will reduce the
back ow of chlorine gas when the
feeder is turned off.
2.
1a.
1.
1b.
3.
Pipe Wrench
Bi- ow valve design allows
installation in either ow
direction.
Pipe Thread Tape
or Sealant and Primer
and PVC Cement
If using male adapters, apply
pipe thread tape or sealant to the
threaded end of each adapter.
Screw adapters into each end of Perform-Max
Feeder following
directions for a male adapter or a female adapter. Hand tighten.
Finish tightening by turning 1 to 2 revolutions with pipe wrench.
DO NOT OVER TIGHTEN.
4.
5.
The Perform-Max Feeder should always be installed between
the lter and pool (or between heater and pool if applicable).
Never install Perform-Max Feeder before the heater or
damage to the heater could occur.
Do NOT install in copper pipe as
chemical corrosion may lead to pipe
failure.
P
r
i
m
e
r
For better stability, you
can order a mounting
base (part number
01-22-1485) that
screws on to the bottom
of the Perform-Max
Feeder. Then mount on
a treated wood base
using Phillips pan head
screws, one in front and
two in back.
P
r
i
m
e
r
P
V
C
C
e
m
e
n
t
P
V
C
C
e
m
e
n
t
12"
12"
12"
If using female adapters, apply
pipe thread tape or sealant to the
threaded end of each feeder port.
OR
Install