Do you have a question about the SANLI Red Back and is the answer not in the manual?
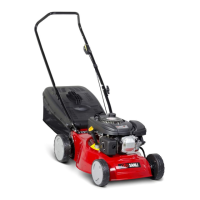
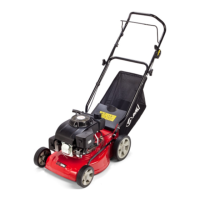
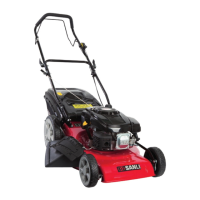
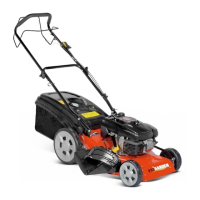
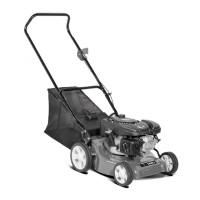
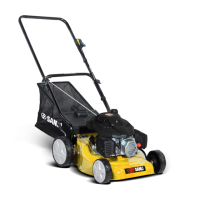
Lists the parts included with the Sanli lawn mower.
Connect the lower handle bar using bolts and nuts.
Position and secure the starter cord for operation.
Fit handle knobs and bolts for the upper handle.
Secure cables into place using provided clips.
Lift the rear flap to prepare for catcher attachment.
Lower the grass catcher hook onto the bar.
Ensure the machine is ready for use after assembly.
Add 600ml of SAE 30 or 10W/30 engine oil to the mower's sump.
Add fresh, premium unleaded petrol (95 octane) to the fuel tank.
Position mower on a safe, flat area away from hazards.
Move the red petrol tap lever to the 'On' position.
Move the throttle control to the 'Cold Start' position.
Hold handle and pull starter cord vigorously to start engine.
After 15 seconds, move throttle to the 'Run' position.
Move throttle to 'Run' and refer to starting procedure.
Move throttle to 'Stop' and turn fuel tap to 'Off'.
Connect the grass catcher by lifting the rear flap.
Adjust cutting height lever to suit mowing conditions.
Start mower, mow, and ensure engine is off after use.
Clean grass clippings, engine, and undercarriage regularly.
Store in a dry, ventilated area away from heat sources.
Ensure fuel tank is empty before transporting.
Cut lawn in alternating directions at equal height.
Covers footing, clearing area, pushing mower, and safe distances.
Safe fueling, hot engine precautions, and petrol storage.
Mowing on slopes, weather conditions, and general awareness.
Safety during cleaning, adjustments, and inspection.
Recommended safety gear for mower operation.
Check blade, bolts, and shaft for damage or wear before/after mowing.
Sharpen and balance blade annually; mount correctly with protective gloves.
Check spark plug after 5 hours, then every 25 hours; clean or replace.
Clean or replace air filter regularly, especially in dusty conditions.
Check oil level on a level surface using the dipstick.
Change oil after 5 hours initially, then every 25 hours or annually.
Details engine, displacement, power, capacity, speed, and dimensions.
Lists common issues and their suggested remedies.
Details what is covered, not covered, and conditions for warranty validation.
Outlines actions that will invalidate the product warranty.
Record of initial service tasks performed after 5 hours of use.
Record of service tasks performed after 25 hours or one year.
Record of service tasks performed after second service or two years.
Record of service tasks performed after third service or three years.
Record of service tasks performed after fourth service or four years.
Record of service tasks performed after fifth service or five years.
| Brand | SANLI |
|---|---|
| Model | Red Back |
| Category | Lawn Mower |
| Language | English |