8
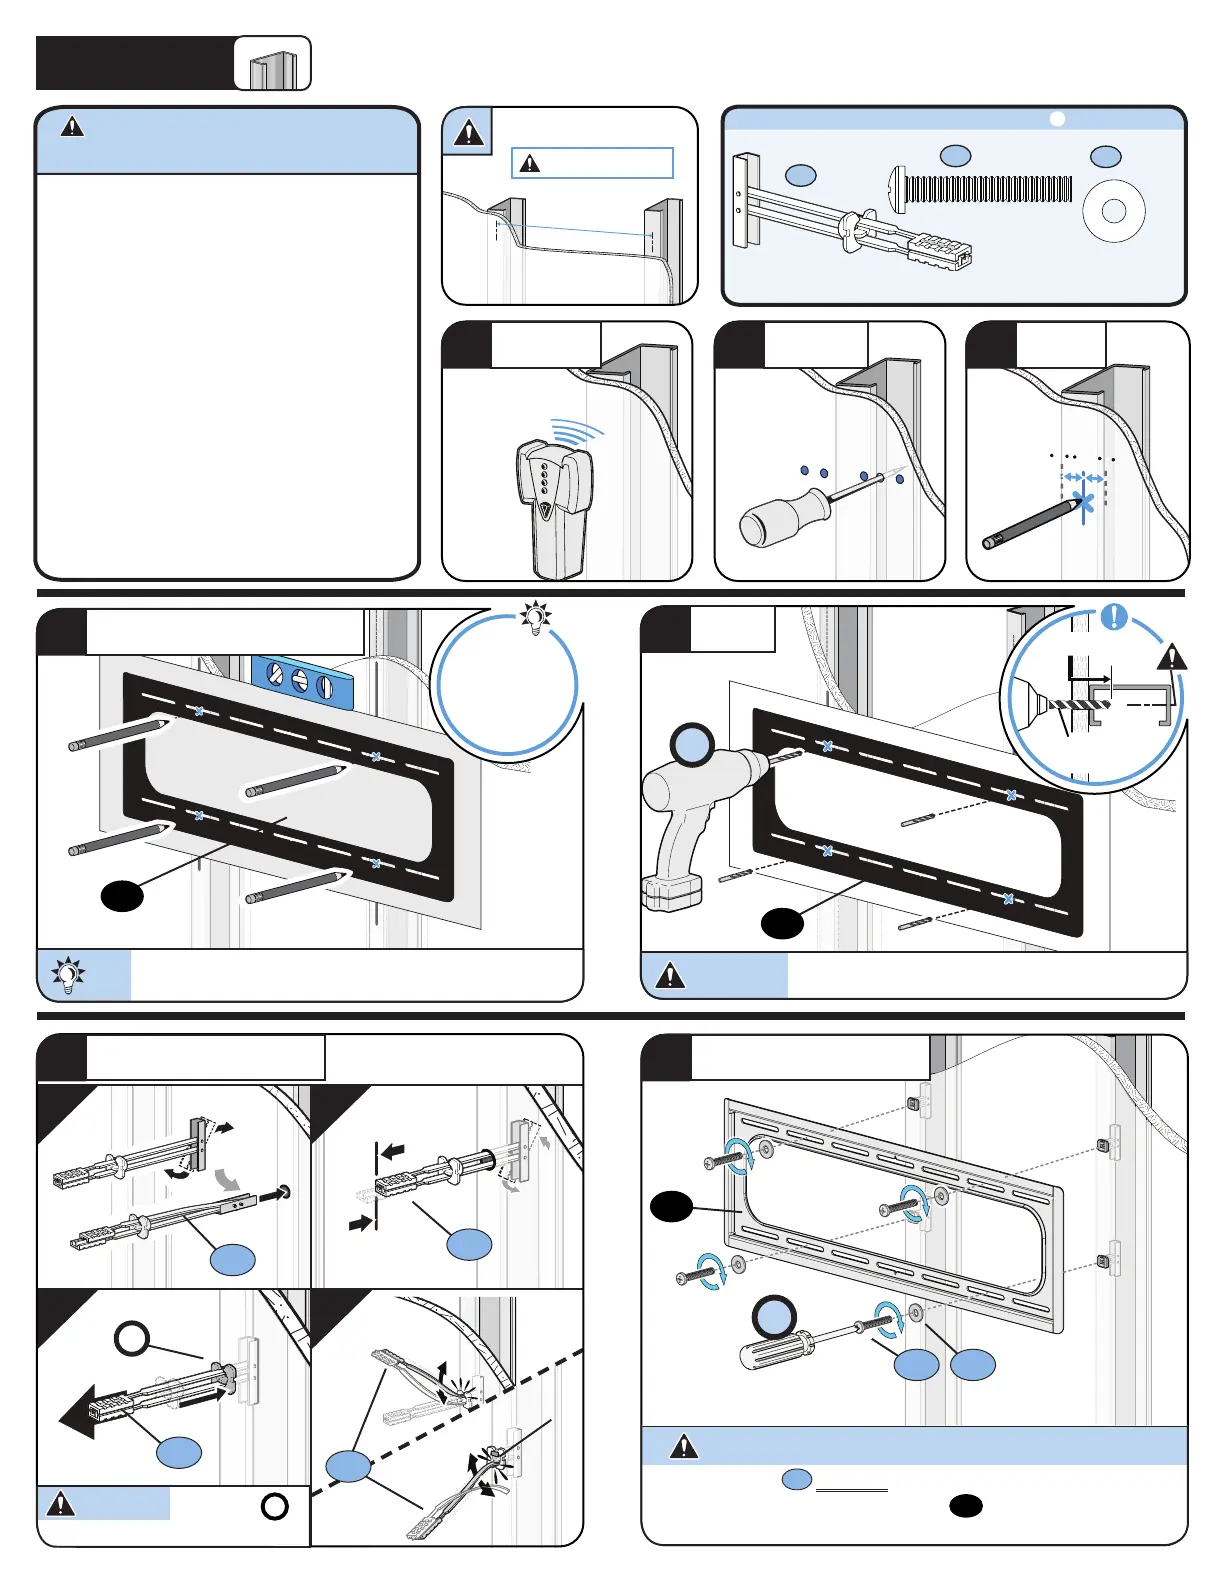
Steel Stud Installation Kit SSMK1 (NOT INCLUDED)
Min. 16 in. (40.6 cm)
CAUTION: Avoid potential personal injury
or property damage!
STEP 2C
1
LOCATE
2
VERIFY
3
MARK
● Studs must be at least 2x4 / 25 ga.
● If back side of wall is unfinished, drywall must be
installed to a minimum of one stud left and right
of the stud(s) being used to install the mount
● Drywall must be a minimum of 1/2 in. (13
mm) thick on each side of the studs, and a
minimum clearance of 1 ⅞ in. (48 mm)
behind the wall is required
● This product must be centered on the studs
● Stud type and structural strength must conform to
the North American Specification for the Design of
Cold-Formed Steel Structural Members
[362 S 125 18, C-Shape, S - Stud Section]
● Drywall must be secured to studs with screws
12 in. (304.8 mm) on center
1/4-20 x 1 ¾ in.
1/4 in.
x4
S1
x4
S2
x4
S3
1/4-20 SNAP Toggle BB
*
Contact Customer Service to inquire about the additional hardware.
*
1 in. (25 mm)
1/2 in.
(13 mm)
4X
4
POSITION TEMPLATE
TIP:
To calculate your precise wall plate location, check out
our Height Finder at sanus.com [www.san.us/1172].
www.
san.us/1172
HeightFinder™
Visit
5
DRILL
CAUTION:
Be sure you drill into the CENTER of the stud.
Steel Stud Installation
a
b
c
d
S1
S1
S1
P
4X
6
INSTALL ANCHORS
7
SECURELY TIGHTEN
All four screws
S2
MUST BE firmly tightened to prevent
unwanted movement of the wall plate
07
.
Ensure the wall plate is
securely fastened to the wall before continuing on to the next step.
CAUTION:
Avoid potential personal injury or property damage!
S1
CAUTION:
Be sure cap
P
is
seated against the drywall surface.
S 3 S2
06
06
07