6901-172002 <01>
7
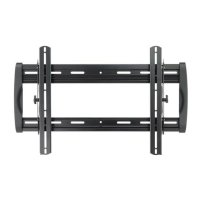
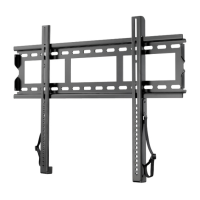
3 Mount the Wall Plate
Wood Stud Mounting
[01]
[03]
[01]
< 16 mm
(5/8 in.)
[05]
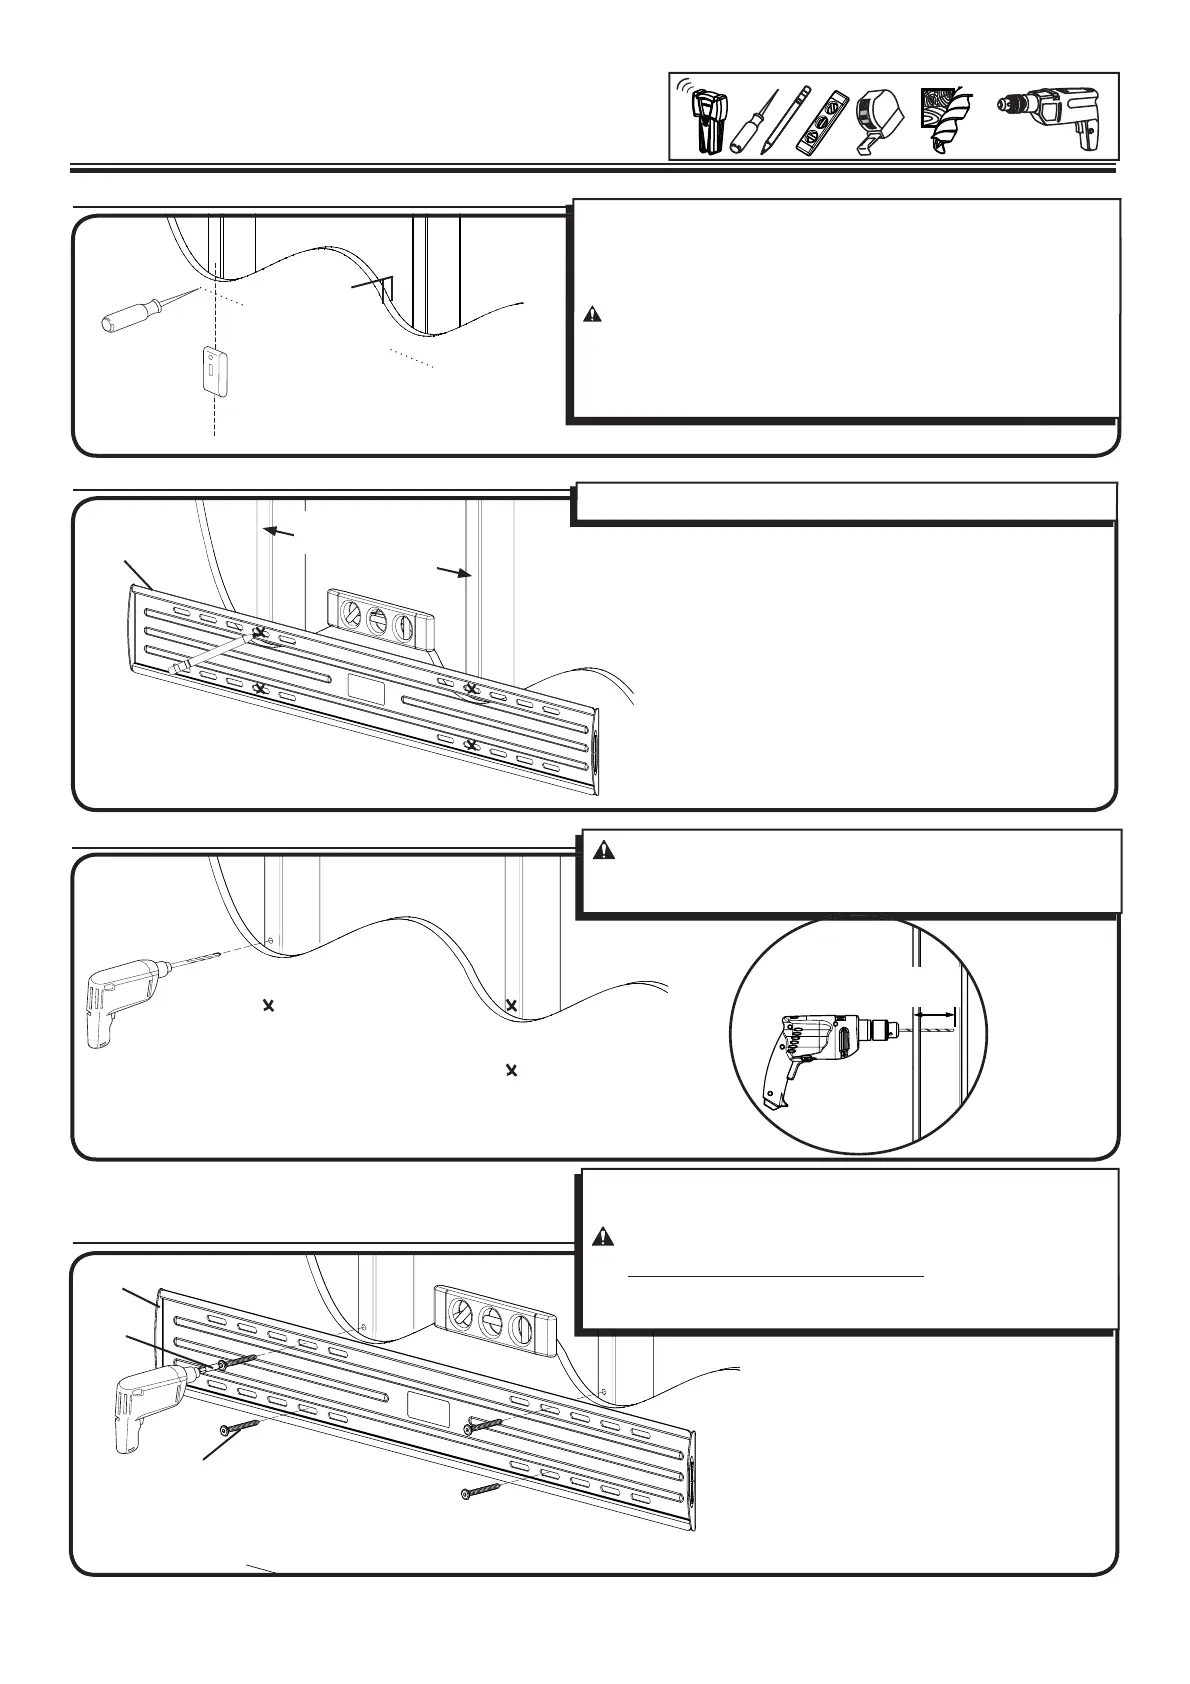
3-1 Locate studs
3-2 Mark the wall
Level the wall plate [01] and mark the hole locations.
For assistance in determining wall plate location, see Height Finder at
sanus.com.
Locate studs. Verify the center of the stud(s) using an awl or edge to
edge stud nder.
CAUTION: Avoid potential personal injuries and property
damage!
Ù Any material covering the wall must not exceed 16 mm (5/8 in.).
Ù Minimum wood stud size: common 2 x 4 in (nominal 1½ x 3½ in.).
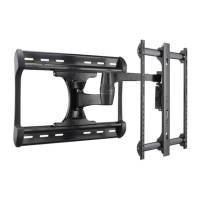
3-3 Drill pilot holes
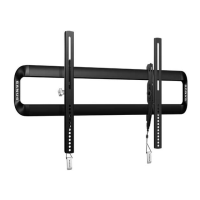
3-4 Tighten lag bolts
5 mm
(3/16 in.)
70mm
(2¾ in.)
LL11
406-609 mm (16-24 in.)
ML11
406 mm (16 in.)
CAUTION: Avoid potential injuries or property damage! Pilot
holes MUST be drilled to a depth of 70 mm (2¾ in.), using a 5mm
(3/16 in.) diameter drill bit.
Using a drill and the allen driver bit [05] tighten lag bolts [03] only
until they are pulled rmly against the wall plate.
CAUTION:
Avoid potential injuries or property damage!
Ù DO NOT over-tighten the lag bolts [03].
Ù Tighten the lag bolts only until they are pulled rmly against the
wall plate [01].