14
HERE WE GO!
Scan here to view
your install video.
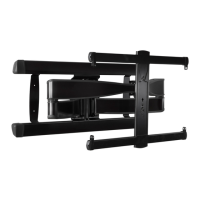
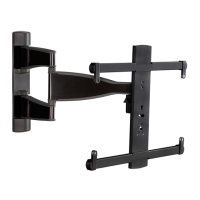
Model: SLF8-B1
6
700-0
04620 <00>
Locate your studs and choose a height for your
TV, then simply tape this template to the wall,
and you can drill right through.
san
.
us/969
san.us/971
THIS IS YOUR DRILLING TEMPLATE
FOR STEP 2
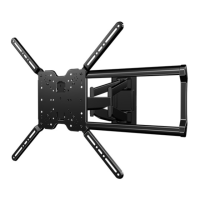
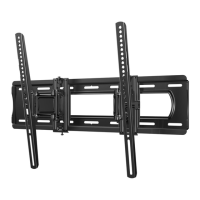
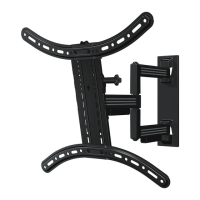
WELCOME AND THANKS FOR CHOOSING SANUS SIMPLICITY
YOU’RE REALLY GOING
TO ENJOY STEP 3
Once the wall plate is installed, attach the arm to the
wall plate. Next, simply pick-up your T
V, hang it on the
arm, and secure it. Congratulations! Y
ou’re done.
We're here to help!
If you ha
ve q
uestions at any point, contact customer service at:
1-888-333-1376
Monda
y – Friday 8
AM
– 9
PM
CST
Saturday – Sunday 10:30
AM
– 7
PM
CST
From your typical viewing location, position your TV so
your eyes a
re level with the middle of the screen
. For most
people, this is between 40 " and 60
" (101 cm and 152 cm)
above the floo
r. For precise drilling locations, scan the
HeightWizar
d
™
link below or contact customer service.
GET STARTED
WITH STEP 1
VIEWING HEIGHT
RECOMMENDATION
Grab the TV brackets and line them up
with the holes on the back of your TV.
Attach using the bolts that fit.
Refe
rence the
product
manual for
details on moun
t
i
ng to c
oncrete.
Be sure to
review the manual for
compl
ete safety instructions.
40
– 6
0 in.
101 –
152 cm
10
°
10
°
THIS
W
A
Y UP
Min. 24 in.
(610 mm
)
Min. 24 in.
(610 mm)
Min. 16 in.
(406 mm)
1
HERE WE GO!
Scan here to v
iew
your install video.
Model: SLF8-B1
6
700-0
04620 <00>
Locate your studs and choose a height for your
TV, then simply tape this template to the wall,
and you can drill right through.
san
.us/969
san.us/971
THIS IS YOUR DRILLING TEMPLATE
FOR STEP 2
WELCOME AND THANKS FOR CHOOSING SANUS SIMPLICITY
YOU’RE REALLY GOING
TO ENJOY STEP 3
Once the wall plate is installed, attach the arm to the
wall plate. Next, simply pick-up your T
V, hang it on the
arm, and secure it. Congratulations! You’r
e done.
We're here to help!
If you ha
ve q
uestions at any point, contact customer service at:
1-888-333-1376
Monda
y – Friday 8
AM
– 9
PM
CST
Satu
r
day – Sunday 10
:30
AM
– 7
PM
CST
From your typical viewing location, position your TV so
your eyes ar
e level with the middle of the scree
n. For most
people, this is between 40
" and 60 " (101 cm and 152 cm)
above the floor. For p
r
ecise drilling locations, scan the
HeightWizard
™
link below or contact customer service.
GET STARTED
WITH STEP 1
VIEWING HEIGHT
RECOMMENDA
TION
Grab the TV brackets and line them up
with the holes on the back of your TV.
Attach using the bolts that fit.
Reference the
product
manual for
details o
n mount
i
ng to c
oncrete.
Be sure to
review
t
he manual for
compl
ete safety instructi
ons.
40
– 6
0 in.
101 – 152 cm
10
°
10
°
THIS WAY UP
2
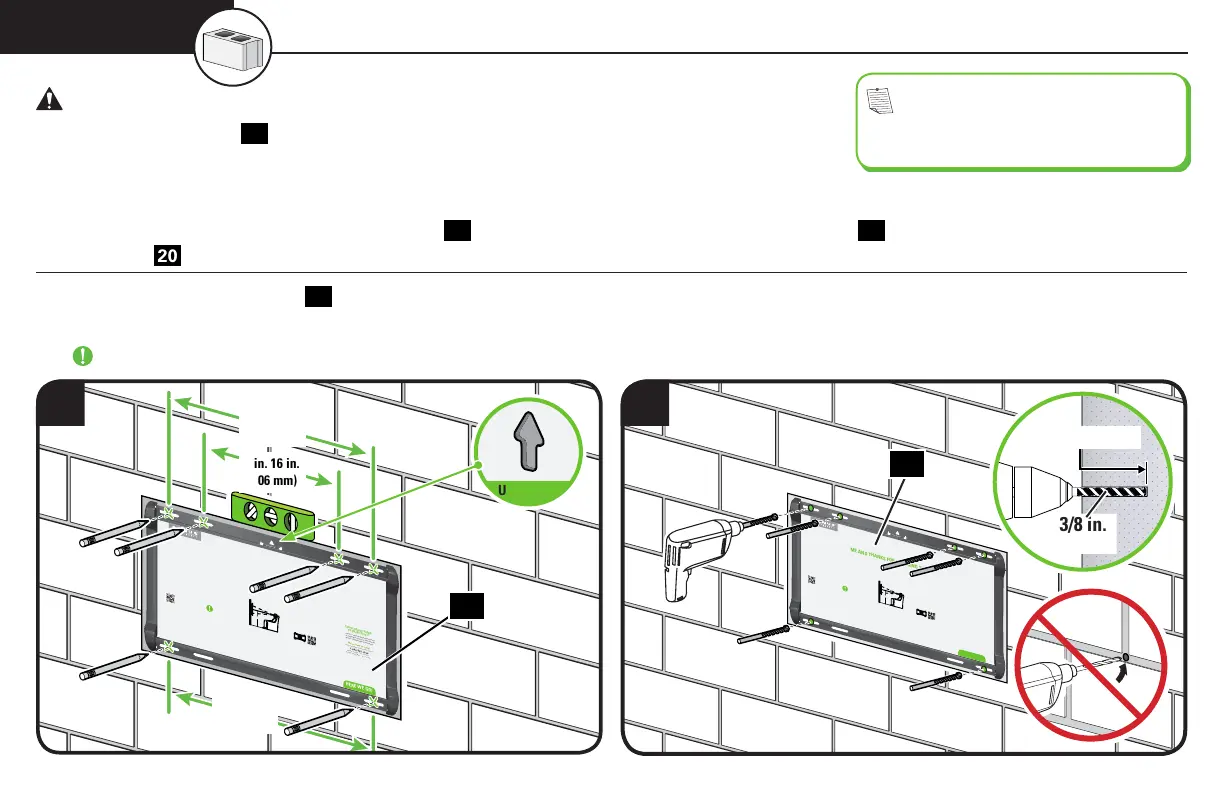
CAUTION: Avoid potential personal injuries and property damage!
● Mount the wall plate
20
directly onto the concrete surface
● Minimum solid concrete thickness: 8 in. (203 mm)
● Minimum concrete block size: 8 x 8 x 16 in. (203 x 203 x 406 mm)
● Minimum horizontal space between fasteners: 24 in. (610 mm) bottom / 16 in. (406 mm) top
● For concrete applications, the base of the arm
24
(STEP 3) must remain centered in the wall plate
20
. Keep this in mind when selecting the
wall plate
20
location.
1. Level the wall plate template
19
and mark the hole locations (two on the bottom, four on top).
2. Drill pilot holes into solid concrete, using a 3/8 in. (10 mm) diameter drill bit. Never drill into the mortar between blocks.
IMPORTANT: Pilot holes must be drilled to a depth of 4 in. (101 mm).
3/8 in.
(10 mm)
4 in. (101 mm)
19
NOTE: For assistance in
determining wall plate location, try our
HeightFinder
™
at Simplicity.Sanus.com
STEP 2B Solid Concrete or Concrete Block Installation
19
UP ARROW
 Loading...