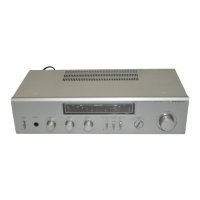
The Sanyo Stereo Amplifier DCA 200UM is a robust audio component designed to enhance your listening experience through its versatile amplification capabilities and user-friendly features. This service manual provides comprehensive details for its maintenance and operation, ensuring longevity and optimal performance.
Function Description
The Sanyo DCA 200UM serves as the central hub for your audio system, primarily functioning as a stereo amplifier. It takes audio signals from various input sources, amplifies them, and delivers the enhanced sound to your speakers. This amplifier is equipped to handle multiple audio inputs, including a dedicated phono input for turntables, tuner input for radio, and auxiliary inputs for other audio devices like CD players or cassette decks. It also features tape monitor functions, allowing you to connect and monitor recording devices.
A key aspect of its design is the inclusion of both pre-amplifier and power amplifier sections. The pre-amplifier section handles the initial processing of the audio signals, including input selection, volume control, and tone adjustments. This allows for fine-tuning of the sound before it reaches the power amplifier. The power amplifier section then takes these processed signals and boosts them to a level sufficient to drive your speakers, providing clear and powerful audio output.
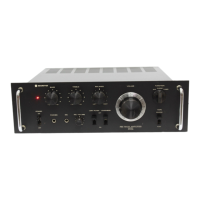
The amplifier also incorporates a microphone input, enabling you to mix microphone audio with other sources, which can be useful for karaoke or announcements. For private listening, a headphone jack is provided, allowing you to enjoy your audio without disturbing others. The speaker output section is designed to accommodate various speaker impedance levels, offering flexibility in speaker choice.
Usage Features
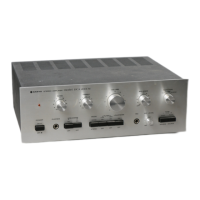
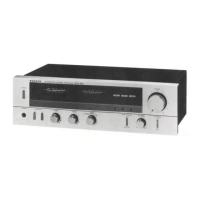
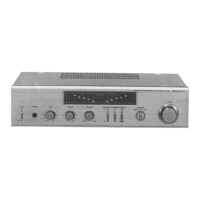
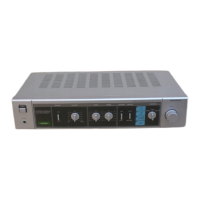
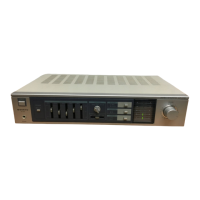
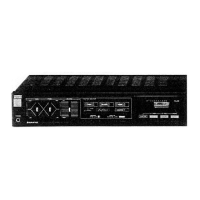
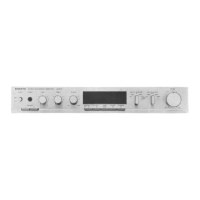
The Sanyo DCA 200UM is designed with a straightforward interface, making it accessible for users to operate. The front panel features a range of controls for input selection, volume adjustment, and tone shaping.
- Input Selection: Dedicated controls allow you to easily switch between different audio sources such as Phono, Tuner, Aux, and Tape 1 and 2. This ensures that you can connect all your essential audio components and select them with ease.
- Volume Control: A prominent main volume knob provides precise control over the overall output level, allowing you to adjust the loudness to your preference.
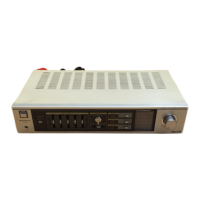
- Tone Controls: Bass and Treble controls are included, enabling you to tailor the frequency response of the audio to suit your listening environment or personal taste. These controls allow for boosting or cutting specific frequency ranges, providing greater sound customization.
- Filter Controls: The amplifier is equipped with High Filter and Low Filter controls. These filters are useful for reducing unwanted noise or enhancing specific aspects of the audio. For instance, a low filter can help remove turntable rumble, while a high filter can reduce hiss from older recordings.
- Loudness Control: A loudness control is integrated to compensate for the human ear's reduced sensitivity to bass and treble frequencies at low volume levels. When activated, this feature boosts these frequencies, providing a fuller sound even at quiet settings.
- Microphone Mixing: The microphone input comes with its own volume control, allowing you to adjust the microphone level independently and mix it with other audio sources.
- Tape Monitor Function: The tape monitor feature allows you to connect a tape deck and monitor the signal being recorded, or to use external audio processors in the tape loop.
- AC Outlets: The amplifier includes switched and unswitched AC outlets on the rear panel. These can be used to power other audio components, simplifying cable management and ensuring that connected devices turn on and off with the amplifier.
- Speaker Selection: The amplifier supports multiple speaker sets, typically labeled A and B, allowing you to connect and switch between different pairs of speakers or use both simultaneously.
Maintenance Features
The service manual outlines several key maintenance procedures to ensure the Sanyo DCA 200UM operates reliably and efficiently over time. These procedures are primarily for technicians or experienced users, focusing on internal adjustments and component replacement.
- Adjustment of Main Amp P.C. Board: This section details critical adjustments for the main amplifier printed circuit board.
- Mid-Point Potential Adjustment: This involves setting the voltage between the speaker terminal and ground to a precise 0V ±0.01V using specific variable resistors (VR 01, VR 02). This adjustment is crucial for stable operation and preventing DC offset at the speaker outputs, which could damage speakers.
- Idling Current Adjustment: The idling current needs to be set to 35mA by adjusting variable resistors (VR 03, VR 04). This is achieved by measuring the voltage across specific resistors (R91, R92) and setting it to 0.018V ±0.001V. Correct idling current ensures optimal performance of the output transistors and prevents excessive heat generation.
- Adjustment Procedure: The manual emphasizes repeating these adjustments until no further improvement is possible, ensuring the amplifier is finely tuned. It also advises turning the semi-fixed variable resistors slowly and being careful with polarity during measurements.
- Preparation: Before any adjustments, specific steps must be followed, including disconnecting the PRE OUT/MAIN IN connector, allowing the unit to stabilize after power-on, and connecting dummy load resistors to the speaker terminals. The use of an electronic voltmeter or circuit tester with a high input impedance is also specified.
- Parts List: A comprehensive parts list is provided, detailing every component used in the amplifier, from packing materials and cabinet parts to electrical components and PCB assemblies. Each entry includes the key number, part number, description, location, and quantity. This list is invaluable for identifying and ordering replacement parts, facilitating repairs and ensuring that the correct components are used.
- Exploded View Diagrams: Detailed exploded view diagrams illustrate the assembly of the amplifier, showing the placement of all components. These diagrams are essential for disassembling and reassembling the unit correctly, making it easier to locate specific parts for inspection or replacement.
- AF P.C.B. Ass'y Bottom View: A bottom view diagram of the AF (Audio Frequency) PCB assembly is included, showing the layout of components and traces. This is crucial for troubleshooting and repair, allowing technicians to identify components and test points accurately.
- Wiring Diagram: A complete wiring diagram illustrates all electrical connections within the amplifier, including connections to the power transformer, various PCBs, switches, jacks, and outlets. This diagram is indispensable for tracing signals, diagnosing wiring faults, and ensuring proper re-connection after repairs.
- Notes for Part Orders: Important notes regarding part orders are included, specifying that orders must contain the model number, part number, and description. It also mentions that ordering quantities for screws and resistors must be in multiples of 10 pieces, streamlining the procurement of common small components.
By providing these detailed instructions and diagrams, the service manual ensures that the Sanyo DCA 200UM can be effectively maintained, repaired, and kept in optimal working condition for many years of enjoyment.