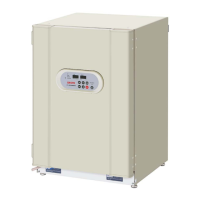
Control panel and keypad
12
13
14
151617
1
2
3
4
5
6
7
8
9
10
11
1. Digital temperature indicator (TEMPERATURE
o
C): Normally, this indicator shows the chamber
temperature. In the setting mode, it shows the set value of the chamber temperature. If the self
diagnostic function detects any abnormality, an error code will be displayed.
2. Heater lamp (HEAT): This lamp lights when the heater is energized.
3. UV indicator (UV): This lamp lights when the UV lamp is ON. The blink of this indicator
recommends the replacement of UV lamp. See page 19 for the details. MCO-18AC(UV) or when an
optional UV system kit MCO-18UVS3 is installed.
4. Door lamp (DOOR): This lamp lights when the outer door is open.
5. Water level alarm lamp (RH PAN): This lamp blinks when the water in the humidifying pan is less
than approximately 0.8 liter. MCO-18AC(UV) or when an optional UV system kit MCO-18UVS3 is
installed.
6. Upper limit regulator: This regulator is used to set the upper temperature limit.
7. Over heat lamp (OVER HEAT): This lamp lights when the chamber temperature reaches the upper
limit set value.
8. CO
2
inject lamp (INJECT): This lamp lights when CO
2
gas is being injected.
9. Digital CO
2
density indicator (CO
2
%): Normally, this indicator shows the CO
2
concentration in
the chamber. In the setting mode, it indicates the set value of the CO
2
concentration. In the calibration
mode, the decimal point in the digital CO
2
density indicator blinks.
10. Set key (SET): Pressing this key to enter the setting mode, and the digits to be set will blink.
11. Calibration key (CAL): Pressing this key to enter the CO
2
calibration pre-conditioning mode.
Normally when the outer door is opened, the fan motor will stop operating. This mode allows the fan
motor to continue to circulate the chamber environment to ensure accurate CO
2
uniformity inside the
chamber. At this time, by pressing this key for approximately 5 seconds, the incubator enters the
temperature calibration input mode. And then pressing this key again, the incubator enters the CO
2
calibration input mode. See page 31 and 32 for the details. Also, used to change the UV lamp ON
period. See page 21 for the details.
Note:
This operation affects the basic performance. When calibrating the CO
2
density, contact a Sanyo sales
representative or agent.
10

 Loading...