27
S4179705
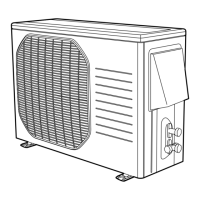
3-17. Preparing the Indoor Side Tubing
Tubing can be extended in 4 directions as shown in
Fig. 3-52.
Arrangement for Left Tubing
(a) Cut out the left tubing outlet. (Fig. 3-53)
Arrangement for Right Tubing
(a) Cut out the right tubing outlet using a hacksaw.
(Fig. 3-54)
Arrangement for Left-rear and Right-rear Tubing.
(a) It is not necessary to cut a hole.
Left-rear
tubing
Left
tubing
Right-rear
tubing
(Recommended)
Right tubing
0949_T_I
Tubing can be extended in 4 directions as shown in
Fig. 3-52.
Arrangement for Right-rear Tubing
(a) Remove the 2 screws and slide out the side
cover. (Fig. 3-55)
(b) Extend the wide tube from the outdoor side and
connect it directly to the mating tube inside the
indoor unit. Use a flare nut. (Fig. 3-56)
Arrangement for Right Tubing
(a) Remove the 2 screws and take off the side cover.
(Fig. 3-55)
(b) Cut out the L-shaped tubing outlet using a hacksaw.
(Fig. 3-57)
(c) Using the L-shaped tube (field supply), connect
tubing between the indoor and outdoor units.
(Fig. 3-59)
Arrangement for Left and Left-rear Tubing.
(a) Remove the 4 screws (2 on each side) and take
off both left and right side cover. (Fig. 3-58)
(b) Remove 4 screws to remove the bottom cover.
(c) Using the L-shaped tube (field supply), connect
tubing as in Fig. 3-60.
0951_T_I
Right tubing
outlet
1356_T_I
0950_T_I
Left tubing
outlet
Fig. 3-53
Fig. 3-54
Fig. 3-55
1357_T_I
Tubing
from the
outdoor
unit
Fig. 3-57
Fig. 3-56
Fig. 3-60
Fig. 3-58
Fig. 3-59
1360_T_I
L-shaped tube
1359_T_I
L-shaped
tube
1361_T_I
Indoor unit
Bottom
cover
Left
side
cover
Right
side
cover
Fig. 3-52
KHS2432
KHS3632
 Loading...