Do you have a question about the Sartorius CPA 10001 and is the answer not in the manual?
General operating instructions to prevent damage to equipment.
Voltage rating checks and caution with RS-232 cables.
Avoid extreme temperatures, moisture, shocks, blows, or vibration.
Check for external damage immediately after unpacking.
Choose a location free from heat, drafts, vibrations, and moisture.
Acclimate balance to room temperature for 2 hours before use.
Explains verification seal for accuracy class II balances.
Steps for installing chamber components for Model CPA2P.
Steps for installing chamber components for Model CPA2P-F.
Positioning and securing the analytical draft shield.
Procedure for setting up components for triangular weighing pan.
Procedure for setting up components for round weighing pan.
Connect male connector to female connector on the electronics box.
Instructions for placing and securing the 3-sided draft shield.
Placing components for rectangular weighing pan up to 10 kg.
Placing the weighing pan for capacities over 10 kg.
Use original Sartorius equipment and plug in the AC adapter.
Connecting country-specific power cords to the AC adapter.
Insert plug, tighten screw, and connect AC adapter to outlet.
Details on Class 2 and Class 1 plug-in adapters and grounding.
Unplug balance before connecting/disconnecting peripheral devices.
Time required for the balance to reach operating temperature.
Fasten chain or lock to secure balance at installation place.
Compensate for unevenness at the place of installation.
Adjust front feet to center the level indicator bubble.
Adjust leveling feet to center the level indicator bubble.
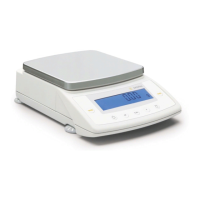
Description of the balance display and key functions.
Function can be used alone or with application programs.
Taring, assigning IDs, printing weights.
Calibrate and adjust at place of use for legal metrology.
Requires steady hand; test measurements recommended.
Balance preparation steps and how to tare the balance.
Switching the balance off and standby mode.
Using the filter pan with a 125 mm diameter.
Port location and metrology restriction for below-balance weighing.
Steps to attach hanger and install shield for microbalances.
Determining and correcting weight discrepancies.
Internal calibration/adjustment required after warmup.
Conditions for calibration and error messages.
Blocked by seal; requires menu access switch.
Menu code setting and automatic weight application.
Configuration options for calibration and adjustment sequence.
Automatic calibration based on temperature/time changes.
Restricted temperature ranges for legal metrology use.
Adapting balance requirements via Setup menu options.
Steps to open and navigate the Setup menu.
How to print current menu settings from different levels.
Configure ISO/GLP parameters and adjust display for lighting.
Enter IDs, set date/time, adjust display brightness levels.
Key actions for activating input, scrolling, confirming, and saving settings.
Usage of F and CF keys to start, toggle, or end applications.
All application programs selectable for use as legal measuring instruments.
Weighing multiple components up to a defined total weight.
Weighing up to 99 components, storing, clearing memory, toggling.
Setting parameters for automatic printout when components are stored.
Example format of printout for net-total formulation data.
Determine the number of parts by weighing a reference sample quantity.
Minimum load, setting reference quantity, automatic output options.
F key for determination, CF key for clearing data.
Setting and storing the reference sample quantity.
Automatic updating optimizes counting accuracy.
Using a second balance for higher precision in counting.
Setting parameters for the Counting program.
Example printout format for counting results.
Obtain weight readouts in percent relative to a reference weight.
Minimum load, reference percentage, storage parameter, decimal places.
F key for calculation, CF key to end program.
Setting and storing the reference percentage value.
Setting parameters for the Weighing in Percent program.
Example printout format for percentage weighing.
Weighing unstable samples or under unstable conditions by averaging.
Manual/automatic start, load thresholds, animal activity settings.
F key to activate, CF key to end.
Setting and storing the number of subweighing operations.
Setting parameters for the Animal Weighing program.
Example printout format for animal weighing.
Menu code 2 1 2 for toggling weight units.
Setup menu configuration for the unit toggling application.
Press F key to toggle between weight units.
Generating printouts for documentation and meeting requirements.
Automatic/manual printouts, line format, application parameters, ISO/GLP.
Settings for manual/automatic printing, line format, ISO/GLP, and auto print.
Refers to the "Configuration" section for printout settings.
Examples of printout formats without data identification codes.
Examples of printout formats with data identification codes.
Generating printouts of initialization values for applications.
Automatic printing of weight readouts.
Parameters for ambient conditions, GLP header, and footer.
Menu codes for ISO/GLP records and line format configuration.
Using F key for header and CF key to close application.
Example lines included in a general ISO/GLP printout.
Example lines for external calibration ISO/GLP printout.
Port for connecting balance to computers or peripherals.
Interface type, standard, transmission rates, parity, handshake modes.
Default settings for transmission rate, parity, handshake, etc.
Refers to Pin Assignments and Pin Assignment Chart.
How non-verified digits are identified on printouts.
Output format with ID code preceding a 16-character string.
Illustrates output examples for 22-character format.
Explains special codes like Stat, T1, N, N1, COMPxx, etc.
Lists interface error codes and their meanings.
Describes two formats for sending control commands to the balance.
Lists command characters for Format 1 and Format 2.
Setting parameters for error-free data transmission.
Details on hardware and software handshake options.
Software handshake controlled via XON/XOFF.
Data output via print command or software command.
Controlling automatic data output and print intervals.
Contact Sartorius for output speeds faster than 10 Hz.
Description of the 25-contact D-Submini female connector.
Recommended specifications for the male connector.
Warning about incorrect pin assignments in third-party RS-232 cables.
Comprehensive list of pin functions for the interface connector.
Lists common display errors, their causes, and solutions.
Instructions for removing parts and securing doors for transport.
Sartorius offers service contracts; repairs by trained technicians.
Risk of explosion if battery is replaced incorrectly.
Instructions for cleaning the balance with mild detergent and dry cloth.
Detailed guide for cleaning stainless steel parts.
Instructions for cleaning chamber and draft shield components.
Steps to take if safe operation is no longer warranted; power off and secure.
Guidelines for proper disposal of packaging, equipment, and batteries.
Technical data for CPA2P and CPA2P-F models, including range, readability, and dimensions.
Printer for date, time, statistics, and transaction counter functions.
Reflective remote display requiring a data interface.
Battery packs for extended operation, with level indicator.
Carrying cases for models with or without analytical draft shield.
Software for transferring weighing data to a computer.
Kit for density determination experiments.
Antistatic pan for specific balance models.
Calibration weights available with DKD certificate.
Guide for optimum balance use in quality management systems.
AC adapters for weighing capacities up to and over 10 kg.
Accessory draft shield chamber for specific models.
Draft shield cover accessory for specific balance models.
Data cables for PC connection (25-pin and 9-pin).
Adapter for D-Sub 25-pin to 9-position connection.
Remote control switch for balance functions like F, TARE, CF.
T-connector for foot/hand switches, not for multiple intelligent peripherals.
Hanger accessory for below-balance weighing on specific models.
Nickel chromium steel weighing bowls of various volumes.
Dust covers for display units and control units of various models.
Explains Council Directive 90/384/EEC for non-automatic weighing instruments.
Services provided for initial balance verification and optimal results.
Sartorius service technicians for inspection and verification.
Information on verification validity and contacting local offices.
Declares compliance with Council Directive 90/384/EEC and European standards.
Illustrates location and types of markings on balance models.
Explains the meaning of labels K, M, S, MD, T on the plates.
Example of a plate showing model designation and CE mark.
Example of a descriptive plate on an already verified weighing instrument.
| Maximum Capacity | 10000 g |
|---|---|
| Capacity | 10000 g |
| Readability | 0.1 g |
| Repeatability | 0.1 g |
| Linearity | ±0.2 g |
| Pan Size | Ø 310 mm |
| Calibration | Internal/External |
| Display | LCD |
| Operating Temperature | 10 °C to 40 °C |
| Interface | RS232 |