EasyManua.ls Logo

Sauder 426932 - User Manual

Sauder 426932
28 pages
Print Icon
To Next Page IconTo Next Page
Loading...
sauder.com
NOTE: THIS INSTRUCTION
BOOKLET CONTAINS IMPORTANT
SAFETY INFORMATION.
PLEASE READ AND KEEP FOR
FUTURE REFERENCE.
sauder.com
CONTACT US FIRST
BEFORE MAKING ANY RETURNS TO THE STORE.
sauder.com
CONTACT US FIRST
BEFORE MAKING ANY RETURNS TO THE RETAILER.
Visit sauder.com/service to order replacement parts, view video assembly tips, or chat with a live rep.
Prefer the phone? Give us a ring at
1-800-445-1527.
Customer Service is available Monday-Friday - 9 a.m. to 5:30 p.m. EST (except holidays)
Sauder.com
Share your journey!
English pg 1-17
Français pg 18-20
Español pg 21-23
Lot # 542612 03/17/20
Purchased: __________________
Storage Cabinet
Model 426932
Treat yourshelf.
Question and Answer IconNeed help?

Do you have a question about the Sauder 426932 and is the answer not in the manual?

Summary

Contact Us First Before Making Returns

Assembly Tools Required

Part Identification

Hardware Identification

Assembly Instructions

Step 1: Prepare and Attach Ends to Fixed Shelves

Attaching the ends (A, B) to the fixed shelves (E) using screws.

Step 2: Attach Back Panel

Securing the back panel (D) using nails, ensuring squareness.

Step 3: Insert Wood Dowels into Ends

Inserting wood dowels (1) into the ends (A, B) for stability.

Step 4: Attach Metal Brackets to Skirt

Fastening metal brackets (2) to the skirt (G) with screws.

Step 5: Fasten Skirt to Ends

Attaching the skirt (G) to the ends (A, B), aligning with dowels.

Step 6: Fasten Skirt to Ends and Fixed Shelf

Securing the skirt (G) to ends (A, B) and fixed shelf (E).

Step 7: Attach Hinges to Doors

Mounting hinges (3) onto the doors (C) using screws.

Step 8: Fasten Doors to Ends

Attaching the doors (C) with hinges to the unit's ends (A, B).

Step 9: Attach Pulls to Doors

Affixing the door pulls (6) to the doors (C) with screws.

Step 10: Install Furniture Tipping Restraint

Securing the unit to the wall using the tipping restraint kit (98).

Step 11: Door Adjustments

Fine-tuning door alignment using hinge adjustment screws.

Step 12: Insert Shelf Pins and Adjustable Shelves

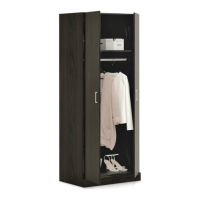
Placing shelf pins (4) and adjustable shelves (F) into the unit.

Step 13: Final Assembly and Cleaning

Completing assembly, cleaning the unit, and final checks.

General Safety Warnings

5-Year Limited Warranty

General Conformity Certificate

Sauder 426932 Specifications

General IconGeneral
BrandSauder
Model426932
CategoryIndoor Furnishing
LanguageEnglish

Related product manuals