Do you have a question about the Sauder 426930 and is the answer not in the manual?
Attach a rod hanger to the upright using two 1/2" flat head screws.
Attach the top and bottom panels to the upright with four 1-9/16" flat head screws.
Secure the fixed shelf to the upright using two 1-9/16" flat head screws.
Attach a rod hanger to the left end panel using two 1/2" flat head screws.
Connect the left end panel to the top, fixed shelf, and bottom using six 1-9/16" screws.
Attach the long brace to the upright and left end panel using four 1-9/16" screws.
Attach metal bracket and insert wood dowels into the back skirt.
Connect the back skirt to the left end and bottom panels.
Attach the right end panel to the top, bottom, and back skirt using five 1-9/16" screws.
Secure short braces to the upright and right end panel using eight 1-9/16" screws.
Fasten back panel with nails, ensuring it's square, and follow safety warning regarding unit stability.
Insert two wood dowels into the left and right end panels.
Attach five metal brackets to the front skirt using ten 1/2" flat head screws.
Secure the front skirt to the bottom and end panels using ten 1/2" flat head screws.
Attach three hinges to each door using six 1/2" flat head screws.
Attach the doors to the end panels and upright using eighteen 1/2" flat head screws.
Secure the door handles to the doors using six 15/16" pan head screws.
Fasten the furniture tipping restraint kit to the top of the unit.
Secure the unit to the wall by attaching the strap to a wall stud.
Place shelf pins into desired hole locations in the right end and upright.
Turn the adjusting screw to move doors side-to-side.
Loosen screws, move doors up/down, then retighten screws.
Loosen mounting screw, move doors in/out, then retighten.
Set the adjustable shelves onto the shelf pins.
Stick appliques onto visible screw heads to cover them.
Apply bumpers to the top and bottom where they contact the doors.
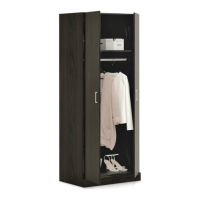
Insert the clothes rod into the rod hangers.
Clean the assembled unit with a damp cloth and wipe dry.
Details warranty coverage for defects, exclusions for misuse, and conditions.
Outlines repair, replacement, refund options and limitations on damages.
States warranty is non-transferable and disclaims implied warranties.
Provides instructions for making claims and contact information for inquiries.
Details the company's history, values, and manufacturing processes.
Provides contact information, website for service, and social sharing prompts.
Certifies compliance with safety standards and lists manufacturing details.
| Product Name | Sauder 426930 |
|---|---|
| Category | Indoor Furnishing |
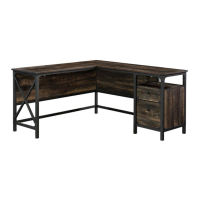
| Type | Computer Desk |
| Material | Engineered Wood |
| Assembly Required | Yes |