9
www.cranecpe.com
Crane ChemPharma & Energy
Basic Installation Guide Mounting the Solenoid Valve
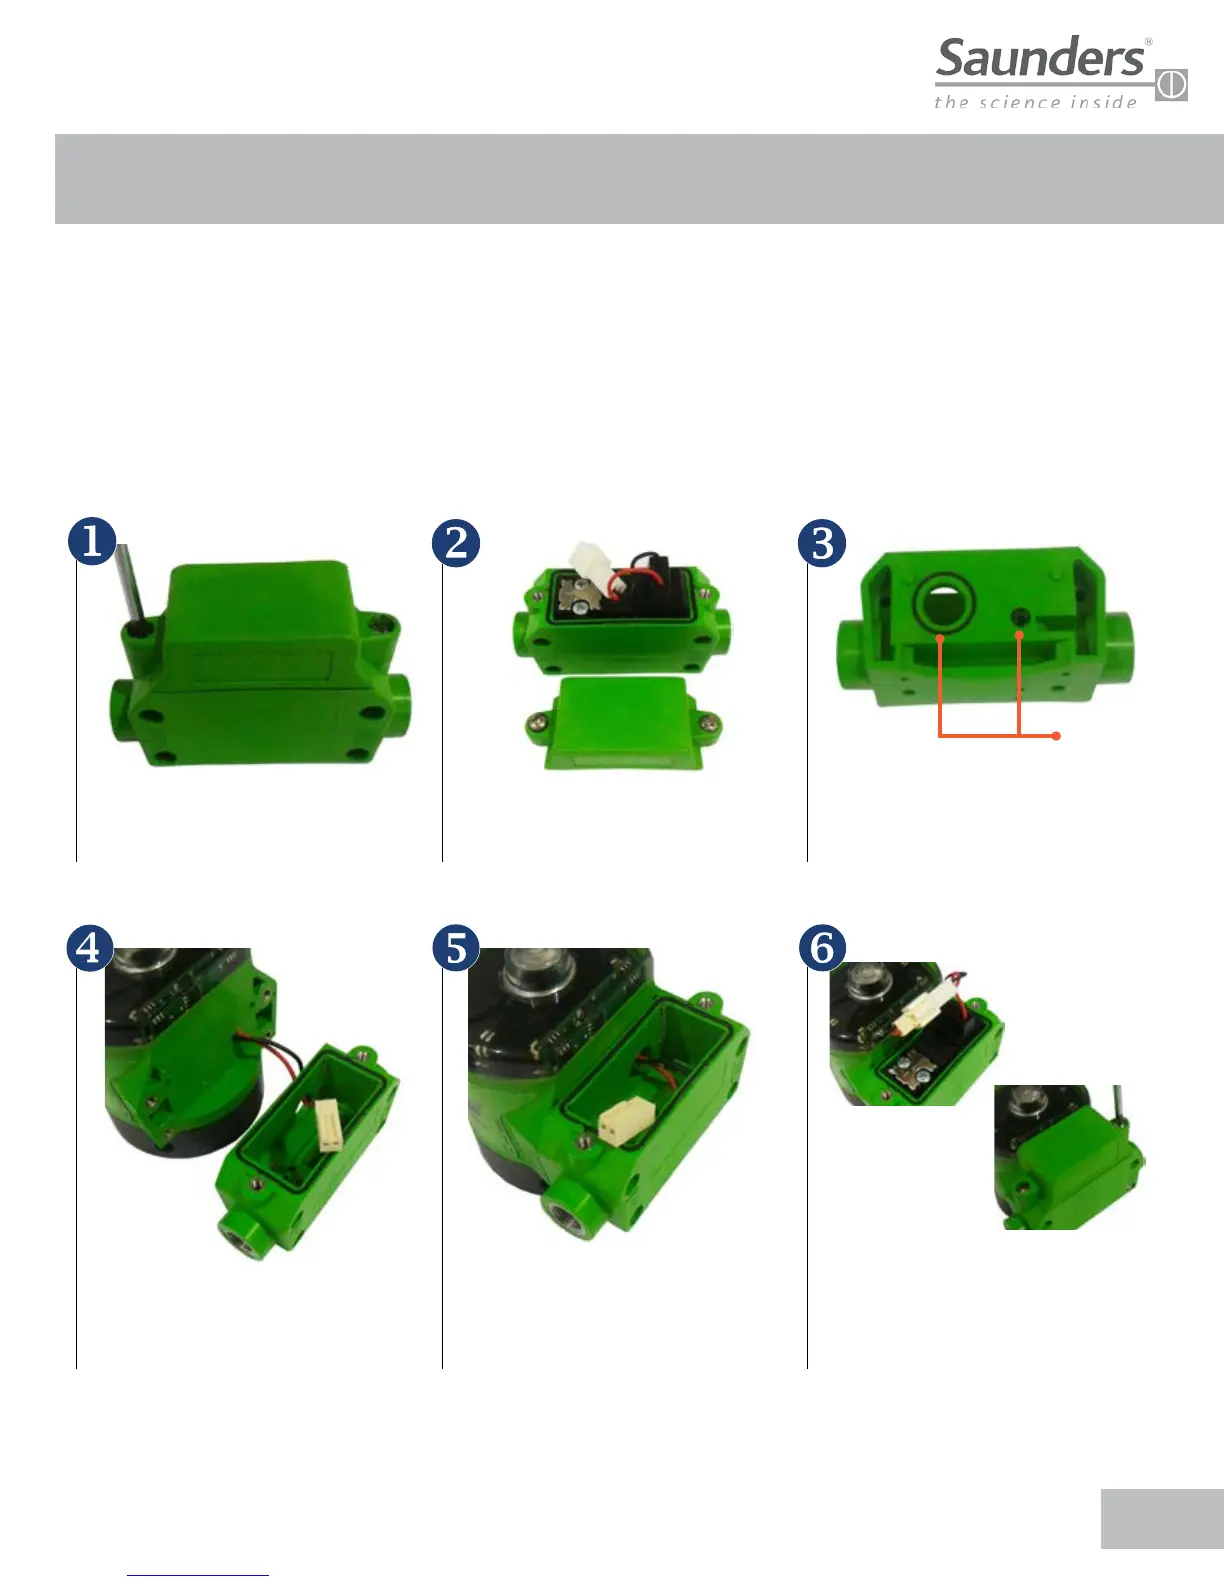
ORINGS
Remove the plastic solenoid cover
by loosening the two screws that
secure it to the pneumatic body.
Insert the electrical connector from
the sensor into the larger orifice of
the pneumatic case.
Remove the two screws securing
the coil and pull the entire
assembly out.
Attach the pneumatic case to the
electronics module with the four
fastening screws provided.
Make sure the two O-rings are
attached to the side of pneumatic
case. (This will avoid contamination
and any air leakage.)
Re-attach the coil to the pneumatic case
and tighten the two fastening screws.
Connect the two cables (electronic
sensor and the coil). Replace the
solenoid cover and tighten the screws
Tools Required:
• Philips or Flat head screwdriver 8 mm open ended spanner to suit air fittings.
• Low strength threadlock adhesive (recommended)
• Thread sealing compound for pneumatic fittings (if required)
Note: For actuators that require a mounting kit. Please contact Saunders for the relevant
installation procedure