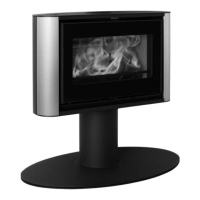
12 CHIMNEY CONNECTION, REVOLVING BASE
Best-possible working of your wood-burning stove with rotating plinth, will depend to a great extent on having the stove carefully installed
by a properly trained fitter. We recommend the following fitting method:
Solution with elbow pipe for brick chimneys (Fig. 1):
1. Place the wood-burning stove on a permanent underlay at the desired installation position in order to mark the position of the wall col-
lar.
2. Shorten the elbow pipe to the desired height.
3. Saw a notch in the elbow pipe to ensure correct fitting. Height: 15 mm. Width: 13 mm.
4. Fit the packing supplied in the service pack 30 mm from the edge of the elbow pipe.
5. Fit the flue collar (A) to your wood-burning stove.
6. Slot the elbow pipe (C) into the flue collar.
7. Temporarily position the wood-burning stove about 90 mm further away from the wall/chimney than you plan to install it, to allow the
elbow pipe to rest against the wall/chimney. Make sure the elbow pipe is perpendicular/horizontal (compared to the wall). Mark the
circumference of the pipe on the wall/chimney.
8. Move the elbow pipe and wood-burning stove to one side.
9. Make a hole in the wall/chimney suitable for the wall collar (D) to pass through.
10. Place the wood-burning stove, wall collar and elbow pipe with the deco ring (E) in the right position.
11. Adjust so that the wood-burning stove and elbow pipe are perpendicular and horizontal.
12. Wedge the wall collar in place.
13. Tighten the four screws (F) on the wall collar slightly, and press the three clips (G) between the wall collar and the elbow pipe.
14. Check that everything is set-up properly.
15. Set the wall collar in concrete.
16. After the concrete has set, tighten the 4 screws on the wall collar to hold the elbow pipe firmly in place.
17. Push the deco ring up against the wall.
Top-mounted Steel Chimney (Fig. 2):
1. Place the wood-burning stove on a permanent underlay at the installation site.
2. Shorten the uninsulated start section to the desired height.
3. Saw a notch in the uninsulated start section to ensure correct fitting. Height: 15 mm. Width: 13 mm.
4. Fit the packing supplied in the service pack 30 mm from the edge of the uninsulated start section.
5. Fit the flue collar (H) to your wood-burning stove.
6. Attach the piece of plywood (I) provided in the flue collar to the bottom of the cavity.
7. Slot the non-insulated start section (J) into the flue collar.
8. Attach the ceiling collar and guide (K) to the start section and fit the first insulated length of chimney (L), which should reach to the
ceiling.
9. Tighten the ceiling collar and guide so that the chimney is held in place.
10. Rivet/screw the non-insulated start section to the first length of the chimney using 4 pop rivets or self-tapping screws.
11. Then fit the remaining chimney sections.
The chimney must be suspended from the ceiling; this is why a ceiling collar and guide, or a beam in the roof construction must be used.