8
English
4.3 Chimneys and fl ue pipes
• The fi replace can be connected to a chimney and fl ue
pipe approved for solid fuel fi red appliances with fl ue gas
temperatures specifi ed in «2.0 Technical data”.
• The chimney’s cross-section must be at least as big as the
fl ue pipe’s cross-section. See «2.0 Technical data» when
calculating the correct chimney cross-section.
• Several solid fuel fi red appliances can be connected to the
same chimney if the chimney’s cross-section is suffi cient.
• Connection to the chimney must be carried out in
accordance with the installation instructions from the
supplier of the chimney.
• Before making a hole in the chimney the fi replace should
be test-mounted in order to correctly mark the position of
the fi replace and the hole in the chimney. See fi g. 1 for
minimum dimensions.
• Ensure that the fl ue pipe is inclined all the way up to the
chimney.
• Use a fl ue pipe bend with a sweeping hatch that allows it
to be swept.
Be aware of the fact that it is particularly important that
connections have a certain fl exibility in order to prevent
movement in the installation leading to cracks.
Chimney draught; See «2.0 Technical data». If the draught
is too strong you can install and operate a fl ue damper to
control the draught.
4.4 Assembly prior to installation
• See «9.2 Delivery units» for total of packages.
• Remove the product from the packaging and check for
visible damage and that the control handles work. Lift the
ash lip, plastic bag containing screws, smoke outlets and
the glove out of the burn chamber.
• IMPORTANT!: A sheet of foam plastic is placed between
the baffl e and the exhaust defl ector for protection during
transport. Be sure to remove this before using the fi replace
for the fi rst time.
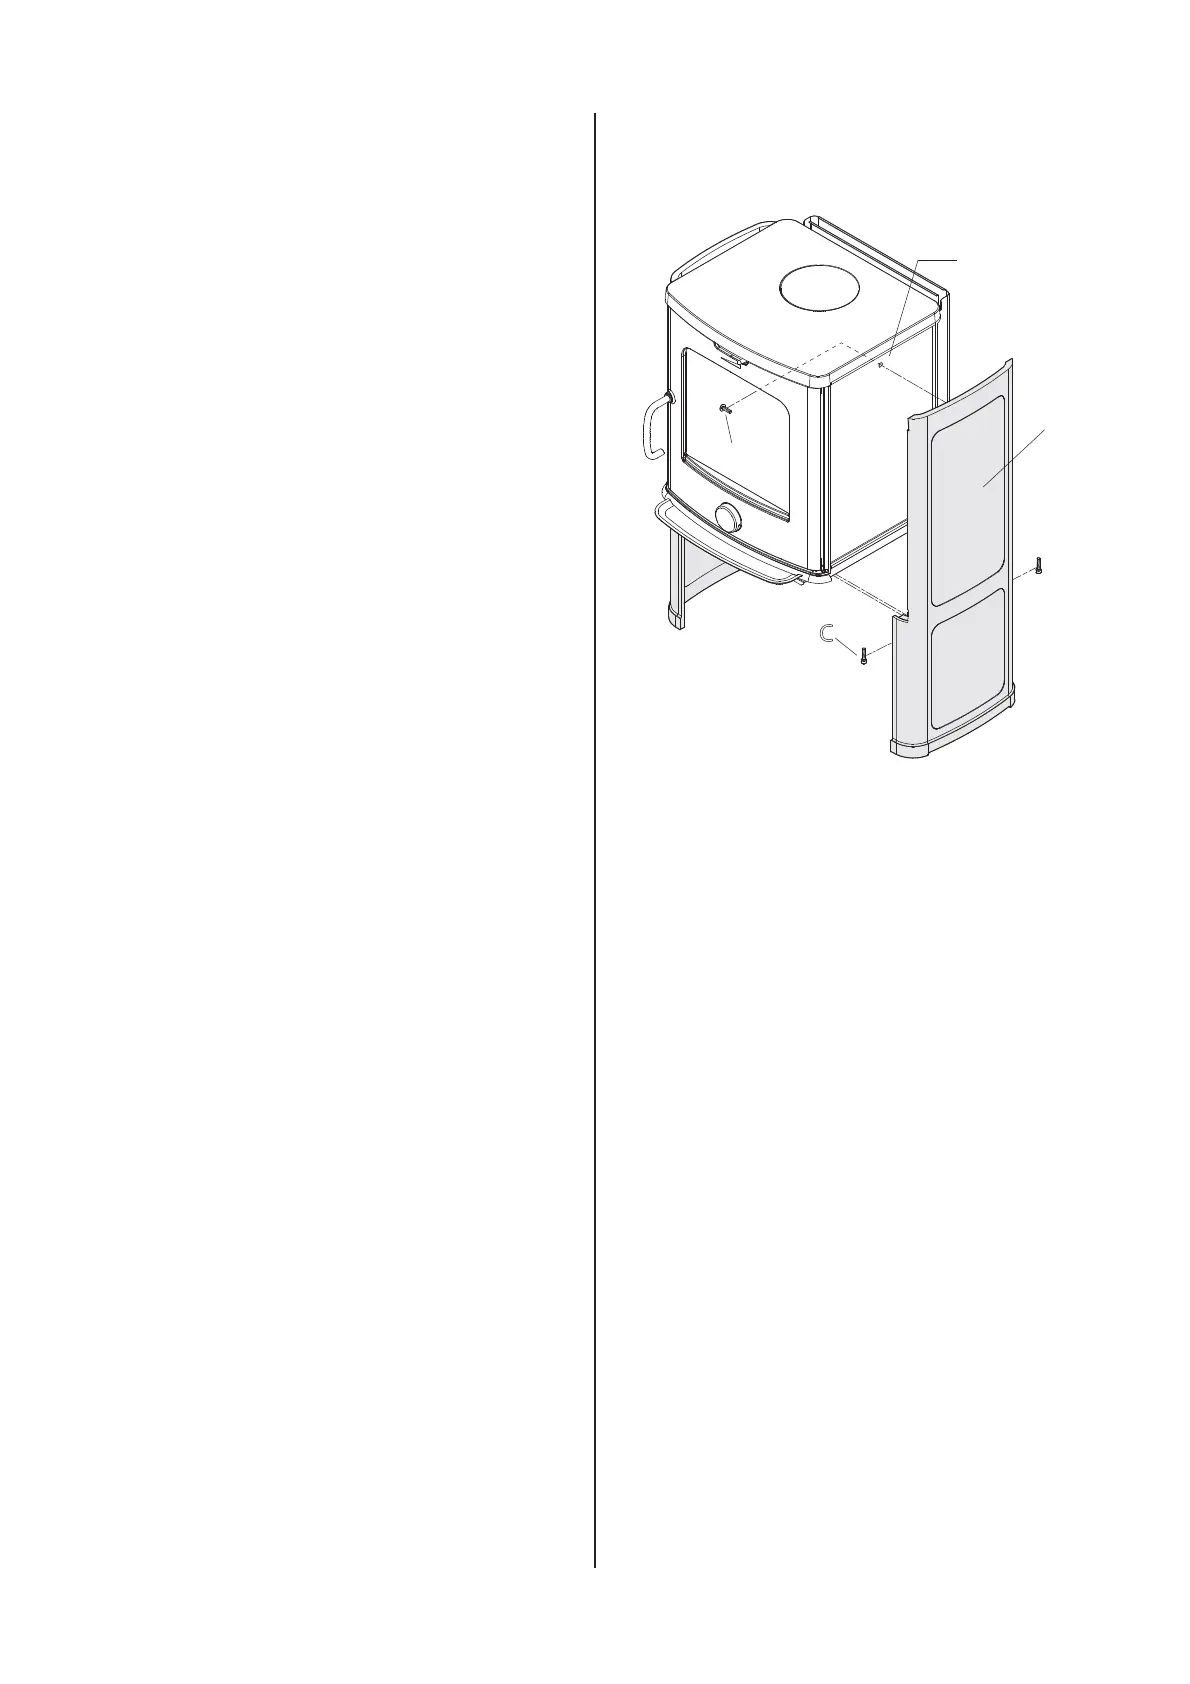
4.5 Fitting the convection panels
Fig. 3
A
B
C
D
1. Lay the stove carefully on its back
2. Remove the baffl e and exhaust defl ector according to
fi g. 6 and fi g. 7.
3. Remove the screw and nut placed in the hole on the sides
(fi g. 3A).
4. Fit the convection panels (fi g. 3B) using the screws
provided (fi g. 3C and fi g. 3D).
5. Place the stove upright.