11
If the handle can not get the belt to run straight it is necessary to make a different
adjustment. This may, for example, be the case if you have received the RB unit as extra
utils. of the tape straight way out in the following section 2.3.
2.3 Thorough adjustment of the sanding belt.
If the belt starts running unevenly and the handle (D) on fig. 2.2.5 cannot make the belt run
straight it is necessary to make an adjustment with the adjustment part. Via the adjustment
part seen on fig. 2.3.1 you can change the angle of the contact disc which is relevant for
the sanding belt run.
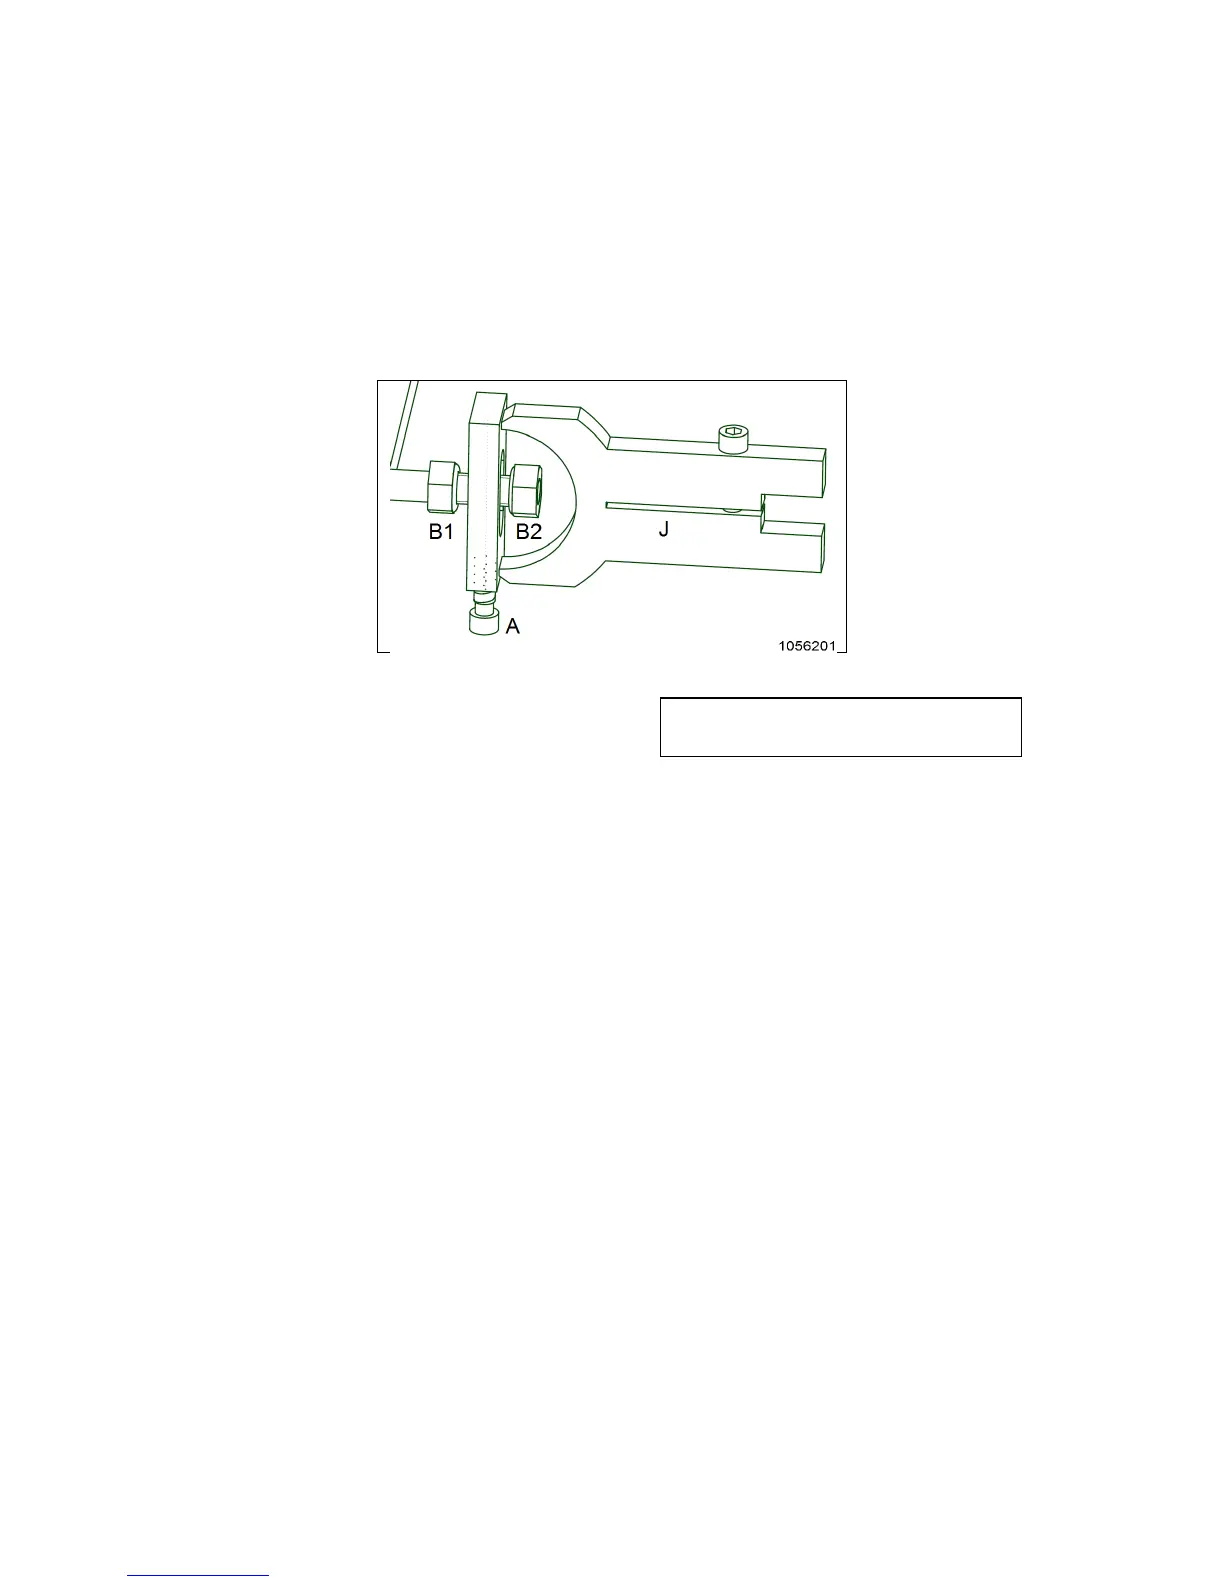
Fig 2.3.1 The adjustment part can adjust the grinding belt.
2.3.a Get ready to adjust
Loosen the right and left support brackets and turn the handle D so it is approx. midway
between the two extreme positions. Check that the machine stands stable and that both
bodies are horizontal. The nuts B1 and B2 are shown in Fig. 2.3.1 should be free and
detached as the drawing.
2.3.b Adjustment with adjustment part
Turn unbracobolt w/spring in adjustment part labeled "A" fig. 2.3.1. This will move the
thread in adjustment part up or down and this will result in the tape runs either right or left.
If you turn the bolt counter clockwise it influences the band to the left and turn the bolt
clockwise influences the band to the right. Run the belt forward by hand to see the result of
your adjustment. When the tape runs just it is adjusted. Then the machine can be started
you can fine tune with the same bolt while it is running.
2.3.c Adjustment of grinding belt.
Check that the belt runs level on the roll. First through manual operation. If the belt runs to
one side, it can be adjusted using an unbraco-bolt w/spring (pos. 34 and 43). Then the
machine can be started at low speed and can be fine tuned with the same bolt. The
adjustment is locked by tightening the two nuts (pos. 32) on the adjustment part. The
rough adjustment should only be done occasionally. To ensure that the adjustment does
not shift, the supporting brackets are now fastened (Nos. 12 and 13 (RB)).
For normal operation, the belt is fine-tuned by using adjustment lever D as usual on the
belt grinder. (see drawing below)
3. Users guide