GB
|
27
www.scheppach.com / service@scheppach.com / +(49)-08223-4002-99 / +(49)-08223-4002-58
Using the tyre ination device
(g. 1, 6, 7, 8)
The compressed air tyre ination device (G)
is used to inate car tyres. With the corre-
sponding accessories it can also be used to
inate and regulate bicycle tyres, inatable
dinghies, air mattresses, balls etc.
Pressure can be released by actuating the
vent valve (7).
m Attention! The manometer has not
been ocially calibrated! After inating,
please check the air pressure with a cal-
ibrated device.
Using an air blow gun
You can also use the tyre ination device
(G) as an air blow gun to clean out cavi-
ties and to clean soiled surfaces and work
equipment.
To do so, please rst remove the hose with
the valve adapter (8).
Now screw the blow-out adapter (D) to the
tyre ination device (G).
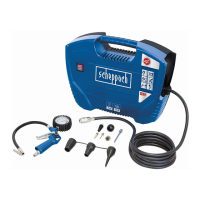
Using the adapter set
The adapter set enables you to use the
following additional capabilities of the tyre
ination device:
• Pumping up balls with the help of the ball
needle (F).
• The valve adapter (E) enables bicycle
tyres to be inated.
• Filling pools, air mattresses or boats with
the help of the additional adapter (K).
• Filling items with threaded valves (e.g.
Boats) with the screw-in valve adapter (J).
• Deating large volume items. The deat-
ing adapter (C) can be used for this.
9. Attachment and operation
n Important!
You must fully assemble the appliance
before using it for the rst time!
Mains connection
• The compressor can be connected to
any 220 - 240-240 V~ 50 Hz shock-proof
socket which is protected by a 16 A fuse.
• Before you use the machine, make sure
that the mains voltage is the same as the
operating voltage (see the rating plate).
• Long supply cables, extensions, cable
reels etc. cause a drop in voltage and
can impede motor start-up.
• At low temperatures below +5°C, slug-
gishness may make starting dicult or
impossible.
ON/OFF switch (g. 1)
• To switch on the compressor, press the
button (2) on position I.
• To switch o the compressor, press the
button (2) on position 0.
Establishing connections (g. 2-4)
m Attention! Switch the device o for this.
When doing so, hold the coupling rmly
in order to avoid injuries due to the hose
springing back.
• First connect the air hose (5) with the
quick coupling of your compressor.
• Connect the tting of your compressed
air tool to the compressed air hose (5) of
the compressor.
• To disconnect this coupling again, pull
the quick-coupling (4) back at the com-
pressed air hose (5).