38 GB
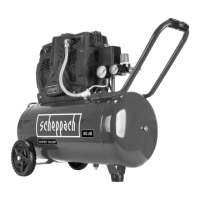
6. Technical data
Mains connection 230 V ~ 50 Hz
Motor rating W 2200
Operating mode S1
Compressor speed 2850 min
-1
Pressure vessel capacity (in
liters)
50
Operating pressure approx. 10 bar
Theoretical intake capacity (l/
min)
approx. 412
sound power level L
WA
97 dB(A)
uncertainty K
WA
2,03 dB
Protection type IP20
Weight of the unit in kg approx. 44,5
Oil (15W 40) l approx. 0,25
Max. altitude
(above mean sea level)
1000 m
The noise emission values were measured in ac-
cordance with EN ISO 3744.
Wear hearing protection.
The effects of noise can cause a loss of hearing.
7. Before starting the equipment
Before you connect the equipment to the mains sup-
ply make sure that the data on the rating plate are
identical to the mains data.
• Prior to initial commissioning, remove the trans-
port plug (B) and ll the crank housing with oil as
described in item 8.4.
• Check the equipment for damage which may have
occurred in transit. Report any damage immedi-
ately to the transport company which was used to
deliver the compressor.
• Install the compressor near the point of consump-
tion.
• Avoid long air lines and supply lines (extension
cables).
• Make sure that the intake air is dry and dustfree.
• Do not install the compressor in a damp or wet
room.
• The compressor may only be used in suitable
rooms (with good ventilation and an ambient tem-
perature from +5 °C to 40 °C). There must be no
dust, acids, vapors, explosive gases or inamma-
ble gases in the room.
• The compressor is designed to be used in dry
rooms. It is prohibited to use the compressor in
areas where work is conducted with sprayed water.
• The oil level in the compressor pump has to be
checked before putting the equipment into opera-
tion.
8. Attachment and operation
m Important!
You must fully assemble the appliance before using it
for the rst time!
You will require the following tools for assembly and
installation: 2 x open-ended wrench size 17 mm (not
included)
You will require the following tools for assembly and
installation: 2 x open-ended wrench size 14 mm (not
included)
8.1 Fitting the wheels (Fig. 5)
• Fit the supplied wheels (11) as shown.
8.2 Fitting the supporting foot (2x)(Fig. 6)
• Fit the supplied supporting foot (2x) as shown.
8.3 Fitting the air lter (2x)(Fig. 7,8)
• Remove the transportation stop (A) and screw the
air lter (14) to the equipment.
8.4 Changing the transportation cover (B)
(Fig. 9,10)
• Remove the transport lid (B) of the oil lling open-
ing (19).
• Fill the included compressor oil into the crank
housing and insert the included oil sealing plug
(15) into the oil lling opening (19).
8.5 Mains connection
• The compressor is equipped with a mains cable
with shock-proof plug. This can be connected to
any 230-240V ~ 50 Hz shock-proof socket.
• Before you use the machine, make sure that the
mains voltage is the same as the operating voltage
(see the rating plate).
• Long supply cables, extensions, cable reels etc.
cause a drop in voltage and can impede motor
start-up.
• At low temperatures below +5°C, sluggishness
may make starting difcult or impossible.
8.6 ON/OFF switch (Fig. 2)
• Pull the ON/OFF switch (16) upwards to switch
on the compressor. To switch off the compressor,
press the ON/OFF switch down.
8.7 Setting the pressure (Fig. 1,3)
• Use the pressure regulator (5) to set the pressure
on the pressure gauge (4).
• The set pressure can be drawn from the quick lock
coupling (3).
• The vessel pressure can be read off the pressure
gauge (6).
• The vessel pressure is drawn from the quick lock
coupling (7).
 Loading...