www.scheppach.com
26
|
GB
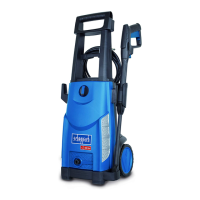
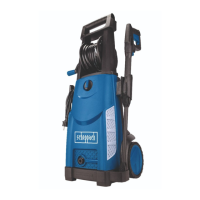
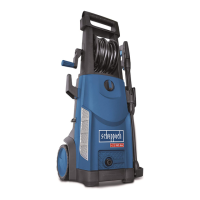
- Rotary jet for surface cleaning work
- Cleaning agent mode for spraying cleaning
agent.
11. Electrical connection
The electrical motor installed is connected and ready
for operation. The connection complies with the appli-
cable VDE and DIN provisions.
The customer‘s mains connection as well as the ex-
tension cable used must also comply with these reg-
ulations.
Damaged electrical connection cable
The insulation on electrical connection cables is often
damaged.
This may have the following causes:
• Pressure points, where connection cables are
passed through windows or doors.
• Kinks where the connection cable has been improp-
erly fastened or routed.
• Places where the connection cables have been cut
due to being driven over.
• Insulation damage due to being ripped out of the wall
outlet.
• Cracks due to the insulation ageing.
Such damaged electrical connection cables must not
be used and are life-threatening due to the insulation
damage.
Check the electrical connection cables for damage
regularly. Ensure that the connection cables are dis-
connected from electrical power when checking for
damage.
Electrical connection cables must comply with the ap-
plicable VDE and DIN provisions. Only use connection
cables of the same designation.
The printing of the type designation on the connection
cable is mandatory.
Commissioning:
Once you have completely assembled the high-pres-
sure cleaner and all connections have been made,
proceed as follows:
Turn on the water supply. Unlock the pistol (13) via the
locking switch (C). Pull back the trigger lever (D) so
that the air in the device can discharge. (Fig. 5)
Switch on the device by setting the on/o switch (4)
to “ON”. Next, press the trigger lever (D). (Fig. 1/5)
To switch o, release the trigger lever (D), and the de-
vice switches to stand-by. The high-pressure clean-
er starts again when you press the trigger lever (D).
(Fig. 5)
To switch o the high-pressure cleaner completely, set
the on/o switch (4) to “OFF”. (Fig. 1)
Cleaning agent container (9)
Fill the cleaner container (9) with the corresponding
cleaner. The jet width can be adjusted at the nozzle.
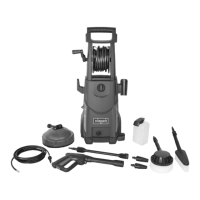
Using the attachments (Fig. 1):
Patio cleaner (12): For cleaning oor and wall surfac-
es.
Turbo nozzle (15): To eliminate stubborn dirt.
Nozzle (16): For coarse cleaning work.
Rotating brush (17): For surface cleaning.
Cleaning brush (18): For surface cleaning.
90° turbo nozzle (19): For car underbody and gutter
cleaning.
Kärcher adapter (20): Use this adapter to attach Kärch-
er brand accessories.
3in1 nozzle (21): It is possible to choose between three
dierent operating modes by turning the nozzle (21).
- Wide jet for normal cleaning work
 Loading...