Page 11
4. Installation
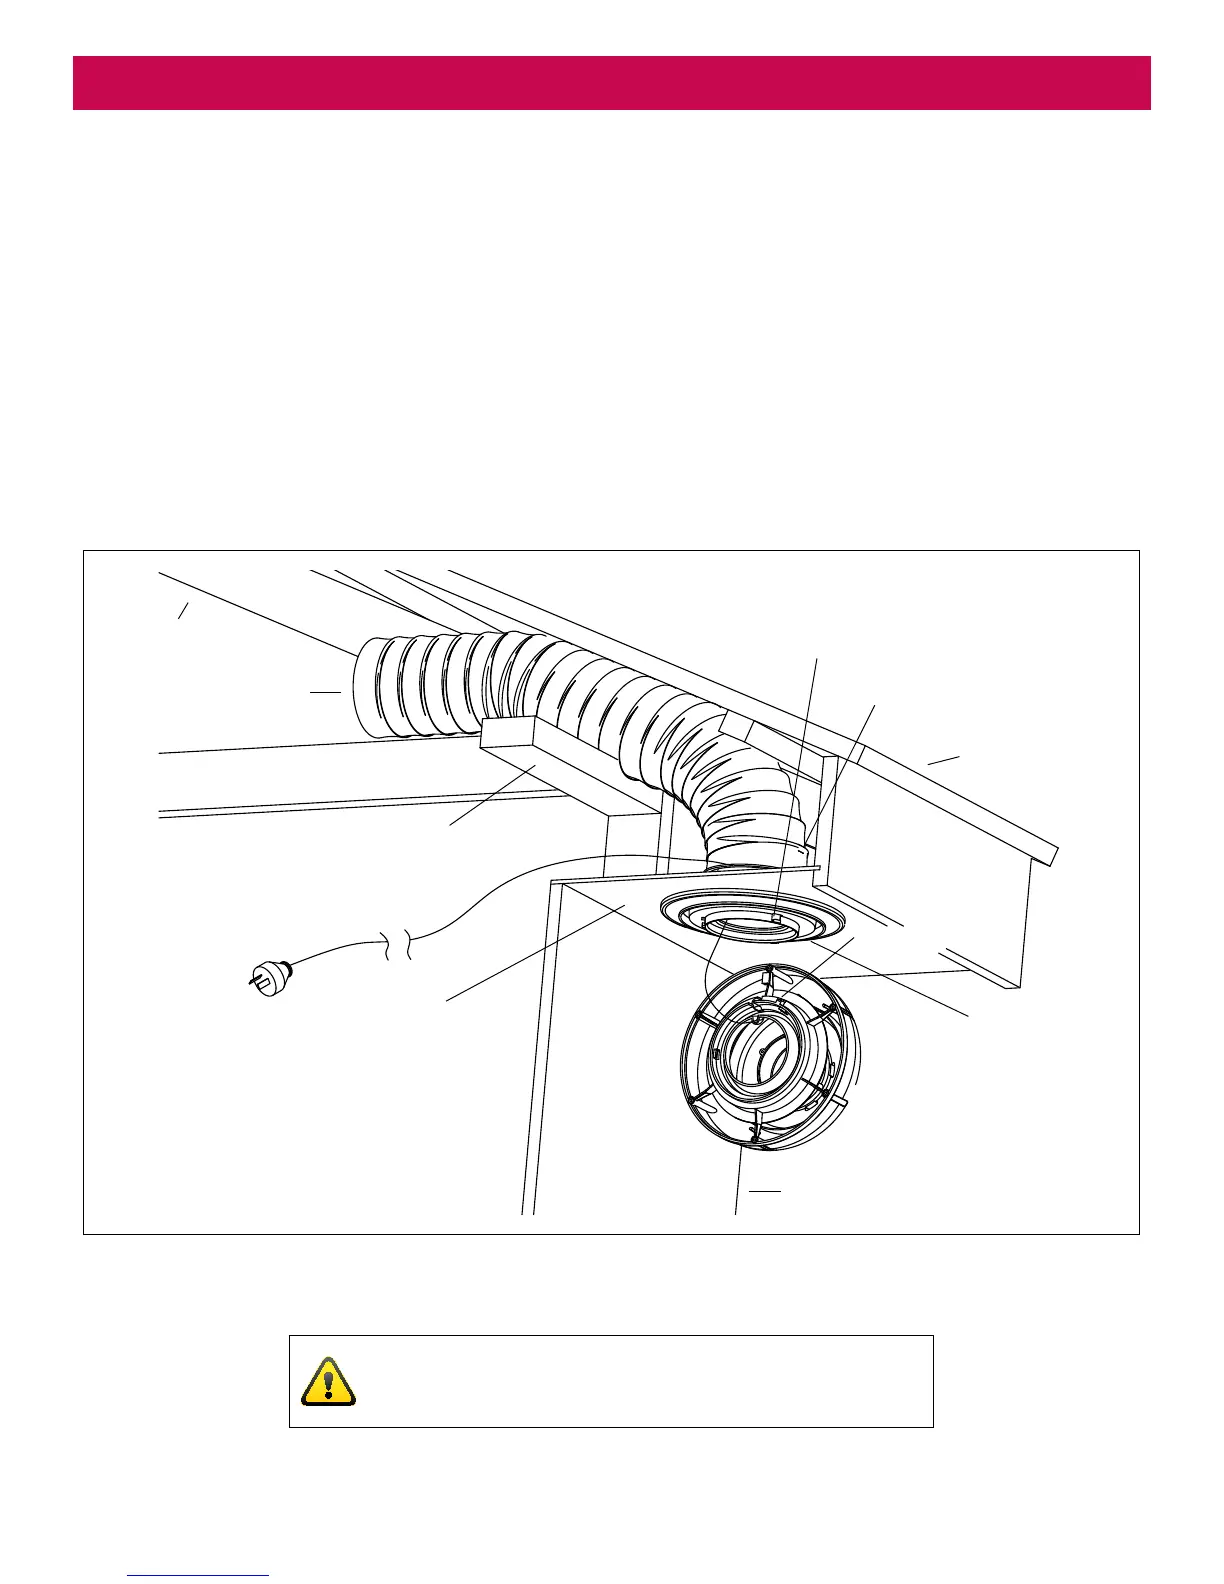
Eaves Installation
After ensuring sufcient clearance exists for the mounting ange and ducting, refer gure 1, cut a
circular hole 165mm Ø, maintaining adequate clearances. The eaves sheeting should be reinforced.
Pre-drill mounting ange recess. Refer gure 3.
If access to the eaves space is restricted, before xing mounting ange to eaves, preassemble
mounting ange, PVC pipe, bell-mouth adaptor and exi-duct then feed up into roof space.
Remember to run power cord through the assembly and out the slotted PVC pipe wall, refer gure 3.
Fit fan module to mounting ange by placing in position, rotating clockwise to engage bayonet
ngers then secure by screwing in locking screw (while holding fan module rmly in the fully clockwise
position).
Ensure that one of the three
bayonet ngers is accessable
for securing locking screw
Bell-mouth Adaptor
Roof Cladding
Locking Screw
Pre-drill mounting
ange recess and
secure to reinforced
eaves sheet using #8
self tapping screws
Wall
Eaves
Top Plate
150mm Ducting
Roof Frame/Truss
Figure 3
IMPORANT
For more exible ducting instructions, refer page 19.
NOTE: Ensure that power cord
is feed through exit slot and is
not allowed to double back
restricting fan inlet.