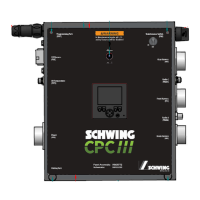
The Schwing CPC3 Fault Isolation Manual provides a comprehensive overview of the CPC3 system, its components, and troubleshooting procedures. This manual is designed to assist technicians in diagnosing and resolving issues with the CPC3 system, which serves as an upgraded replacement for previous CPC systems (C32, CPC, and CPC2). The CPC3 system is the brain of the concrete pump, controlling all inputs and outputs, and its functionality may vary depending on the original system and installed options.
System Overview: Functions
The CPC3 unit performs all functions previously handled by C32, CPC, and CPC2 units. Key functions include:
- Displaying PTO, Pump, and Boom Hours.
- Providing easy troubleshooting screens.
- Featuring a Maintenance Switch that supplies constant power to the Dump Valves.
- Enabling easy Teach mode operation for calibrating joysticks.
Important Technical Specifications
The Primary PLC, which is the central processing unit, has 32 inputs and 48 outputs. It is rated IP67, meaning it is dust-tight and protected against immersion in water up to 1 meter. The PLC must be programmed before shipping to ensure proper operation.
The Power Distribution Module (PDM) is a central location for all fuses, relays, and circuit breakers. It distributes power to all components. Primary circuits use either self-resetting or manual resetting circuit breakers. Self-resetting breakers reset when power is cycled, while manual resetting breakers require manual intervention. The only exception is 5A circuits, which use lighted fuses due to the unreliability of circuit breakers at low amperages. Non-essential functions are protected by fuses.
The 2.8" Display provides all CPC3 information and connects via a simple M12 connector. It activates with the PTO and must be programmed before shipping.
The Scanreco Radio is a 915 MHz Mini 303 unit with an LCD. It indicates system status through lights:
- "A" Light: E-Stops are clear, hopper is closed, system is operating.
- "C" Soft Stop: E-Stops are clear, but a switch was not neutral first.
- "E" Light: An error is present and not acknowledged.
The Radio Signal Light is off during normal operation, flashes red if the signal is poor, and turns solid red if the link is lost.
Usage Features
2.8" Display Views:
- Home Page: Displays RPM (Driveshaft Speed), Oil Temp, Oil PSI (optional), Strokes/Min (optional), messages, errors, and comms link statuses. It also shows two Stroke Counters with individual resets.
- Menu Screen: Provides access to various settings. The default password is "1234".
- Proportional Control Settings: Allows enabling Teach Mode and resetting min/max values to factory defaults. Viewable without a password.
- Remote Control Status Screen: Displays the status of the remote control.
- Keypad Status Screen: Displays the status of the keypad.
- Maintenance Screen: Shows error messages and allows resetting hour meters.
- I/O Screen: Displays troubleshooting information, current voltages, and I/O statuses.
- Configuration Screen: Only available at the factory.
Teach Mode Operation:
Teach mode calibrates the joysticks of the Radio Remote for accurate and consistent motion.
- Access "Proportional Settings" from the menu screen. A password is required to change values (default "1234" for customer, factory password for Schwing settings).
- Set RPM to maximum.
- Click "Teach Mode".
- For each boom function:
- Flip the Rabbit/Snail mode switch (Snail for minimum, Rabbit for maximum).
- Hold the joystick in the desired function (e.g., Boom #1 Up). Caution: The boom will move during this time.
- Use the throttle up/down buttons to adjust the value.
- Activate the horn button on the radio to save the setting. A box will appear around the saved value.
- Release the boom function.
- To adjust stroke limiter values:
- Flip the Rabbit/Snail switch to Neutral ("S/M" value appears).
- Adjust the Stroke pot below 5 for max current, and above 5 for min current.
- Use throttle up/down to adjust the value.
- Activate the horn button to save.
- To revert to factory settings, hold the Factory Reset button for 5 seconds.
Maintenance Features
Maintenance Switch:
- Located on the side of the control panel.
- Puts the CPC3 system into bypass mode, bypassing most safety features, including E-STOPS.
- Keyed switch allows removal by the owner.
- Turns on all Dump Valves regardless of E-Stops.
- Intended as a backup for system failures; immediate repair is recommended to prevent damage.
- If the PLC is operational, throttle can be controlled via the "Engine RPM Control" on the Maintenance Screen using +/- buttons (rear keypad throttle will not work).
- In Maintenance Mode, the Radio remote will show "NO CAN BUS MESSAGES" and will not be operational.
- Stroke Limiter buttons will still work from the rear keypad if the PLC is operational.
Troubleshooting:
The manual provides a detailed fault isolation guide with specific steps for various issues, including:
- Display not turning on.
- Primary PLC not turning on (no lights).
- Throttle control not working.
- Oil Cooler not turning on.
- Slew Limits not working.
- Fuse F9 blowing in maintenance mode.
- Stroke Counter and Strokes/Min not counting.
- Work Lights not working.
- Hopper Light not working.
- System not turning on.
- Radio Display showing "NO CAN BUS MESSAGES" or "E" indicator light.
- Display messages like "Slew Limit [Left/Right]", "E-Stop [Rear/Boom/Remote]", "Hopper Grate Open", "Soft Stop-Neutral all switches", "Reset E-Stop Request", "No comms Keypad<>PLC", "Dirty Oil Filter", "Telescopic Boom Limit", "No Driveshaft Speed Detected", "No Alt D+ Voltage", "Hydraulic Oil Temp High", "Ram Change Mode Enabled", "Teach Mode Enabled", "Oil Pressure Sensor Fault", "Water Tank Level Low", "Maintenance Switch Enabled", "VBBS Volts Low-Check CB[#]", "No Comms HMI<>PLC", "PLC Temp High", "Pump RPM High-Check Gear", "Error Code-Goto Maint. Page", "No Comms PLC<>Receiver", "Oil Temp Sensor Fault", "Operate Oil Cooler Manually", and "[Boom/Remote/Rear] E-stop Error".
For each issue, the manual outlines diagnostic steps, such as checking connections, fuses, and sensors, and provides instructions for replacement or further troubleshooting. It also includes guidance on how to determine the PLC version, which is crucial for ensuring compatibility with replacement parts.