82
Operation
SP 500 / 750-15 / 750-18 / 1000 / 1250 Operation Manual
Cleaning the Rock Valve
SWG98n190.eps
SWG98n189.eps
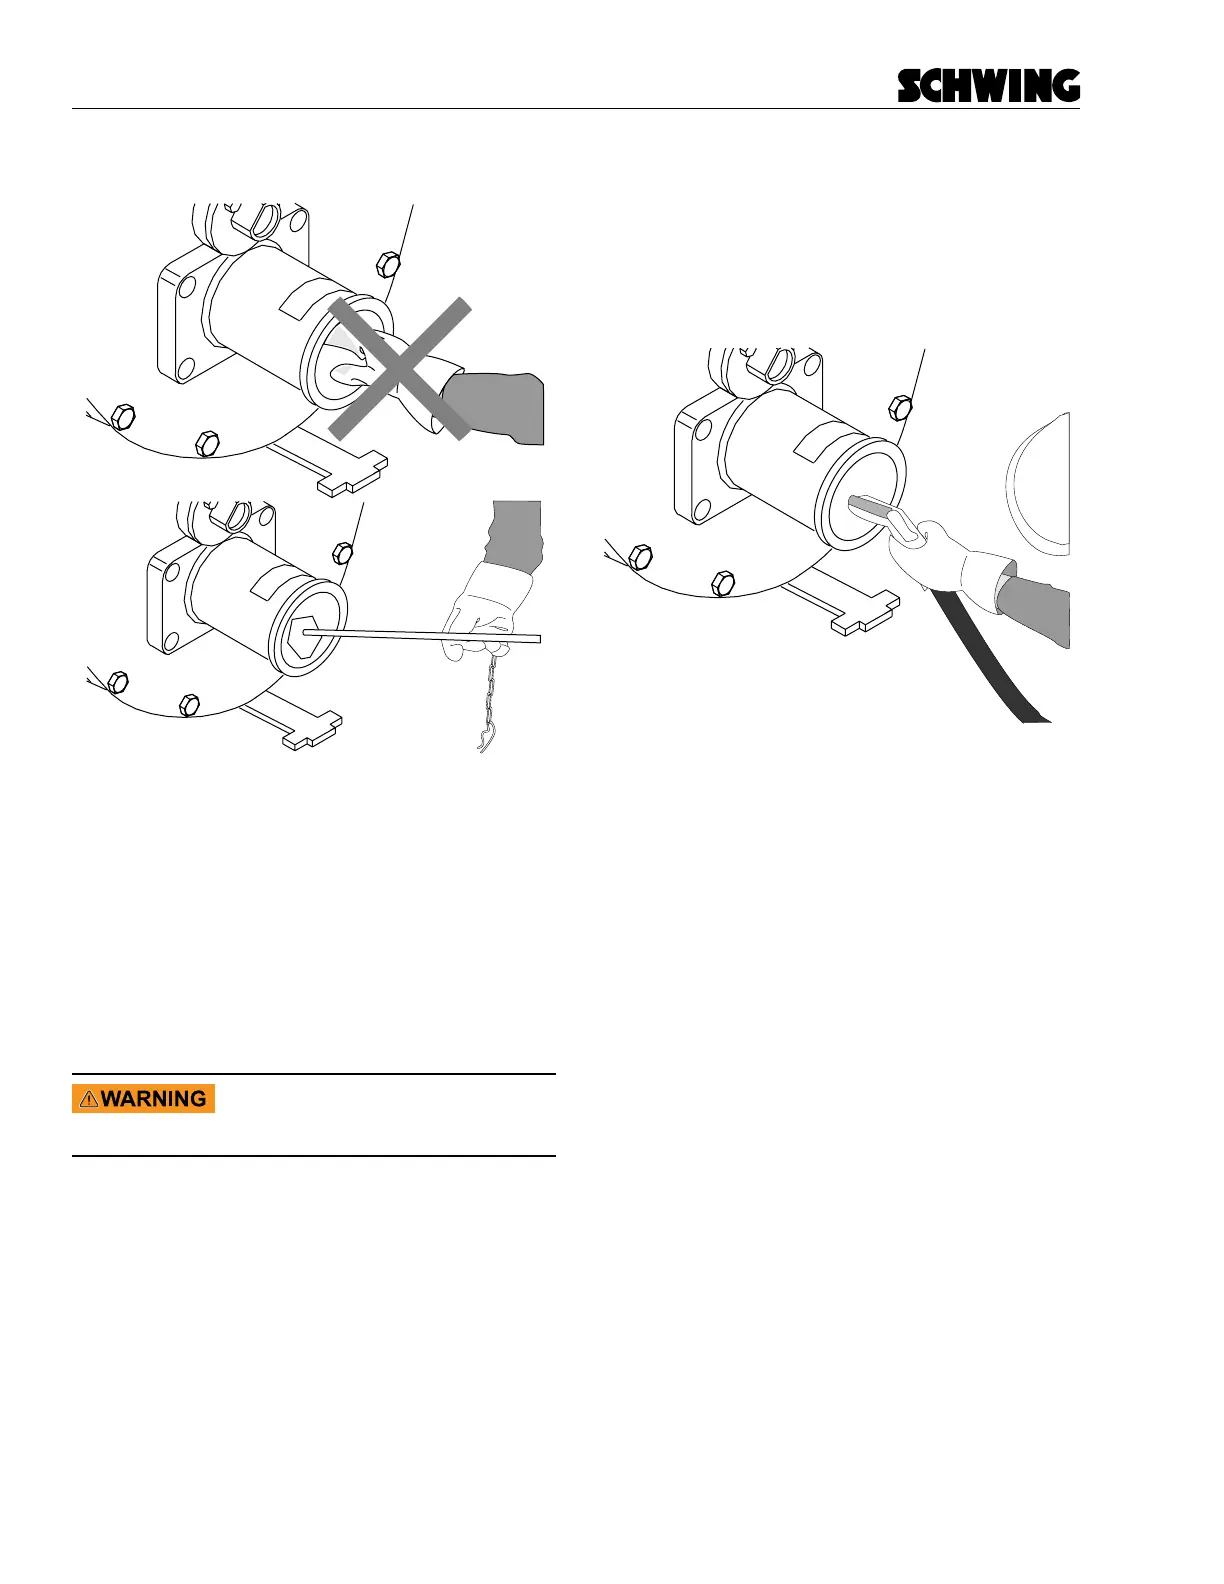
Figure 25
Rock Valve and Material Cylinder Cleanout
Once the hopper is clean, you should clean out the
Rock Valve and material cylinders. Before you begin
this step, bring the engine speed to an idle. Stroke the
concrete pump one complete stroke in reverse, until the
Rock Valve shifts across, then stop the pump. This step
ensures that the exposed material cylinder will have the
rubber ram extended to the end, thereby eliminating the
need to pull material from deep inside the cylinder.
Amputation hazard. Stop pump be-
fore cleaning the Rock Valve and
hopper.
Be sure that the concrete pump is turned to the OFF
position before proceeding. Using your cleanout rake,
pull any material from the exposed material cylinder, the
Rock Valve, and the outlet pipe (Figure 25).
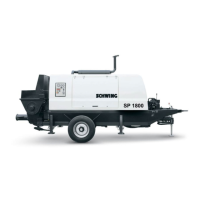
• Spray water into the opening, washing the end
of the rubber ram, the material cylinder, the Rock
Valve, and the outlet pipe (Figure 26). Continue
washing until the water that leaves the valve is
clear and clean. Visually inspect that no rocks,
sand, or clumps of concrete remain. If there is still
material, continue spraying water.
Figure 26
Spraying out Rock Valve
• Be sure that your rake and other tools are out of
the Rock Valve area, then cycle the machine in
reverse for one more stroke. This will expose the
opposite material cylinder, and completely extend
its rubber ram. Remove any loose material with
the clean out rake, then spray out the material cyl-
inder as in the previous step.
• By putting the pump into reverse mode, you are
sucking from the direction of the pipeline (which
is not connected during the cleanout procedure)
and pumping into the hopper. Because of this, you
may nd that you now have some material in the
bottom of the hopper again. You need to wash this
material out.
• Spray o the clamps, gaskets, and wedges.
• Close the hopper cleanout door, and reattach the
bungy cord, if used.