Operations
Getting Started
Consulta physician before you start an exercise program. Stopexercising if you feel pain or tightness in your chest,
become short of feel faint. Contact doctor before the machine Usethe values calculated
breath, or
your you
use again. or
measured bythe machine's computer for reference purposes only.
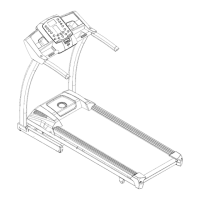
Make sure the treadmill is stable on a clean, hard, level surface, with a sufficient clear workout area. A rubber mat below the
machine is recommendedto prevent electrostatic discharge and protect your floor.
Inspect the walking beltto make sure it is centered and correctly aligned. Referto the Maintenance section of this manualfor the
procedure to align the walking belt.
Stretch your muscles before you start your workout.
1. Connect the Power Cord to a correctly grounded AC wall outlet.
Putthe power cord along the machine, to keep clearance for dismounts from the machine.
2. Turn the Power Switch on the front of the treadmill to the On position. The dual LCD comes on fully for 3
seconds and the console makes a "beep" sound when the console goes into Ready Mode.
Note: Ifthe Safety Key is not in the Safety Key Port,the Program Display shows "Safe key" and the digital
displays show ....
3. Attach the magnetic Safety Key to the round Safety Key Port at the bottom of the Console. When the
Safety Key is in the Safety Key Port, the Program Display shows the message "Welcome" and the digital
displays show "0". The console is ready for you to go to Quick Start Mode or Program Setup Mode.
4. When you start the treadmill, stand with both feet on the Side Foot Support Rails. Start the treadmill at
a slow speed and carefully step on the walking belt. Always use the handlebars to step on or off the
treadmill, or when you change speed or incline.
5. Walk slowly to warm up and gradually increase the workout intensity.
Quick Start (Manual Program)
1. Attach the magnetic Safety Key to your clothing, and put the key to the Safety Key Port. If the key pulls
out of the Safety Key Port, the treadmill turns off immediately for your safety.
2. Push the Quick Start key. The console display counts down for 3 seconds and then starts the Manual
Program at 0.5 mph (0.8 km/h).
3. To increase the speed, push the Speed • (Up) key. Each time you press the Speed • key the speed will
increase by 0.1 mph (or 0.1 km/h). To reduce the speed, press the Speed • (Down) key. There are 4 Preset
Speed keys which you can push at any time during a workout. The Preset Speed keys are labeled 2, 4, 6
and 8. This means if you press 2, the speed adjusts to 2 mph (or 2 km/h).
4. To increase the incline, push the Incline • (Up) key. Each time you push the Incline • key, the incline
increases 1 level. To reduce the incline, press the Incline • (Down) key. There are 4 Preset Incline keys
which you can push at any time during a workout. The Preset Incline keys are labeled 2%, 4%, 6% and 8%.
5. The time counts up from zero for the Manual Program. The maximum time is 99:59.
Program Setup
When the console is in ReadyMode, push the COURSES/PROFILESkeyto goto the Program Selection menu. Usethe • and • keys
to movethrough the menu to find a program option and pushthe ENTER/RESETkeyto record your selection.
Ifyou want to saveyour workout dataresults inyour User profile, goto your User profile first, andthen operate the workout program.
Note: To set up a User profile, goto a USERoption and refer to the User Setup section of this manual.
After each step in Program Setup, you can push the ENTER/RESETkeyto go to the next data item for your program, or push the
QUICKSTARTkeyto goto Workout Mode. The program will use default values for setup data that is not specified.
28
 Loading...