EasyManua.ls Logo

Scosche TA2121B User Manual

Scosche TA2121B
2 pages
To Next Page IconTo Next Page
Page #1 background imageLoading...
Page #1 background image
4
Kit Assembly
Step 6
Mount and screw the assembly into the dash cavity, then reassemble
everything in reverse order to complete the installation.
INSTALLATION GUIDE
Kit Assembly Continued
TA2121B
IN-DASH INSTALLATION KIT FOR
2016-UP TOYOTA TACOMA VEHICLES EQUIPED
W/ PREMIUM STEREO
This premium installation kit is for 2016-UP Toyota Tacoma vehicles with premium model radio. Included are all the parts
you need to mount your car stereo or CD player into your vehicle’s dash. Refer to individual instruction in this manual to
remove your vehicles factory radio and assemble the kit.
PRT (Panel Removal Tool)
Screwdriver
TA2121B 02/16TA2121B 02/16
7746 Left Bracket
7745 Right Bracket
TA2121B Face Panel
6552 Pocket
Question and Answer IconNeed help?

Do you have a question about the Scosche TA2121B and is the answer not in the manual?

Scosche TA2121B Specifications

General IconGeneral
BrandScosche
ModelTA2121B
CategoryAutomobile Accessories
LanguageEnglish

Summary

Installation Guide Overview

Product Description and Purpose

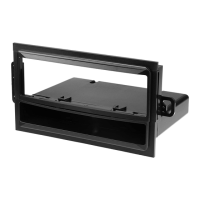
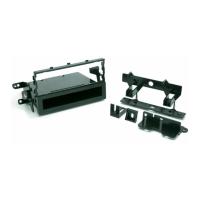
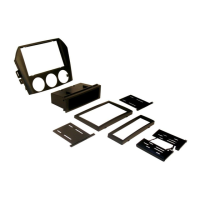
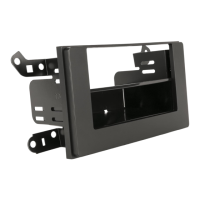
Describes the in-dash installation kit for 2016-UP Toyota Tacoma vehicles with premium stereo.

Required Tools

Lists the essential tools needed for the installation process.

Critical Safety Precautions

Emphasizes disconnecting the vehicle's negative battery terminal before installation.

Support and Liability Information

Provides contact details for assistance and a disclaimer of liability.

Disassembly and Initial Steps

Step 1: Air Vent Panel Removal

Using a Panel Removal Tool (PRT) to remove the air vent duct panel around the radio.

Step 2: Radio Screw Removal

Removing four screws securing the OEM radio in place.

Step 3: Wiring Disconnection

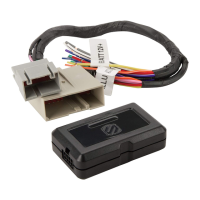
Unplugging all wiring harnesses connected to the OEM radio.

Step 4: Radio Removal

Removing the radio from the dash cavity and unscrewing its brackets.

Kit Assembly and Radio Installation

Step 5: Single DIN Radio Assembly

Attaching the pocket and brackets to the face panel for single DIN radio installation.

Step 5: Double DIN Radio Assembly

Attaching the brackets to the face panel for double DIN radio installation.

Bracket Mounting Note

Important note regarding using specific screw locations ('A') for bracket mounting.

Final Assembly and Completion

Step 6: Mount and Secure Assembly

Mounting the assembly into the dash cavity and reassembling.

Related product manuals