__________________ Vortex M6
9
IMPORTANT:
Hosesandothernaturalrubberpartsdeteriorateafterextendeduse.Hosesmaydevelop
cracks,blistersormaterialwearfromthetemperatureandconstanthighpressuretheyare
subjectedto.Allhosesshouldbecheckedonamonthlybasisforanyvisiblesignsof
deterioration.Anyhoseshowingthesignsofdeteriorationlistedaboveshouldbereplaced
immediately.Allhosesshouldbereplacedeveryfiveyears.
3.4.4 Connectthedrainhosetothedrainreceptacle.
3.4.4.1 Removethedrainhosefromitsshippingpositionontherearof
the instrument by unhooking the hose from the retainer
clamp.
3.4.4.2 Installthedrainhoseintothedrainreceptacle(standpipe,wall
orlaundrytub)followingtheinstructionsbelow.
NOTE: Drain receptacle must be capable of handling a minimum of1‐1/4inch[32cm]
outsidediameterdrainhose.
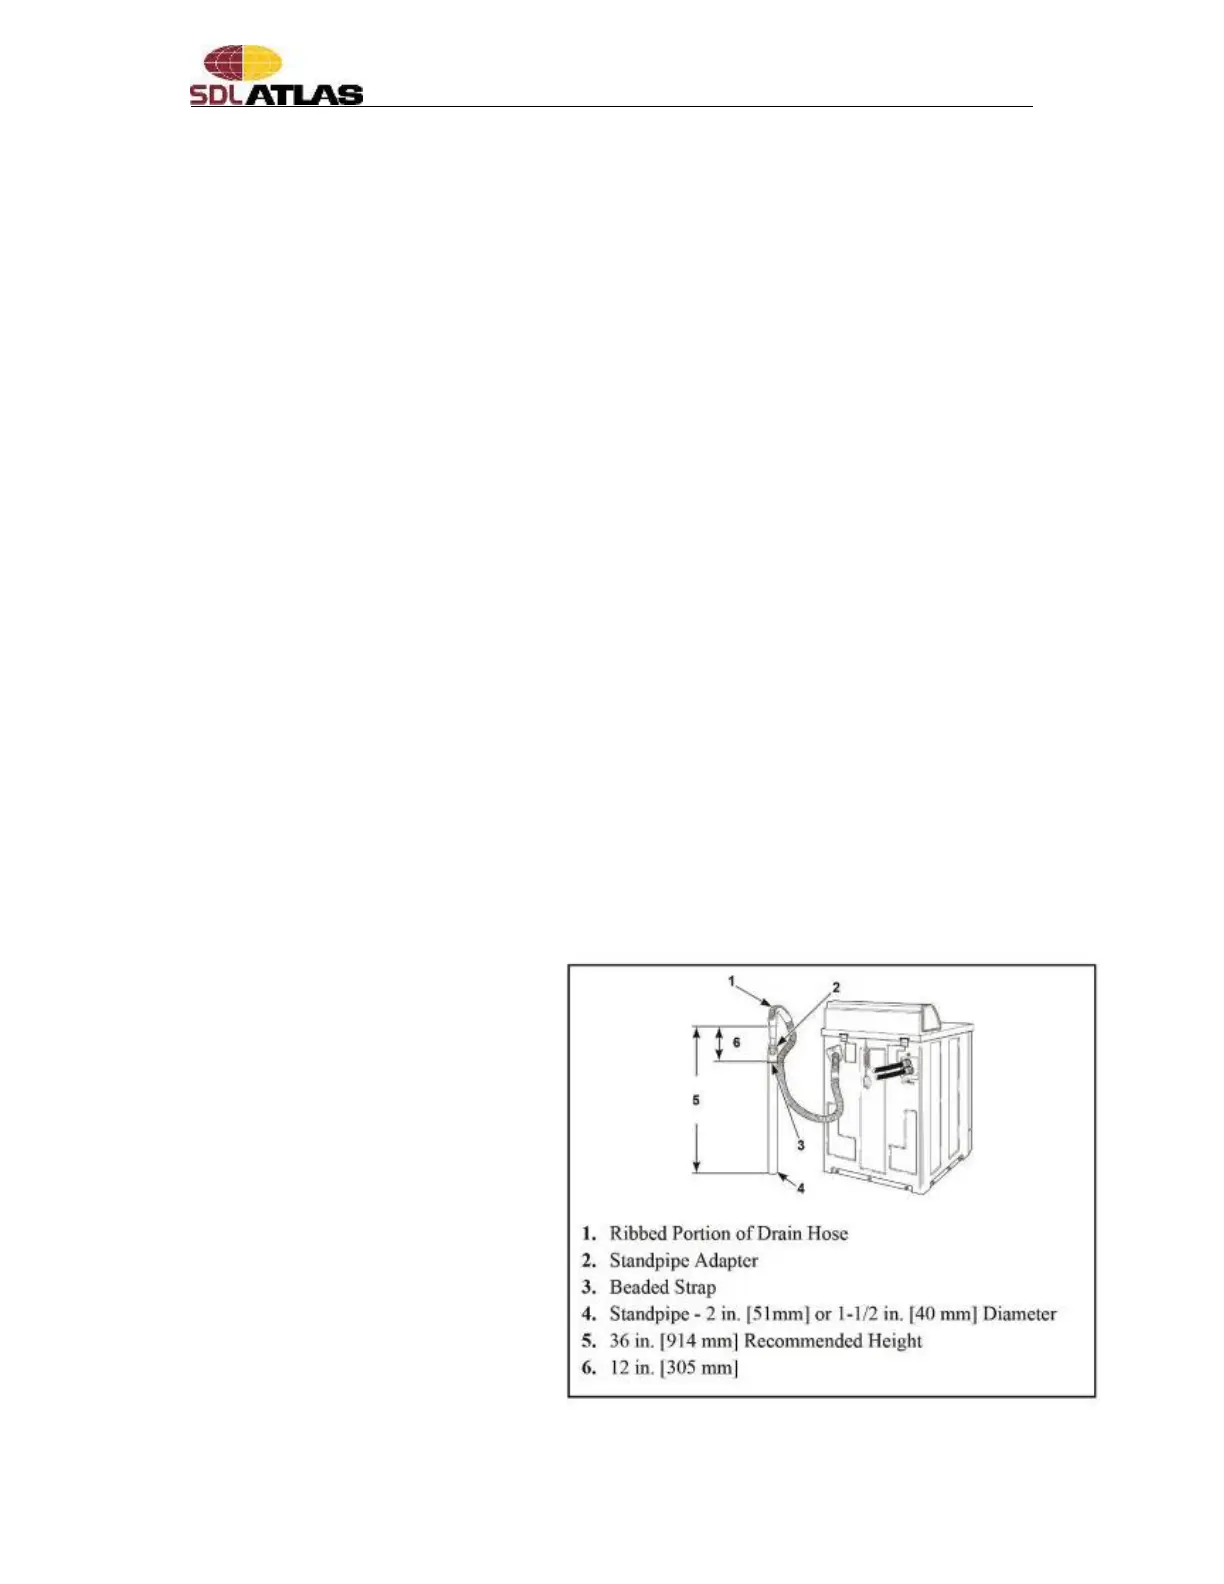
StandpipeInstallation
1. Checkstandpipeheight.Therecommendedheightforthestandpipeis36inches
[914mm].Standpipeshigherthan4feet[1220mm]arenotrecommended.
2. Placetheadapterintothestandpipe.
IMPORTANT: To prevent siphoning,
do not place any ribbed portion of
thedrainhoseintothestandpipe.
3. Remove the beaded strap
fromaccessoriesbagand
place around standpipe
and drain hose,
approximately 12 inches
[300mm]downfromthe
topofpipe.
4. Tighten strap to hold hose
to standpipe. This will
prevent the drain hose
fromdislodgingfromdrain
receptacleduringuse.



 To Next Page