Secomea A/S - Smedeholm 12-14 - DK2730 Herlev - Denmark Applicable to SiteManager models: 1129, 1139, 1149, 3329, 3339, 3349
Tel: +45 8870 8650 - www.secomea.com - support@secomea.com DOC: SM11xx-33xx_initial_contact_v07
SITEMANAGER 11xx/33xx INITIAL SETUP
GENERAL SAFETY NOTICE, PLEASE READ THIS CAREFULLY BEFORE INSTALLING THE SITEMANAGER.
The SiteManager is completely safe to use, if you comply with the below general instructions:
a. Read this Initial Setup guide carefully before setting up the SiteManager.
b. In order for this product to conform with the safety certifications, the SiteManager must
be installed in a Restricted Access Location.
c. When mounting the SiteManager make sure the surface is dry and well ventilated and
not exposed to direct sunshine.
If the SiteManager becomes wet or damp, the SiteManager should at once be discon-
nected and handled with care as moist/water on or in the SiteManager may cause the
SiteManager to malfunction or compromise safety.
d. Do not use the SiteManager in locations with extreme temperatures or near heat- or
cooling sources.
e. At all times keep the SiteManager free from dust and dirt.
f. Do not disassemble or in any other way tamper with the SiteManager unless authorised
to do so.
g. Do not use any unauthorised power supply when powering the SiteManager.
h. Do not use an old or badly maintained power supply with the SiteManager.
i. At all times comply with the correct power specifictations as under powering the Site-
Manager may result in malfunctioning of the SiteManager or connected USB devices.
j. Make sure that only competent and skilled personal undertakes the installation and
setup of the SiteManager.
k. Do not connect or try to connect the SiteManager to unauthorized equipment.
l. Make sure your SiteManager always has the latest version of our firmware installed for
best functionality and cyber security protection.
m. Only use new or well-maintained cables when connecting to the SiteManager.
n. Regularly inspect and check the SiteManager to make sure its surface is unbroken
and that there are no signs of damages to the SiteManager. If the surface is broken or
there are signs of damages to the SiteManager immediately disconnect the SiteMan-
ager.
A DIN Rail Mounting
Push the SiteManager from down and
upwards to apply tension on the
spring-lock, and in the same movement
push the SiteManager in, and over the
top of the DIN rail.
Release and ensure that the
SiteManager it is firmly mounted
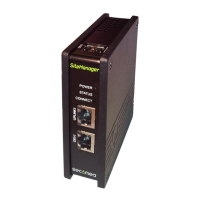
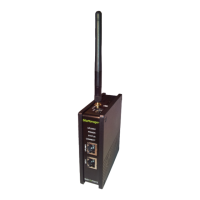
B POWER
SiteManager must be fed 12 - 24V DC. Power consumption is max. 6W for the unit including an
integrated broadband modem (xx39 models) or optional USB mounted broadband modem (xx29 and
xx49 models)
Power should be applied to the
GND and +V terminals only!
It is recommended to connect the earth ground
in orderto reduce interference of noise.
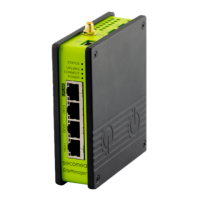
C Ethernet ports
Use a standard Ethernet patch cable (straight or cross over) to connect the UPLINK1 port to a switch
in a network that has access to the Internet.
The DEV port can be connected to an existing network separate from the UPLINK1 network, or you can
create a separate device network isolated from the UPLINK1 network. But you can also just connect
the UPLINK1 port, and only access equipment on the Uplink side.
DO NOT CONNECT THE
DEV AND UPLI NK1
PORTS TO THE SAME
PHYSICAL NETWORK
192.168.2.100/24 192.168.2.2/24
IP 10.0.0.2
192.168.2.2/24
192.168.2.5/24
DO NOT ASSIGN DEV
ADDRESS IN THE SAME
LOGICAL NETWORK AS
UPLINK 1
D Applying UPLINK settings for accessing the Internet
The SiteManager requires being able to access the Internet via an Uplink port in order to target a
GateManager server. By default it will receive its IP address by DHCP, and you only need to manually
configure the Uplink if you will use a fixed IP on UPLINK1, or if you want to use a USB broadband
modem as UPLINK2.
Select one of the following 4 methods:
1. Using the Secomea Appliance Launcher.
a. Download and install the Appliance Launcher tool from here:
http://info.secomea.com/appliance-launcher.
b. Connect the DEV1 or UPLINK1 port of the SiteManager to the local network and power it
on. The SiteManager must be on the same Subnet as your PC. Alternatively connect the
SiteManager with an Ethernet cable directly to your PC.
c. Power on the SiteManager and wait approx. 1 minute for it to become ready.
d. Start the Appliance Launcher and the SiteManager should be listed in the first screen. If
it does not appear immediately, try pressing the Search button a couple of times. (Note
that the Appliance Launcher will only show the SiteManager if your PC has a genuine
private IP address (10.x.x.x, 172.16-31.x.x, 192.168.x.x or 169.254.x.x))
e. Follow the Wizard and set the UPLINK1 address if you want to use a fixed IP address,
or continue the wizard to menu UPLINK2 to set the SSID/WiFi Key for an integrated or
optional USB WiFi module, or PIN Code for an integrated or optional broadband modem.
2. Using the default IP address (10.0.0.1)
a. Connect the DEV1 port of the SiteManager to the Ethernet port of your PC using a
standard Ethernet cable.
b. Configure your PC’s Ethernet adapter to 10.0.0.2 subnet mask 255.255.255.0.
c. Power on the SiteManager and wait approx. 1 minute for it to become ready.
d. Type the following in your web browser: https://10.0.0.1
e. Login with user admin and the SiteManagers’ MAC address as password (printed on the
product label).
f. Enter menu System --> UPLINK1 to set the UPLINK1 address if you want to use a fixed IP
address, or enter menu UPLINK2 to set the SSID/WiFi Key for an integrated or optional
USB WiFi module, or PIN Code for an integrated or optional broadband modem.
g. Continue with section E to configure GateManager settings.
3. Using a DHCP server
a. Connect the UPLINK port of the SiteManager to your local network and power it on.
b. After approx. 1 minute the SiteManager should have received an IP address from your
DHCP server.
c. Check the lease list of the DHCP server to see what the IP address is.
d. Type the IP address in your web browser preceded with https:// (e.g.
https://192.168.41.13).
e. Login with user admin and the SiteManagers’ MAC address as password (printed on the
product label).
f. Enter menu System --> Uplink1 to set the UPLINK1 address if you want to set a fixed IP
address, or enter menu UPLINK2 to set the SSID/WiFi Key for an integrated or optional
USB WiFi module, or PIN Code for an integrated or optional broadband modem.
g. Continue with section E to configure GateManager settings.
4. Using a USB memory stick
a. Login to the GateManager Portal and locate the domain in which the SiteManager
should connect.
b. Click the “USB Configuration” symbol , and set the UPLINK1 or UPLINK2 port settings. If
the SiteManager is connected to a local Intranet with a DHCP server, you do not have to
configure anything.
c. Click create to save the configuration file locally to your PC.
d. Copy the configuration file to a fat32 formatted USB memory stick.
e. Power ON the SiteManager and wait until the SiteManager is ready (Status has stopped
blinking)
f. Insert the memory stick, and wait until the SiteManager has automatically rebooted. If
the SiteManager has GateManager access, STATUS should turn green.
g. Remove the memory stick. No further configuraiton is needed.
E Applying settings for connecting to a GateManager server
1. In the SiteManager Web GUI enter the menu GateManager --> General (if using the Appliance
Launcher, follow the wizard to the GateManager Parameters page).
2. Enter the IP address of the GateManager server that the SiteManager should connect to, and a
Domain Token for the domain where the SiteManager should appear. You should have received
this information from your administrator or from where you received the SiteManager.
3. When the settings are entered, you should reboot the SiteManager. Observe that the Status LED
goes steady Green, which indicates that the SiteManager is connected to the GateManager.
4. Once attached to the GateManager, you can use the GateManager Console or a LinkManager
Client to get remote access to the SiteManager Web GUI to perform additional configuration
(DEV ports, Agents etc.)
5. Detailed guides, new firmware etc. can be downloaded from: http://support.secomea.com