TA Operation/Maintenance Instructions Page 12 of 36
6.0 Machine Setting
Details on the correct setting of the guard, fence and riving knife, together with the use of
the necessary safety devices, are detailed in the following sections of this manual. Prior to
these operations however the following checks should be carried out:
1. The machine is isolated.
2. The saw is not cracked or distorted.
3. The saw collar is clean and in good condition.
4. The sawblade is mounted correctly for clockwise rotation when viewed from left-hand
side of machine.
5. The gap plate is correctly positioned.
6. The saw runs free (check by slowly turning it by hand).
7. The sawguard and riving knife are secure.
8. The timber is free of grit, nails or other foreign bodies.
9. The table is free of spanners, rules etc., and that all tools are returned to their rightful
place.
ENSURE THAT ALL STOCK IS CLEAR OF THE BLADE BEFORE START-UP
ENSURE THAT THE SAWBLADE HAS REACHED FULL SPEED BEFORE PRESENTING THE
WORKPIECE TO IT. IT IS ESSENTIAL THAT THE MACHINE IS SWITCHED OFF WHEN LEFT
UNATTENDED.
6.1 The Spindle Rise and Fall
The height of the saw spindle is adjusted using the rise and fall handwheel at the front of
the machine.
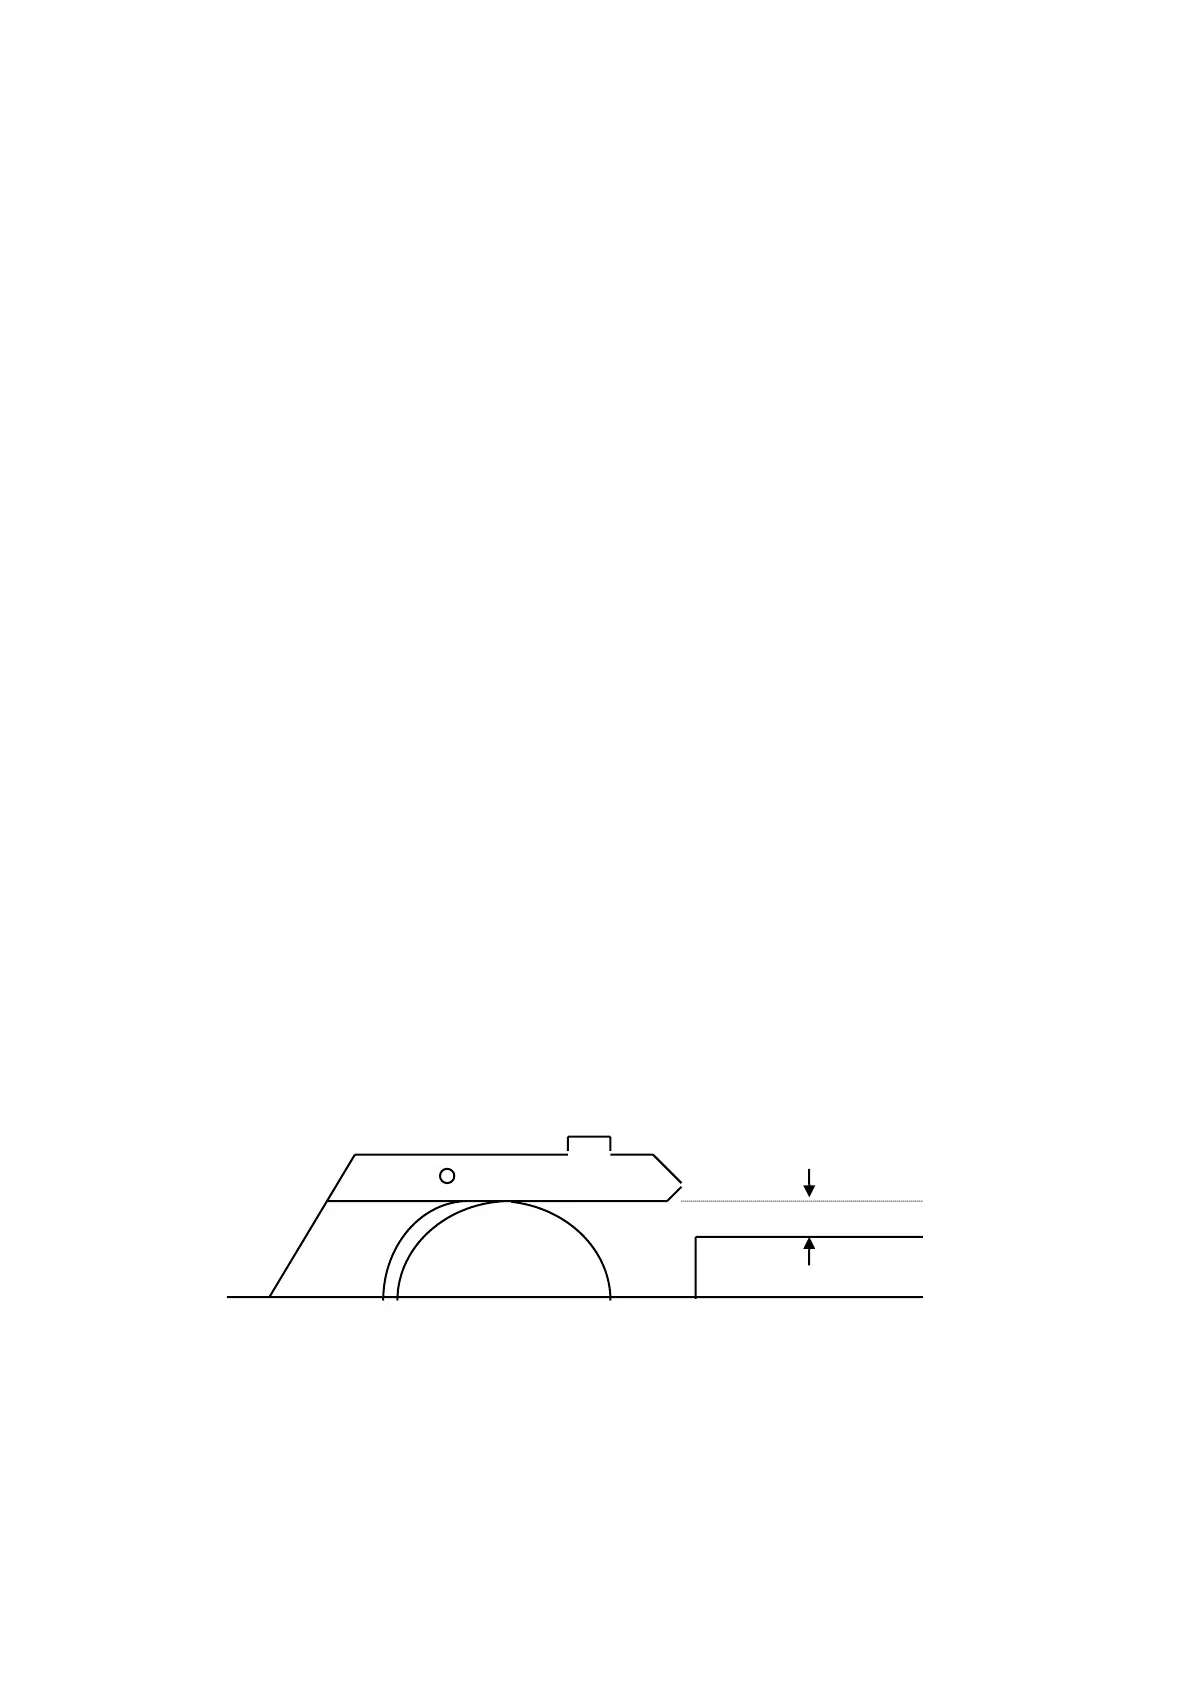
The blade should be set so that the distance between the bottom edge of the sawguard
and the top of the timber being cut does not exceed 10mm. In this position you should
aim to have 3-5 of the blade’s teeth in the wood during the cut. This will minimise the
amount of friction and enable you to maximise feed speed. Clearly, the thicker the stock
the more teeth there are in the wood. This increases friction, reduces feed speed, and
taxes the saw motor. The solution is to replace the blade with a coarser one. Avoid the
temptation to raise the blade to full height. While the number of teeth in the wood
decreases, the footprint of the blade in the wood is much greater. This increases the
chance of kick-back. There is also a much greater chance of injury with the blade at full
height.
10mm
6.2 Tilting the Spindle
The motor and motor bracket tilt on a quadrant of 45
0
from the vertical, by means of the
handwheel positioned to the side of the machine. The graduated protractor scale at the
front of the saw indicates the angle at which it is set. A locking lever is positioned above
the rise and fall handwheel for locking / unlocking the tilt. Do not attempt to tilt the
sawblade with the lock engaged.
 Loading...