TA Operation/Maintenance Instructions Page 30 of 36
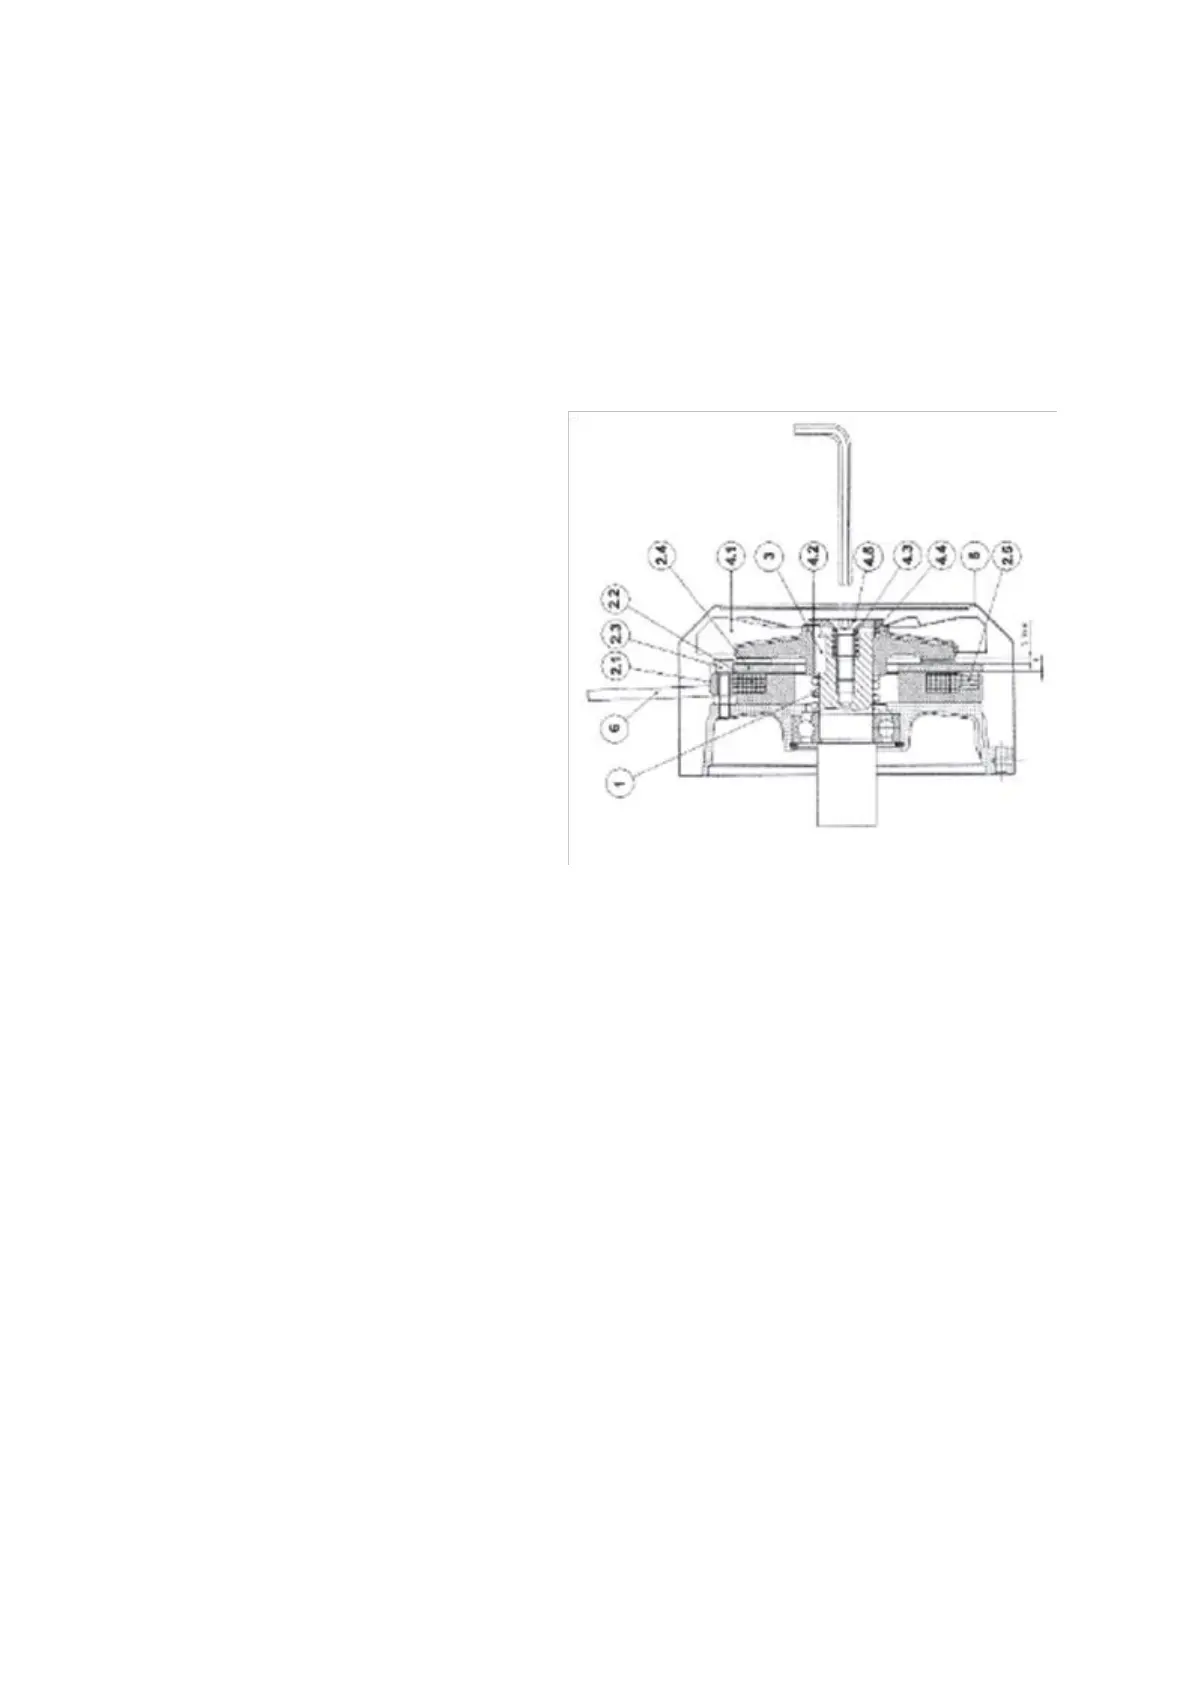
Air-gap Adjustment
1. Tighten down the hexagon head bolt in the centre of the fan cover completely
(without forcing) then unscrew by one third of a turn (with the exception of the TE/TESH
motors which need adjusting by one half of a turn). For a more accurate setting
remove the fan cover & tighten down the hexagon head bolt, again without forcing,
then unscrew until the air-gap (between 2.1 & 2.3) is between 0.3mm & 0.5mm.
2. We recommend the occasional use of an air jet to eliminate dust or other particles that
may have settled on the braking surface.
3. After several air-gap adjustments verify that the thickness of the friction surface is no
less than 1mm, if it is then replace the fan with an original manufacturer’s part.
Parts List:
1 Main contrast spring
2.1 Magnet casing
2.2 Brake coil
2.3 Fastening screw
2.4 Mobile anchor / friction surface
2.5 Braking spring
3 Key
4.1 Fan
4.2 Washer with spigot
4.3 Auxiliary contrast spring
4.4 Elastic pin
4.5 Screw TSPEI UNI 5933
5 Fan cover
 Loading...