MAINTENANCE AND INSTRUCTION MANUAL
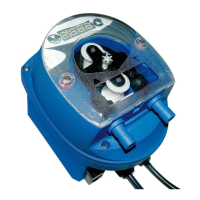
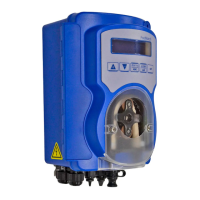
Peristaltic pump regulated through time control.
Automatically accepts AC voltage range as follows:
Max suction height: 5 ft.
TECHNICAL CHARACTERISTICS
Pump flow rate: 8 oz/min.
This pump is timed and provides easy user
The pump is equipped with 2 cables:
Cable 1 power supply (100÷240 VAC).
Cable 2 trigger signal for enabling the dosing cy
cle (20÷240 VAC or 70÷240 VAC).
Programming takes place through the keyboard and the display on the pump’s front panel.
FAILURE TO FOLLOW THESE INSTRUCTIONS COULD RESULT IN PERSONAL INJURY OR DAMAGE TO THE EQUIPMENT LEADING
TO IMPROPER OPERATION OR PROD
Before carrying out any operation on the pump, disconnect the power supply !!
Power the pump using cable with the plug. When this cable is powered, the pump is ON.
Connect cable 2, identified by
the word SIGNAL, to the signal that must start dosing.
Proceed with programming using the keyboard, as described in chapter 3.
When the pump is powered, the display shows the message: on and the signal is active on the SIGNAL cable, the
pump doses according to the
cycle set with the keyboard.
The dosing cycle consists of 3 phases:
Filter time (5 seconds) fixed. The display shows a mobile “
Programmable delay time (0÷999 seconds). The display shows the message “
Programmable dosing time (0÷999 seconds). The display shows “
out time (0÷999 minutes).
The display shows the countdown, which
starts from the programmed time and goes
to zero. The pump does not dose during the lock
out time, even if it receives another signal on the SIGNAL cable.
PROGRAMMING THE DELAY, DOSING AND LOCK
Enter to programming mode
Press the PRG key. The red display’s first digit begins to blink.
key until the blinking digit displays the desired value of access code.
Press the PRG key. The next digit blinks.
key until the blinking digit displays the desired value of access code.
Press the PRG key. The next digit blinks.
y until the blinking digit displays the desired value of access code.
Press the PRG key. The next digit blinks.
The green display shows “
Programming the delay time
Enter to programming mode (see par. 3.1.1).
The green display shows “
key. The red display’s first digit begins to blink.
key until the blinking digit displays the desired value.
Press the PRG key. The next digit blinks.
key until the blinking digit displays the desired value.
Press the PRG key. The next digit blinks.
key until the blinking digit dis
Press the PRG key. All of the display’s digits stop blinking.
To save the settings, while none of the display’s digits are blinking, scroll the menu using the
display and then press PRG key. The pum
p returns to standby mode and “
” appears on the display.
Programming the dosing time
Enter to programming mode (see par. 3.1.1).
key until the green display shows “
Press the PRG key. The red display’s first digit begins to blink.
key until the blinking digit displays the desired value.
Press the PRG key. The next digit blinks.
key until the blinking digit displays the desired value.
Press the PRG key. The next digit blinks.
digit displays the desired value.
Press the PRG key. All of the display’s digits stop blinking.
To save the settings, while none of the display’s digits are blinking, scroll the menu using the
display and then press PRG key
. The pump returns to standby mode and “
” appears on the display.

 Loading...