Thank you for purchasing a SPECTROMASTER C-700 series.
This Quick Guide introduces the basic operation for this instrument.
Please refer to "Operating Manual" on the CD-ROM (included
product) for usage details.
Spectrometer
for Photo/Video/Cine
SPECTROMASTER
C-700
C-700R
Quick Guide
Input Method of Characters and Figures
(Character Setting Screen, Figure Setting Screen)
No. Key Description
1
1/A/a
Shifts between gures/upper case letters/lower case letters.
2
0-9, ABC,
abc, hyphen,
period
Touching it displays an input value in the upper section.
By touching the same button multiple times, you can
change the character input to the English alphabet (ABC).
3
Delete
Deletes the character at the cursored position.
4
← →
Moves input position.
5
Keypad
Shifts between Standard Keypad and Qwerty Keypad.
6
OK
Conrms the input value and returns to the original screen.
7
Cancel
Cancels the input and returns to the original screen.
4. InputofFigures/Characters
Preset Name Preset Name Preset Name
FigureInput
Screen
UpperCaseInput
Screen
LowerCaseInput
Screen
1
5 5 5
1 1
3 3 3
2 2 2
4 4 4
6 6 67 7 7
2 2
6 65 53 37 7
4 4
1 1
1. ConrmingtheBundledItems
This instrument and the following accessories are included.
Conrmifanyaccessoriesaremissingafterunpacking.
Quick Guide MainBody CD-ROM
- Operating Manual
- C-700 Series Utility
Safety Precaution
Neck Strap Soft Case
Safety Precaution
For Proper Operation
Before using this product, please read this "Safety Precautions" for
proper operation.
WARNING
The WARNING symbol indicates the
possibility of death or serious injury if the
product is not used properly.
CAUTION
The CAUTION symbol indicates the
possibility of minor to moderate personal
injury or product damage if the product is
not used properly.
NOTICE
The NOTICE symbol indicates cautions
or restrictions when using the product.
Please read all notes to avoid errors in
operation.
General Safety Information
• Read the Operating Manual before use.
• Keep the Operating Manual on hand for reference at any
time.
• Stop using this product when there are any abnormalities.
• The modication or disassembly of this product is prohibited.
• Do not attempt to repair this product by yourself.
• This product is intended only for persons with expert
knowledge.
• Monitor children so that they do not touch this product.
• Use this product in a usage environment described in the
Operating Manual.
• This product is not waterproof.
WARNING
There is a danger of electrical shock when using high
voltage strobes.
Avoid contacting the terminals.
This product emits electromagnetic waves.
Do not bring this product close to persons with
pacemakers.
Do not use this product in an explosive atmosphere.
Use of devices emitting electromagnetic waves is
prohibited in hospitals.
CAUTION
• Check the material of the neck strap to see if there is any
risk of allergy.
• Be careful of sudden emission of lights from strobes.
NOTICE
• Do not leave this product on car dashboards in hot weather.
This may damage the product.
• Remove the batteries when this product is not in use for a
long period of time.
• When the desired performance is not achieved, stop using
this product and contact the service center.
Information for Users on Collection and
Disposal of Old Equipment
To protect environment, do not through this device
and batteries away with the normal household waste
at the end of those life, but bring them in at an
ofcial collection point of your country for recycling.
English
* If something is missing, contact the sales agent.
* Batteries (size AA) and a USB cable are not included. Please prepare
them in advance yourself.
5. Turning the Power ON
After installing the batteries, turn the Light Selection Ring
2 to the dark calibration position (
) and turn ON this
instrument by pressing the Power Button 3.
After the Opening screen displays (for 2 seconds) in the
Display Panel, dark calibration starts. After dark calibration
properly ends, the Measurement screen displays.
* If "Please set Light Selection Ring for
dark calibration" is displayed, set the
Light Selection Ring 2 to the dark
calibration position to start calibration.
* When taking measurements, set the
Light Selection Ring 2 to the range L
(icon at the middle) for ALL ambient light.
Forashlight,settheringto"H"(icon
at the top) high-power (brighter than
640lx·s)ashor"L"(iconatthemiddle)
forlow-powerash(lowerthan640lx·s).
Dark Calibration Position
Conrmation Screen
Select a language used when you turn on the power for the
rst time.
The language selected will be displayed and encircled in
blue. Touch the "OK" icon to conrm.
Even after you have conrmed the language, you can change it.
*
IfDarkCalibrationPositionConrmationscreenappears,setthe
Light Selection Ring 2 to Dark Calibration position and perform
calibration again.
* To turn OFF the power, press and hold the Power Button for more
than one second.
*
Please wait 3 or more seconds between turning the power ON/OFF.
Opening Screen
Language Selection
Screen
Measurement Screen
Language Selection
Conrmation Screen
Light Selection Ring 2
Power Button 3
Set to the dark calibration position. Press Power Button 3.
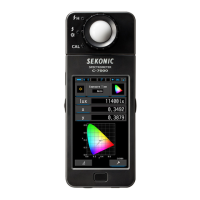
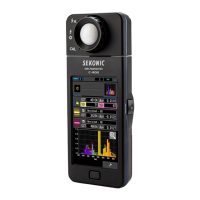
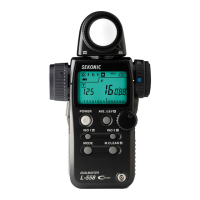
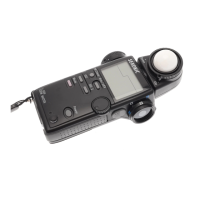
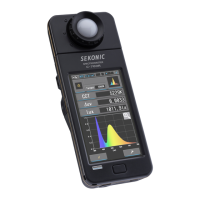
2. Part Designations
The part designations are as follows.
[BottomView]
[RearView][FrontView]
1 Light Receptor
2 Light Selection
Ring
0 Tripod Socket
3PowerButton
4 Display Panel
5
MeasuringButton
7MemoryButton
6MenuButton
8
BatteryCoverLatch
9BatteryCover
c Strap Eyelet
b Sync Terminal
[BatteryCoverSection]
BatteryCoverLatch
Tabs
BatteryCover
dBatteryHolder
aUSBConnector
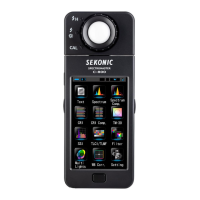
3. Operation Method
The operation method of this instrument's Display Panel is
described.
By touching an icon with your nger, you can select your intended
setting or item.
Scroll Selection
Slide a nger up
or down on the
setting value areas
to change setting
values.
TopIcon
Touch to advance
to the lowest
value.
ScrollBar
Touch and slide
up or down to
scroll settings.
BottomIcon
Touch to advance
to the highest
value.
OneStepIcon
Touch Up or Down
Icon to advance one
position.
* A blue illumination under
icons indicates which icons
are operational.
* Blue bar indicates value
selected.
(Ex.) Shutter Speed Selection Screen
6
-1
.
Measurement Preparation
(Measuring Mode, Display Mode)
You can change screens after turning the power on as follows.
Changes from the Measurement screen to each screen.
*
Pressing Menu Button
6
shifts to the Display Mode Selection screen.
Measuring Mode
Icon Description
Ambient Light
Mode
Measures continuous light such as sunlight,
tungsten, uorescent, LED lights.
Flash Light
Cordless Mode
Detects ash brightness without meter-ash
connection after Measuring Button pressed to arm
meter for 90 seconds and ash red separately.
Measure by triggering a ash during the wait time.
Flash Light
Cord (PC) Mode
Detects ash brightness with PC (synchro)
cord meter-ash connection.
Flash Light
Radio Triggering Mode
(only for C-700R model)
Detects ash brightness without meter-ash
connection after radio transmitted signal is
received by radio-receiver connected ash.
Measuring Mode
Selection Screen
Measurement Screen
(Text Mode)
Display Mode
Selection Screen
Ambient Mode
Cordless Flash Mode
Cord (PC) Flash Mode
Radio Triggering Mode