IN0051 Revision 05 (005293)– 11 of 26
POWER PERFORMANCE PASSION
SP PRO Interactive Inverter Charger
Section 2 for Sonnenschein@home Lithium
1. Do not connect any wires to the pre-charge / battery sense terminals. The battery sense voltage
is read from the Sonnenschein@home battery BMS.
2. Leave the battery temperature sensor connected and rolled up inside the SP PRO. This is not
used in a managed battery system.
3. Follow the Sonnenschein@home Lithium instructions to install the Sonnenschein@home Lithium.
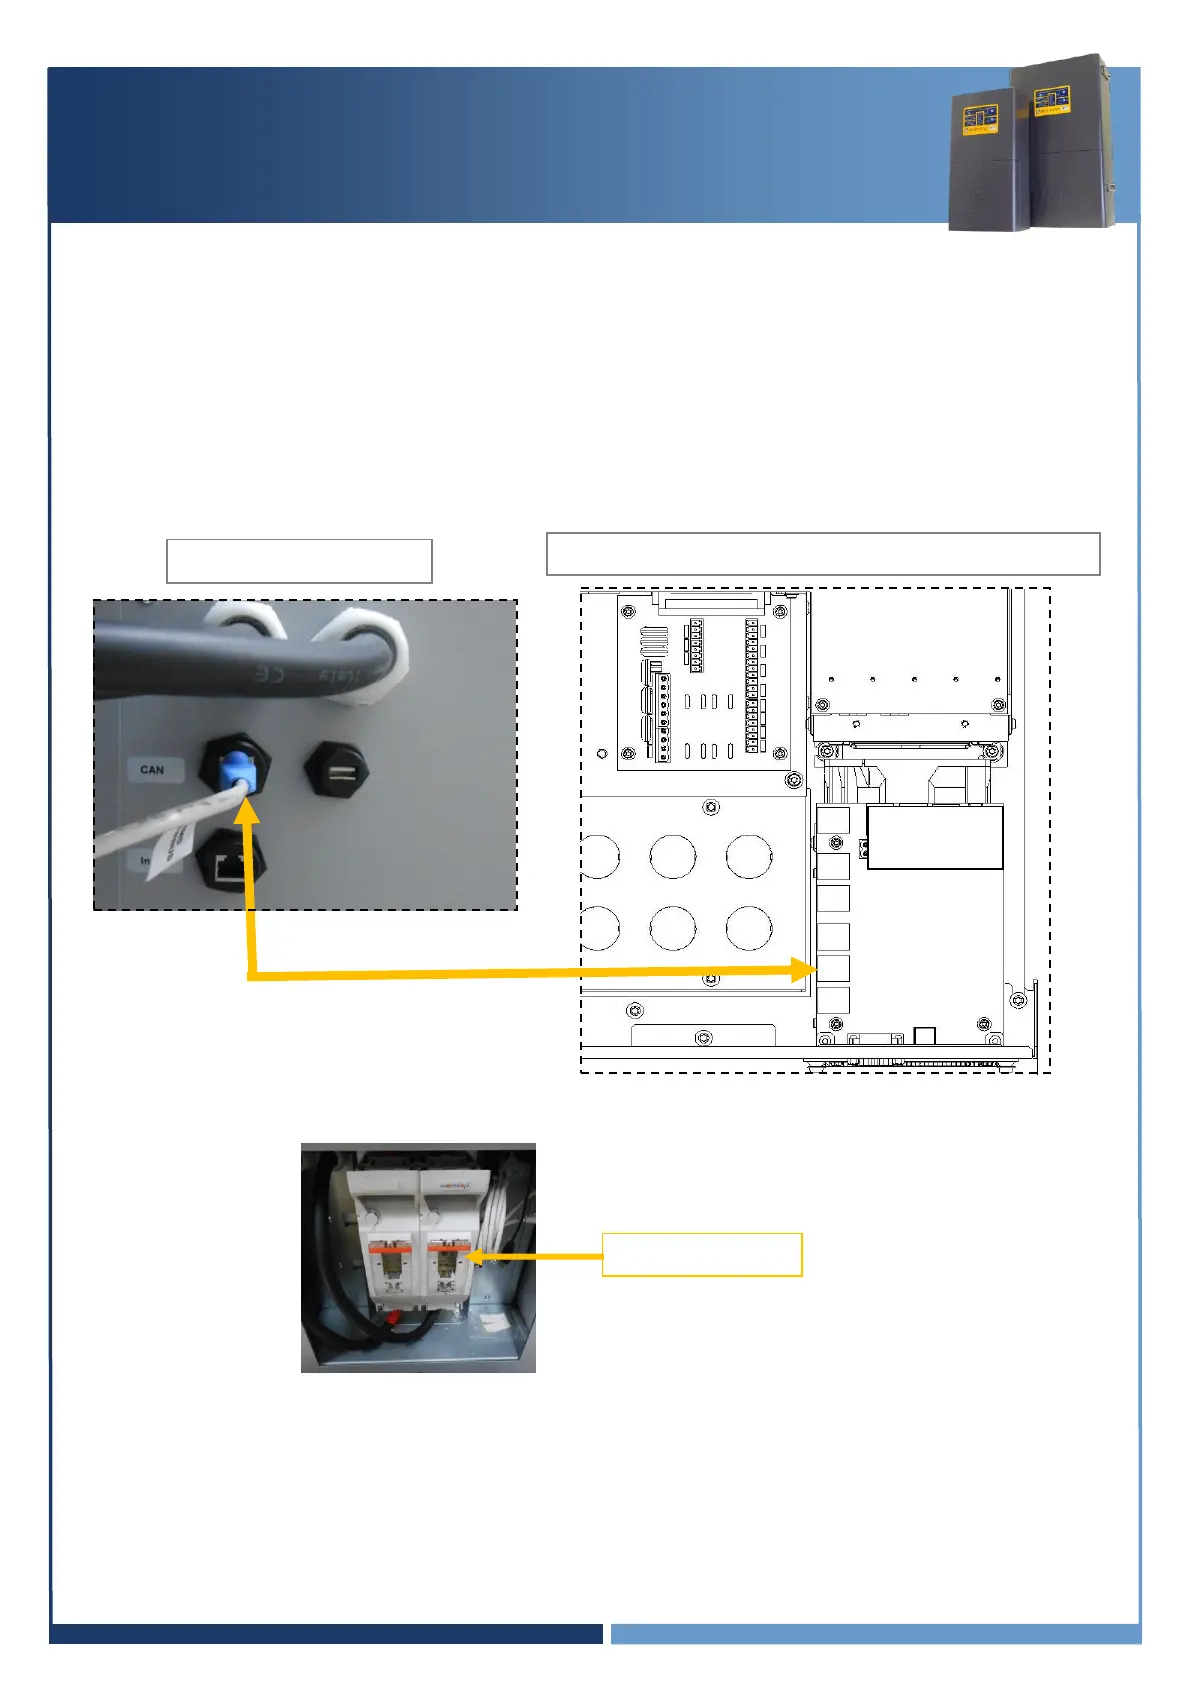
4. Using the applicable installation kit, connect the RJ45 Connector cable from the SP PRO blue or
black comm card “SP PRO CANBUS” to the Sonnenschein@home Lithium “BMS CANBUS”.
4. Fit two 200A NH fuses (ABB OFAF1H200 or equivalent) for SPMC482 or two 160A NH fuses (ABB
OFAF1H200 or equivalent) for SPMC481 into the fuse housing inside the Sonnenschein@home.
NOTE: The battery fuse size for the SPMC482 when used with a Sonnenschein@home lithium must be
200A. In this application ONLY, do not use the 250A fuses as specified in the SP PRO installation manual
as this may damage the Sonnenschein@home lithium. A 200A fuse is suitable in this application as the
nominal battery voltage for the Sonnenschein@home lithium is 54V.
Go to “Check Communications Card Firmware” page 16
SP PRO Inverter (L1 only in a multiphase system)