“Dynamic”
Electronic control for towel heaters
(2)
Rev. Beta - March 2018
Selmo Electronic
Via Pacinotti, 24 - 35030 Rubano (PD) Italy- Tel 049.8976761, Fax 049.8976085 - www.selmo.it
Installation instructions
Installer use only
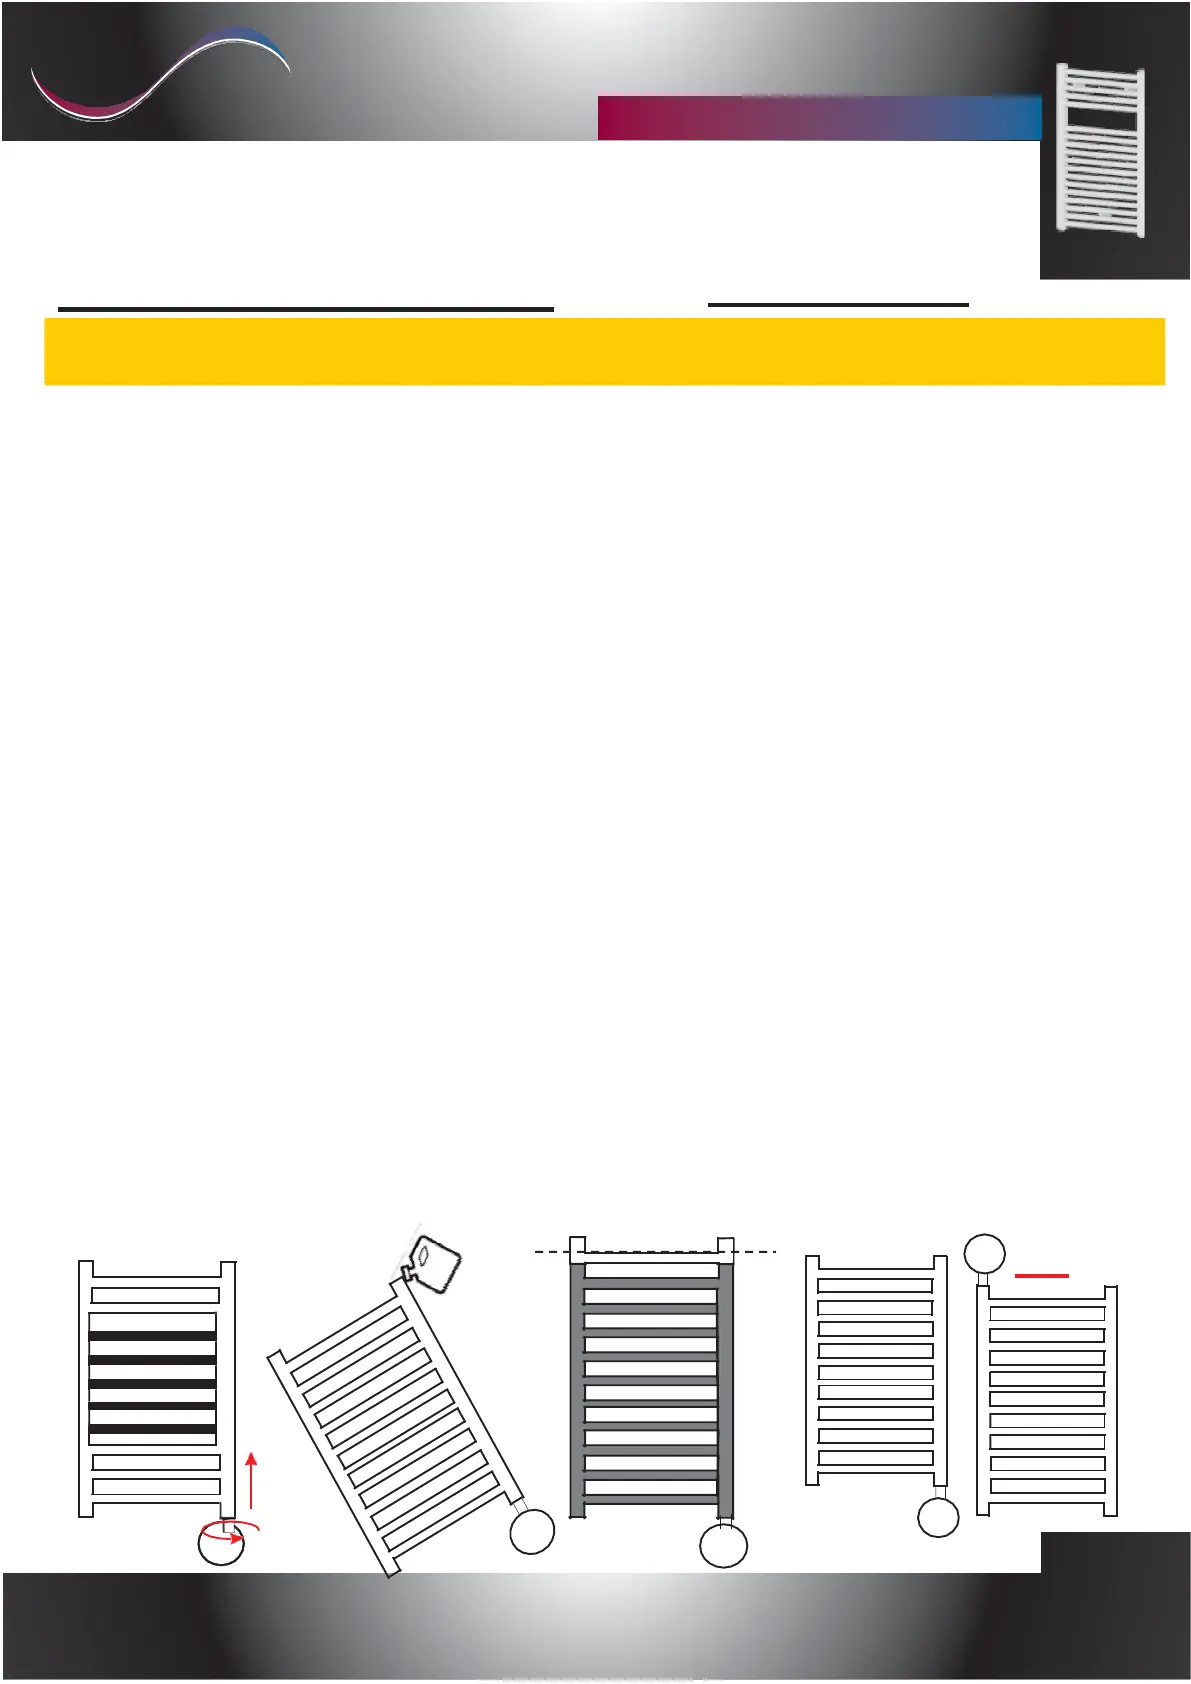
1)
Insert the heating element into the threaded opening in the lower part of the heated
towel rail.
2)
With a 22mm wrench, adequately tighten the resistance with the electronic control to
the body of the towel heater.
3)
The special gasket ensures the tightness of the assembly and allows a slight additional
twist in order to align the thermostat with the towel warmer.
4)
Place the towel warmer in an oblique position (fig 3) making sure that the upper
opening of the towel warmer is in the highest part.
N.B. Do not place the towel warmer on the electronic control of the element
heating.
5)
Fill the towel warmer with the appropriate liquid.
6)
Position the towel warmer vertically and check the level of the internal liquid fig.3.
7)
Make sure of the correct tightening between the towel warmer and the heating
element.
8)
Connect the device to the power supply and activate the heating (In this phase do not
close the upper opening of the towel heater!).
9)
Set the maximum temperature and observe the increase in the liquid level.
- For expansion, the liquid may come out of the towel warmer.
-Remove the excess liquid (with caution to avoid burns) in order not to
wet the thermostat and make sure that the liquid does not reach the edge.
10)
When the liquid level stops rising, wait another 5 minutes and switch off.
11)
If the towel warmer should be refilled, do not wait until it cools down (always paying
attention to the temperature of the internal liquid).
12)
Close the upper opening of the towel warmer with the dedicated cap.
13)
Hook the towel warmer with the appropriate supports on the wall.
14)
Connect the thermostat to the power supply. For versions without an electric plug it is necessary to
install an appropriate device that ensures complete omnipolar disconnection in the conditions of the
overvoltage category III
•
Disconnect the appliance from the mains before installation or maintenance.
•
Protect the device with a 30mAdifferential switch (RCD).
 Loading...