OPERATION
8
WARNING
Do not allow familiarity with tools to make you careless.
Remember that a careless fraction of a second is sufficient
to inflict serious injury.
USE
This saw is designed to cut man made tiles, pavers,
natural stone products and stone tile products ONLY.
Straight line cutting operations such as cross cutting,
mitering, ripping, and beveling can be made by this saw.
ON/OFF SWITCH
Refer to Figure 12
The keyed switch is intended to prevent unauthorized use
of the saw.
1. To turn the saw on, insert the yellow key into the key
slot in the center of the switch. Push the key firmly into
the slot and then pull the ON/OFF switch out to the
ON position.
2. To turn the saw off push the ON/OFF switch in to the
OFF position.
3. Remove the yellow switch key, when the saw has
come to a complete stop, by gently pulling it outward.
WARNING
Remove the switch key whenever the saw is not in use.
Place it in a safe place and out of reach of children.
WARNING
ALWAYS lock the switch OFF when the saw is not in use.
Remove the key and keep it in a safe place. In the event
of power failure, blown fuse, or tripped circuit breaker, turn
the switch OFF and remove the key, preventing accidental
startup when power comes on.
Figure 12
Yellow Key
Switch in ON PositionSwitch in OFF Position
TOOL PLACEMENT
Place the tool on a stable, level surface.
NOTE: Holes in the feet are available for bench mounting.
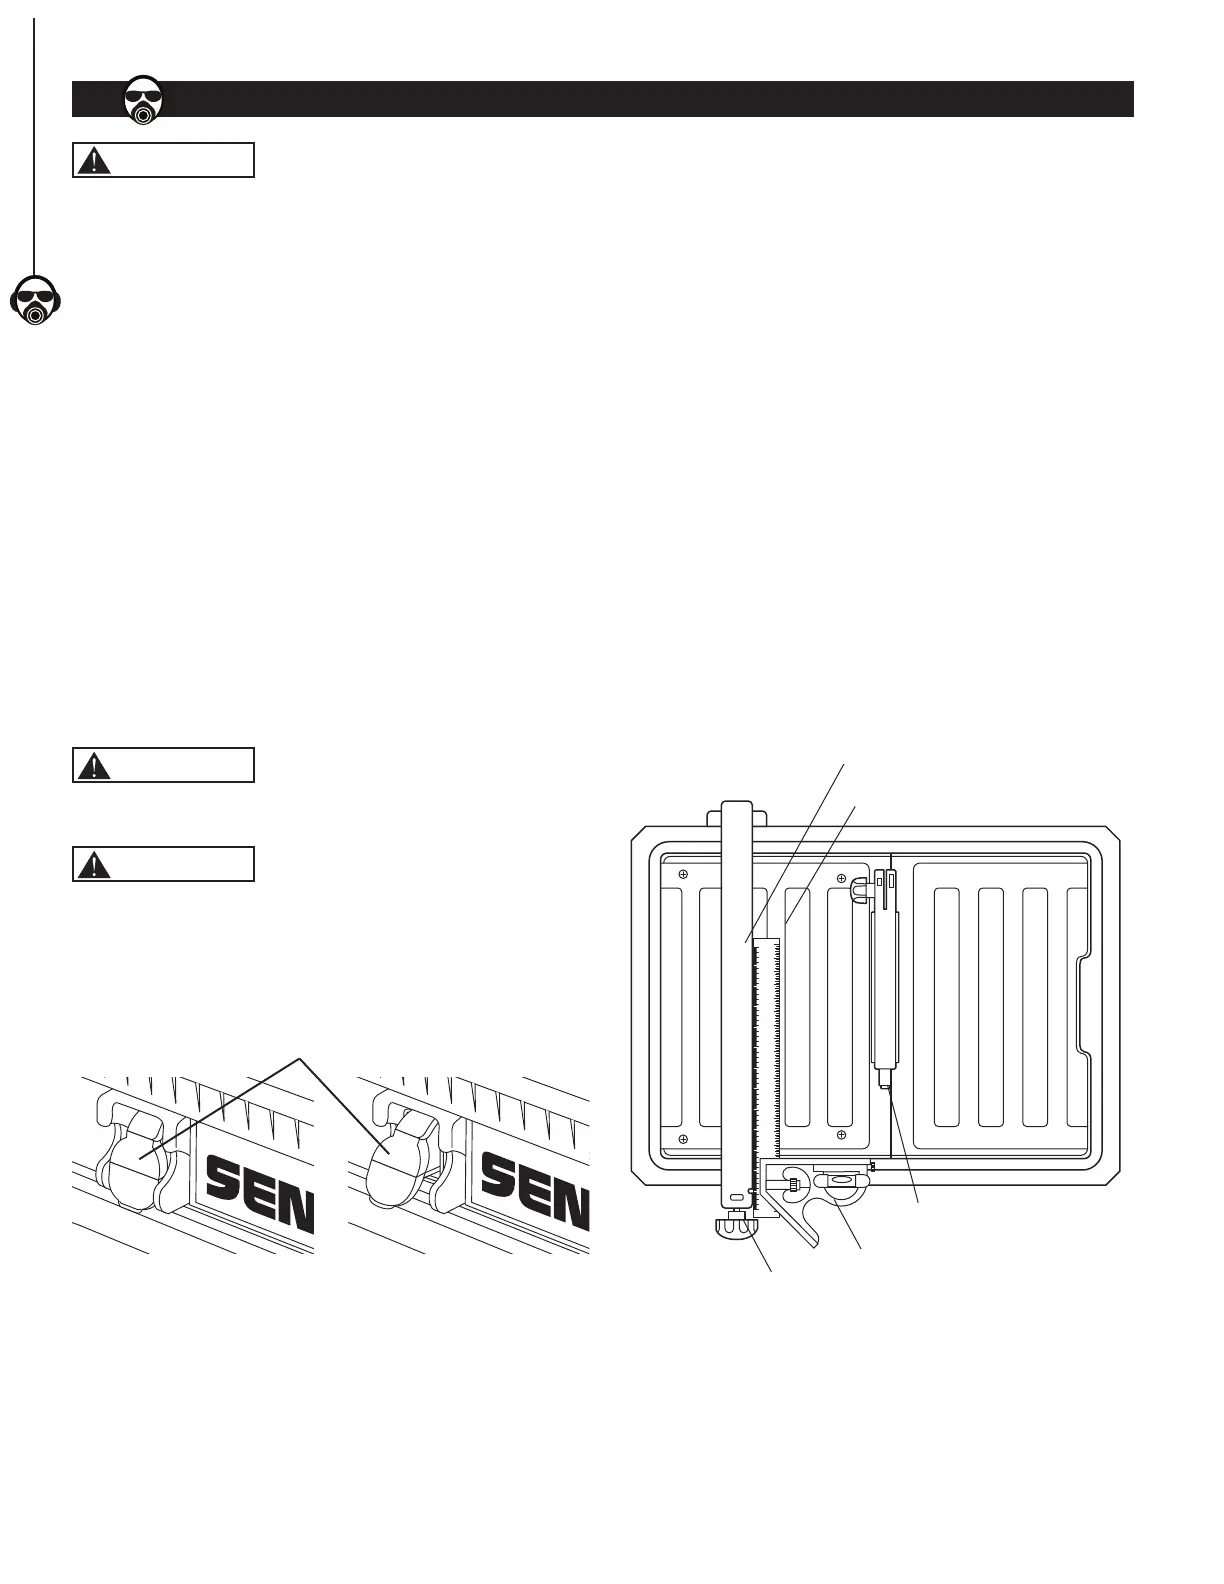
USING THE RIP GUIDE AND MITER GUIDE
See Figure 13
The rip guide can be used from both the left and right side
of the cutting wheel. Install the rip guide and miter guide,
see To Install the Rip Guide.
1. Turn knob on rip guide counterclockwise to loosen.
2. Adjust the rip guide to the desired position. Use the
lines on the top of the table or a square to align rip
guide to the blade.
3. Rotate the knob, clockwise to tighten securely.
To adjust angles:
• Slide miter guide onto rip guide from the front.
• Adjust rip guide to desired position and
secure tightly.
• Adjust to desired angle using angle scale and
tighten securely with miter guide knob.
Figure 13A
109876543210
321 4 5 6 7 8 9 10 11 12 13 14 15 16 17 18 19 20 21 22 23 24 25 0
Rip Guide Knob
Cutting Wheel
Rip Guide
Use these lines to align the rip
guide to the cutting wheel
Square
OPERATION
8
 Loading...