10 Sentry Equipment Corp
Installation Instructions
To avoid potential safety concerns, isolate the sample stream before beginning installation.
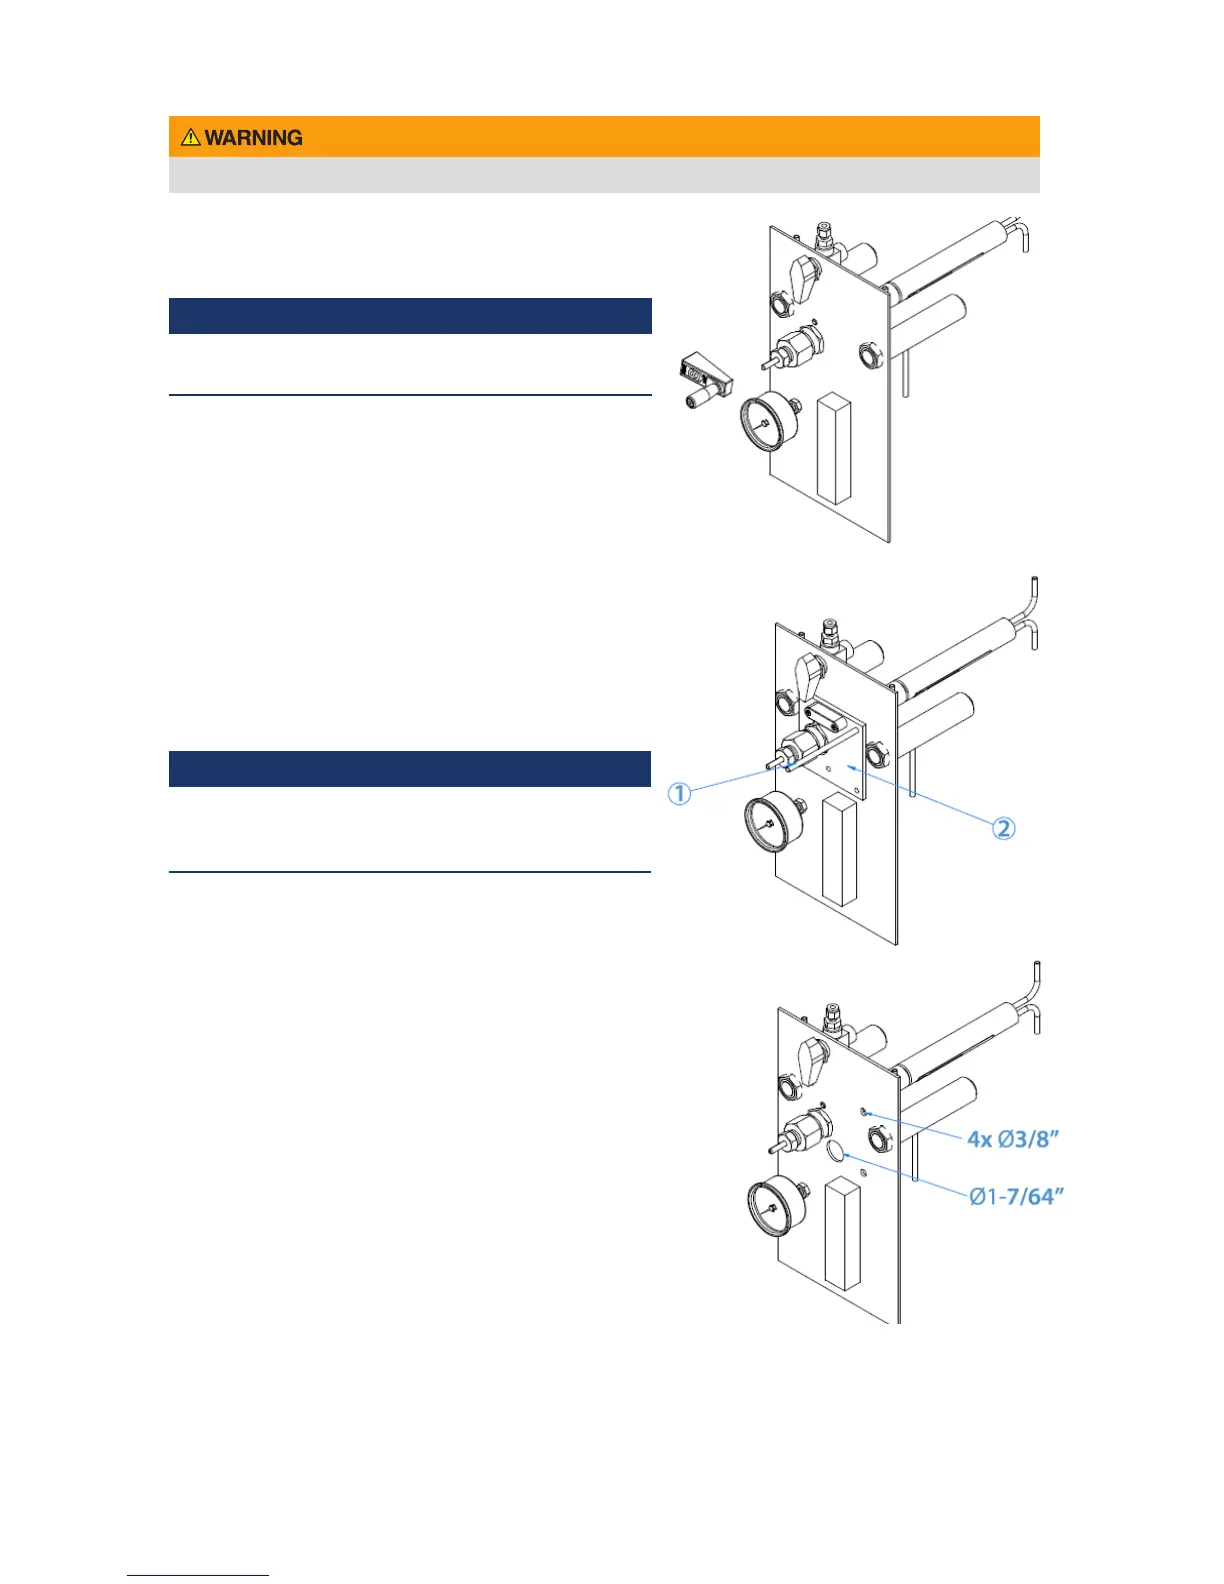
1. Using a 3/16-inch Allen wrench, loosen and
remove the Sentry VREL control valve handle.
 NOTE
Do not mark holes with punch until transfer plate is
level.
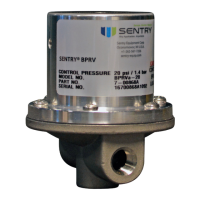
2. Place the transfer plate (2) from the Sentry
AutoVREL mounting kit over the Sentry VREL,
with the LEVEL indicator at the top of the
plate. Once the plate is horizontally level,
mark the ve (5) holes using the transfer
punch and hammer.
 NOTE
Stainless steel is a challenge to drill/punch through,
so make sure to constantly keep the drill wet with the
cutting oil and do not rush drilling.
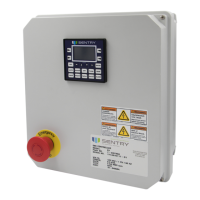
3. Remove the transfer plate and, using the
3/8-inch drill bit, drill the ve (5) holes
through the panel.
4. The four (4) holes around the periphery of
the transfer plate should be deburred with a
standard le.
5. Using the hole punch provided in the Sentry
AutoVREL installation kit, punch out the
1-7/64-inch hole just to the right and below
the Sentry VREL control valve. This hole will
be used for the cable gland, and therefore
MUST be free of burrs. The cable gland will
serve as a channel way for the electrical
connections to the AutoVREL ow controller.