8
TENSION ADJUSTMENT
Thread Tension: The thread tension should be adjusted accord-
ing to sewing materials, layers of fabric. To tighten, turn Tension
Screw clockwise; and loosen the tension by turning counter-
clockwise.
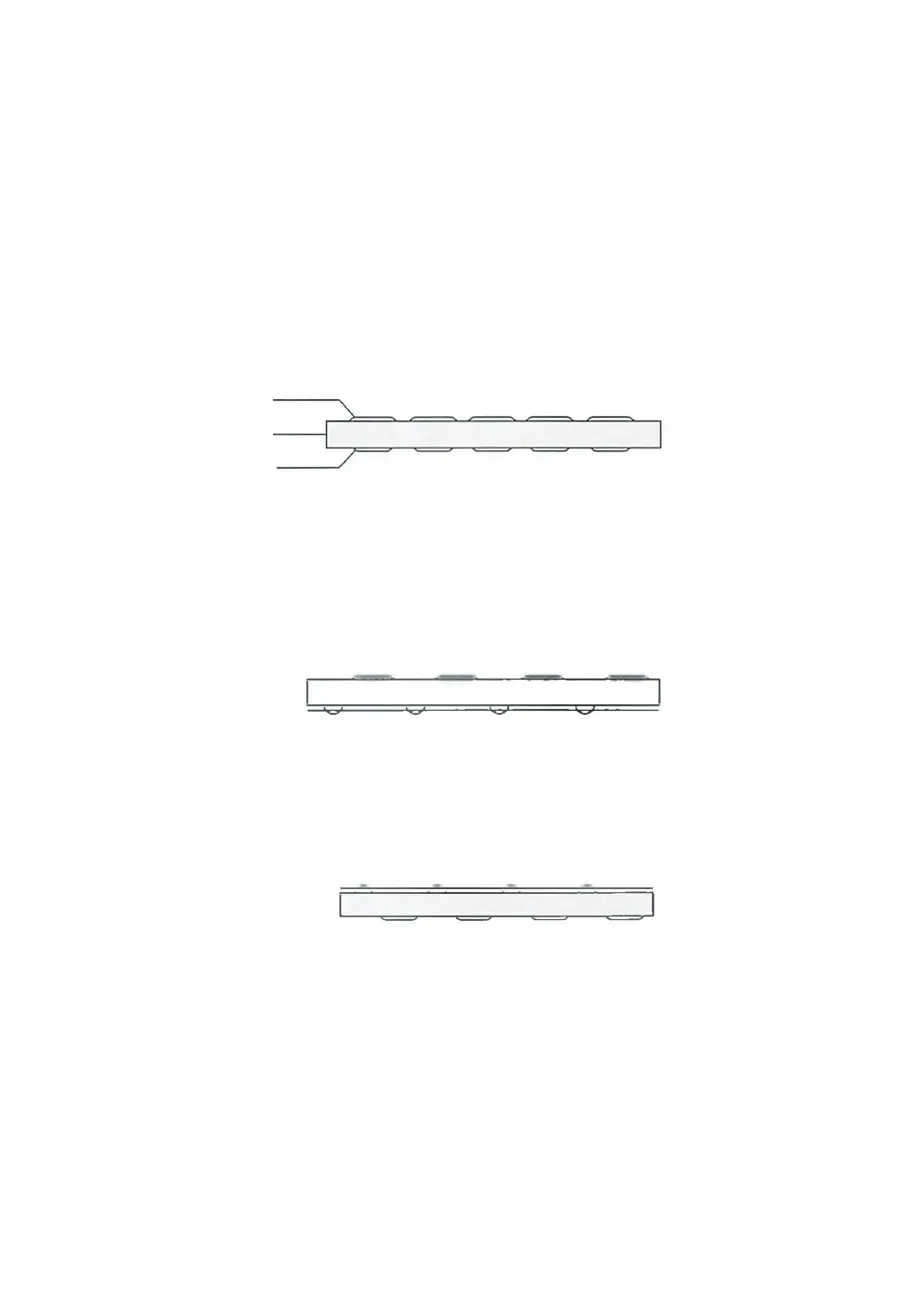
(1) As Fig. A shown, it is the normal stitches, which the top
thread and Bottom thread are neat and uniform. The tension is
just right!
(2) As Fig. B shown, if the bottom threading looks like a straight
line, which indicates the top thread is too loose. Please turn the
Tension Screw clockwise to increase pressure (until it is neither
too tight nor too loose).
(3) As Fig. C shown, when the top thread looks like a straight
line, it indicates the thread is too tight. Please slowly turn the
Tension Screw counter-clockwise to reduce the pressure until
the stitch is back to normal.
Note: If the fabric is too thin/ thick/ slippery/ hard, it will
cause: skipped stitches, thread breaking, pucker or forming
loops, and tension adjustment cannot help that, you should
change the fabric. Please kindly note that this is just a small
domestic sewing machine.
Applicable fabrics: Jean, Cotton fabric, Felt, Polypropylene
cloth, thin Leather, etc.
Top Thread
Cloth
Bottom Thread
Fig. A
Fig. B
Fig. C