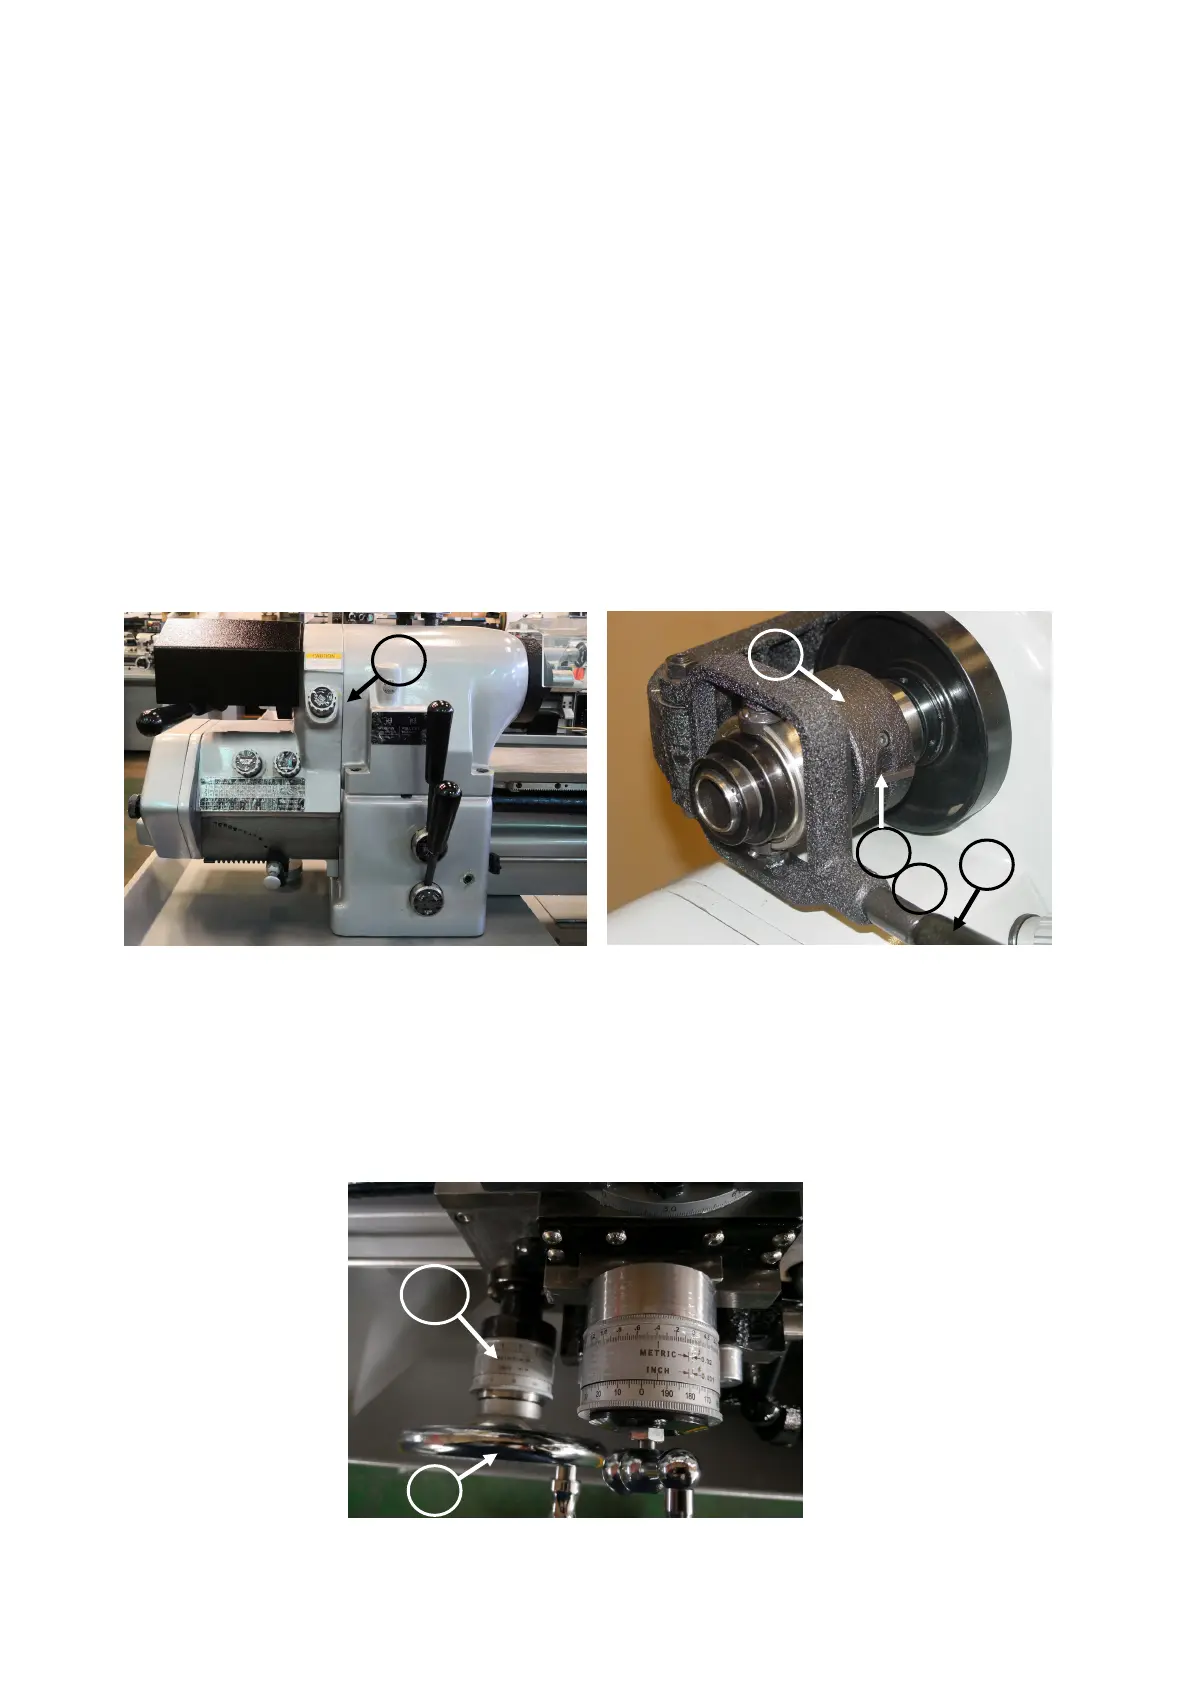
10
L.) COLLET CLOSER ADJUSTMENT
1. Before using collet closer, and any collet or step chuck to be used should be thoroughly
cleaned.
2. Push the lock Pin “E” (Figure 21). To engage lock pin, turn spindle by hand till lock pin
enters notch to lock.
3. Press the Closer Adjusting Finger “F” (Figure22) down to the point “P” (Figure 22).
4. Guard “G” (Figure 22) forward with the left hand, and hold the collet or stop chuck with
the right hand at the same time.
5. Place a work piece in collet or step chuck.
6. Place lever “L” (Figure 22) to the extreme left fixed position. Turn the Shell Guard “G”
(Figure 22) toward operator until the work piece is clamped by the collet.
7. Place lever “L” (Figure 22) to the right, the released position. Turn Shell Guard “G”
(Figure 22) toward operator, move the Adjusting Finger “F” (Figure 22).
8. Test collet closer’s tension on work piece. If the work piece needs additional gripping
pressure, press down on the adjusting finger “F” (Figure 22) and turn Shell Guard “G”
(Figure 22) forward and lock. (see Figure 22).
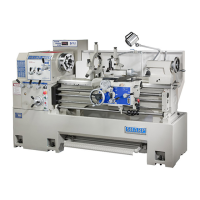
M.) CARRIAGE INDICATING RING
Dual dials with Inch and Metric Handwheel dial “W” (Figure 23) graduations are in 0.01″
0.2mm. It is built for the operator’s convenience of operation. (Figure 22) Spring loaded
indicating ring, just turn to required location by loosening lock screw “L” (Figure 23) Sliding
cover cage exposes only the dial in use.
Figure 21-Control Speed and Direction
Figure 23-Carriage Indicating
W
Figure 22-Collet Closer Adjustment