EN 6
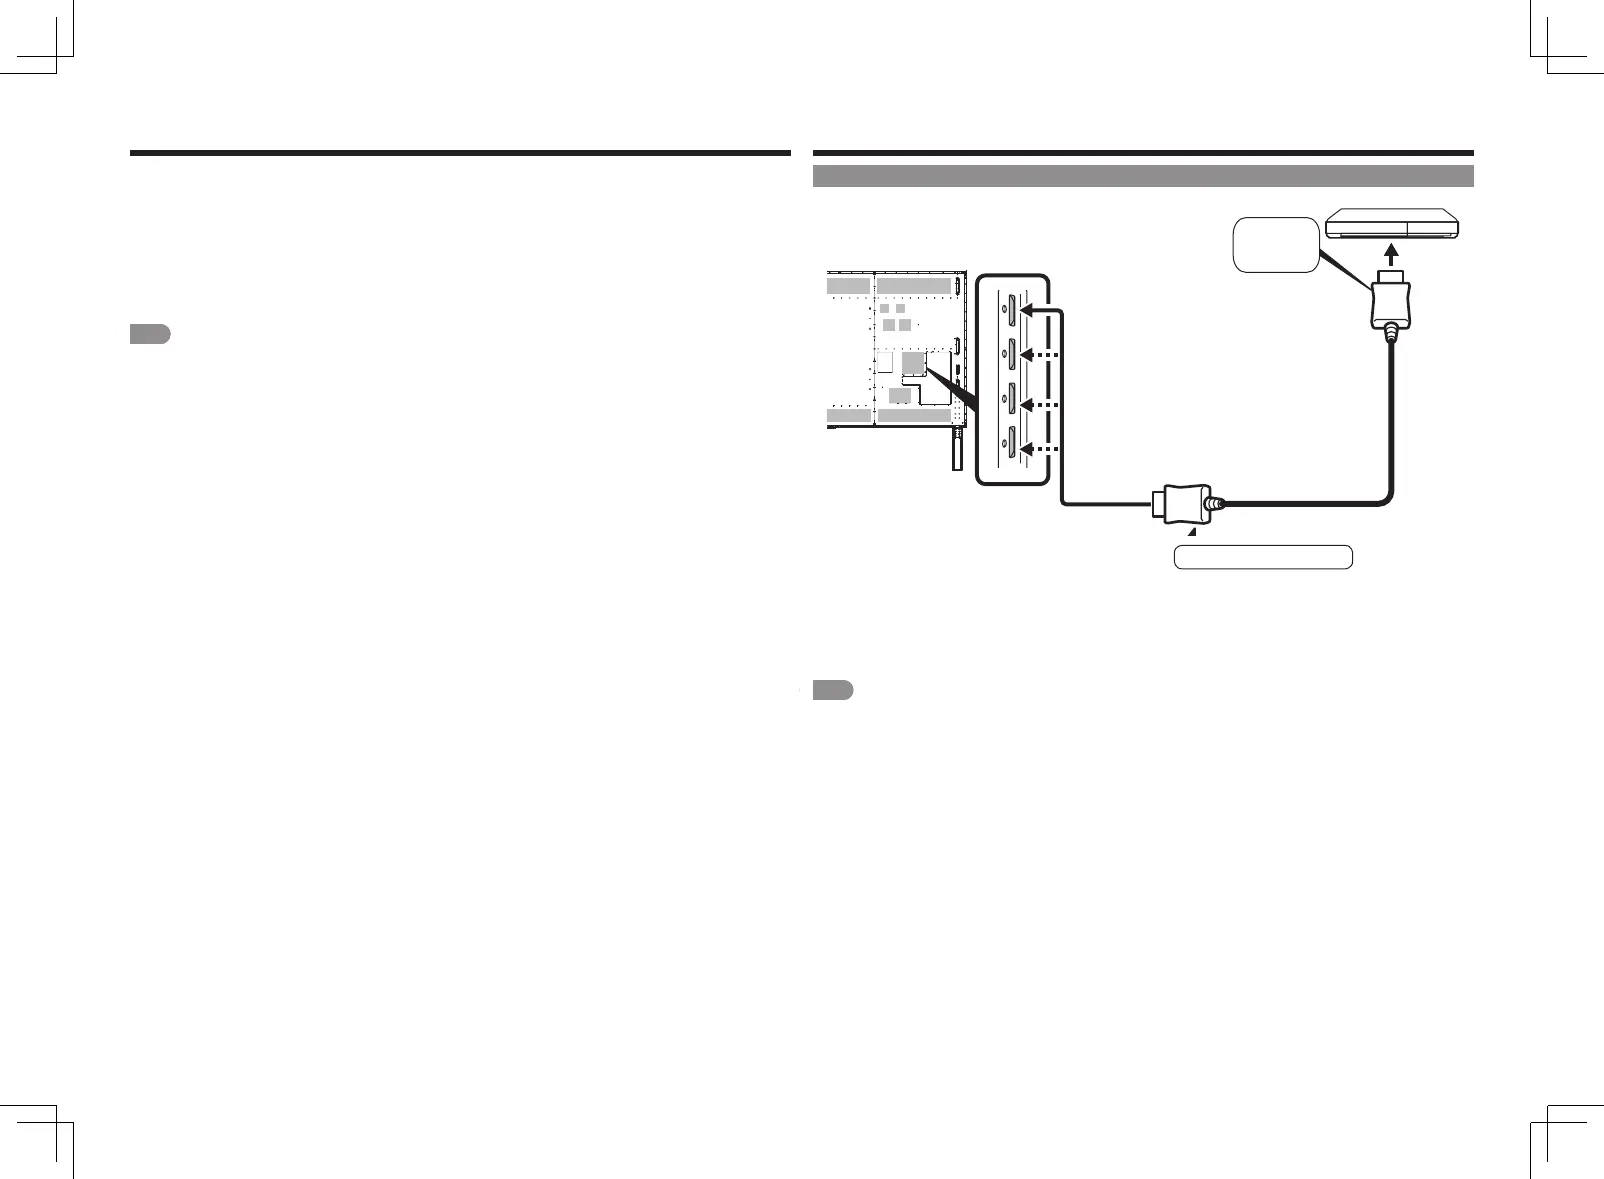
Connecting with Another Device
Connecting with an HDMI Cable
Connected to an HDMI terminal
HDMI output terminal-equipped device
Input 1, input 2, input 3,
input 4 terminals
q
Rear side of Monitor
HDMI cable
(commercial item)
To HDMI
output
terminal
Be sure to use a commercially available certified HDMI cable (high-speed type) that meets the
standards.
• Connect a 4K compatible device to input 1 of the Monitor. To view 4K 60p HDR/SDR video, connect with a Premium
HDMI Cable.
If a cable that does not meet the standards is used, image display, audio output, and HDMI CEC may not be
performed properly or noises may occur in images.
NOTE
• See page EN 5 to connect to an 8K output compatible device.
Connecting an 8K Video Device/Quad-screen display (4K or less) (Continue)
Supported format in Mode2
• 7680 x 4320 (24Hz, 25Hz, 30Hz, 50Hz, 60Hz)
How to switch
• Press INPUT on the remote control unit. While the
menu for input switching is displayed, use
p
/
q
to
select “INPUT7” and press ENTER.
Indication when 8K video input is used
• When 8K signal synchronized with INPUT7 (A to D) is
input, “4320p” is indicated as the video information.
NOTE
• If a signal that is not supported by this Monitor is input,
“Out of range” is indicated. If this is the case, refer to the
operating instructions of your PC or other devices to set an
input signal supported by the Monitor.
• If the input signals are not synchronized, video images are
not displayed properly.
Supported audio signal
• Type:
Linear PCM
• Sampling frequency:
48kHz/44.1kHz/32kHz
How to change the mode
• Each time you press PIP/PbyP, the Mode changes in
the following order.
Mode1
"
Mode2
"
Mode3
"
Mode4
"
Mode1...
How to change the display in Mode1
• Press the button for the input you want to display.
INPUT7-A:F1, INPUT7-B:F2, INPUT7-C:F3,
INPUT7-D:F4
How to change the display position in Mode3/4
• In mode 3, press the button for the input you want to
display at the top left.
The display position of the selected screen and the
upper left screen change.
• In mode 4, press the button for the input you want to
display at the left side.
The display position of the selected screen and the left
side screen change.
INPUT7-A:F1, INPUT7-B:F2, INPUT7-C:F3,
INPUT7-D:F4
• To return initial display position, press CLEAR.