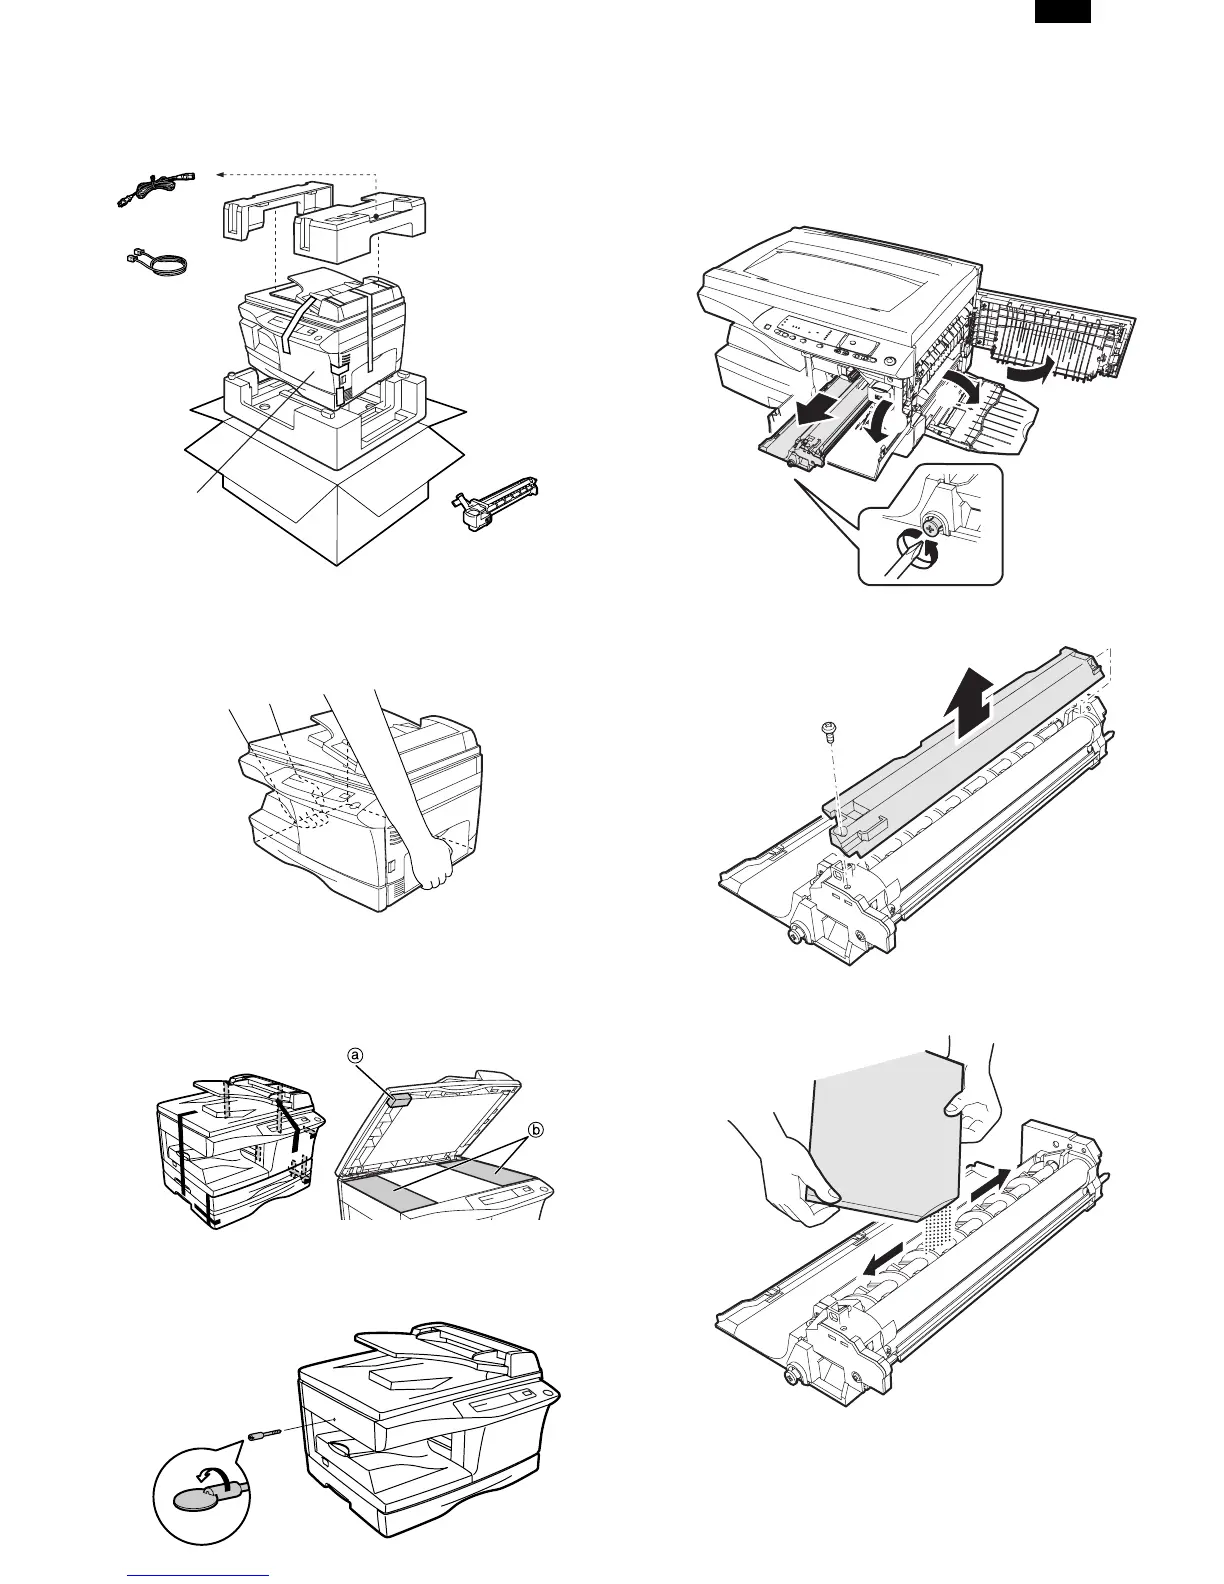
3. CHECKING PACKED COMPONENTS AND
ACCESSORIES
Open the carton and check if the following components and ac-
cessories are included.
4. UNPACKING
Be sure to hold the handles on both sides of the copier to un-
pack the copier and carry it to the installation location.
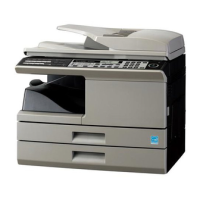
5. REMOVING PROTECTIVE PACKING
MATERIALS
1) Remove pieces of tape and protective cover. Then open the
original cover and remove protective materials (a) and (b).
2) Use a coin (or suitable object) to remove the screw.
Store the screw in the paper tray because it will be used if
the copier has to be moved.
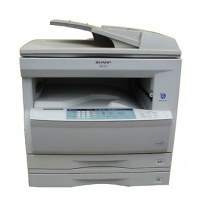
6. Developer unit INSTALLATION
1) 2) 3) Open the side and front cabinets of the copier.
4) Remove the locking tape of the developer unit.
5) Remove the screw which is fixing the copier and
Developer unit.
6) Remove Developer unit slowly from the copier.
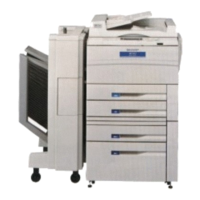
7) Remove the screw (1 pc).
8) Remove Upper developer unit.
9) Shake the aluminum bag to stir developer
10) Supply developer from the aluminum bag to the top of the
MX roller evenly.
Note: Be careful not to splash developer outside Developer
unit.
11) Attach Upper developer unit and fix it with a screw.
Copier
Power cord
Line cord
FAX model
only
Drum cartridge
(installed in copier)
2
4
5
3
1
AR-F152
5 – 2