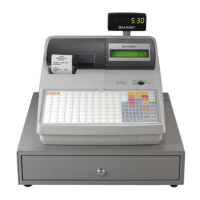
ER-A520U/A530U SERVICE (SRV) MODE
1 – 1
CHAPTER 1. SERVICE (SRV) MODE
A SRV-key is required to perform the 2 types of RESET procedures:
There are 2 classifications of MASTER RESET operations.
1. RESET PROCEDURES
■ MASTER RESET 1
Please select “Procedure A” or “Procedure B” as required.
Procedure A: 1) Set the mode switch to the (SRV’) position.
2) Plug the AC power cord into the wall outlet.
3) While holding down the JOURNAL FEED key, turn the
mode switch to (SRV) position from the (SRV’) position.
Procedure B: 1) Unplug the AC power cord from the wall outlet.
2) Set the mode switch to the (SRV) position.
3) While holding down the JOURNAL FEED key, plug in
the AC cord to the wall outlet.
Note: Procedure B cannot reset the hardware.
Procedure A must be used to reset the hardware.
■ MASTER RESET 2
Please select "Procedure A" or "Procedure B" as required.
Procedure A: 1) Set the mode switch to the (SRV’) position.
2) Plug in the AC power cord into the wall outlet.
3) While holding down the JOURNAL FEED key & the
RECEIPT FEED key, turn the mode switch to (SRV)
position from the (SRV’) position.
4) Program the [0] [1] [2] [3] [4] [5] [6] [7] [8] [9] [00] [000]
[.] [CL] [@/FOR] [SBTL] [CA/AT] keys by depressing
the desired keyboard locations in this order.
Procedure B: 1) Unplug the AC power cord from the wall outlet.
2) Set the mode switch to the (SRV) position.
3) While holding down the JOURNAL FEED key & the
RECEIPT FEED key, plug the AC power cord into the
wall outlet.
4) Repeat the same sequence outlined in “Procedure A”
Note: Procedure B cannot reset the hardware.
Procedure A must be used to reset the hardware.
■ PROGRAM RESET
Please use “Procedure A”, “Procedure B” or “Procedure C”
Prodecure A: 1) Set the mode switch to the (SRV’) position.
2) Plug in the AC power cord into the wall outlet.
3) Without pressing any function keys, turn the mode
switch to the (SRV) position from the (SRV’) position.
Procedure B: 1) Unplug the AC power cord from the wall outlet.
2) Set the mode switch to the (SRV) position.
3) Without pressing any function keys, plug the AC power
cord into the wall outlet.
Procedure C: 1) Unplug the AC power cord from the wall outlet.
2) Set the mode switch to the PGM2 position.
3) While depressing the JOURNAL FEED key & the
RECEIPT FEED key, plug in the AC power cord to the
wall outlet.
*“Procedure C” can be executed when SRV#926-B: PROGRAM
RESET in PGM2 = 4 (enabled.)
Note: Reset messages are printed on the journal-side of the printer.
2. SETUP PROCEDURES
■ MASTER RESET 1
1) During the memory clearing and initializing, “***MRS.***” is
displayed on upper line.
2) When the MASTER RESET is performed, the buzzer beeps 3 times
and the MASTER RESET
*** message is printed on the journal.
■ MASTER RESET 2
1) The function key code and text that may be programmed is
displayed.
2) After placement of the fixed function keys, “
***MRS.***” is dis-
played on upper line during memory clearing and initializing.
3) When the MASTER RESET is fully executed, the buzzer beeps 3
times and the MASTER RESET
*** message is printed on the
journal.
■ PRGRAM RESET
1) When a PRGRAM RESET is performed, “PROGRAM RESET ***”
is printed. (The buzzer does not deep)
MASTER RESET : Clears the entire memory and resumes
initial values.
PROGRAM RESET : Initializes the program without clearing
memory.
MASTER RESET 1: Normal MASTER RESET
Clears the entire memory and resumes initial
values.
MASTER RESET 2: Enables the layout of the fixed keys in addition
to performing a MASTER RESET 1.
Fixed keys: [0] [1] [2] [3] [4] [5] [6] [7] [8] [9] [00]
[000] [.] [CL] [@/FOR] [SBTL]
[CA/AT]
Note: If the [000] key is not required, depress the
location where the [.] key (next step) will be
located, and the [000] key will be inhibited.
ex) 001 0 KEY
3
002 1 KEY
3 ...

 Loading...