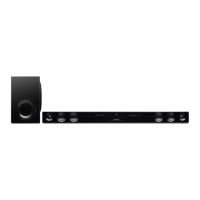
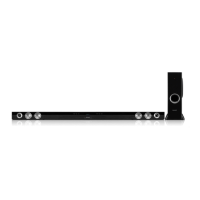
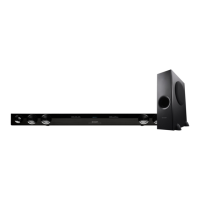
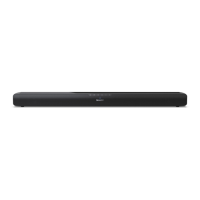
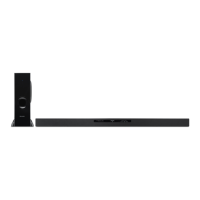
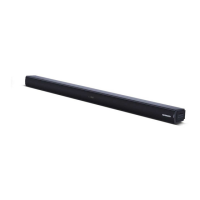
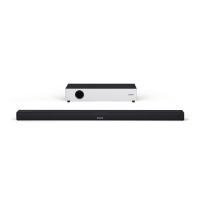
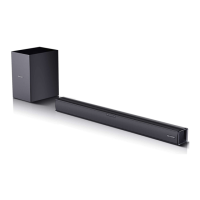
This document describes the SHARP HT-SB38 Sound Bar Home Theater System, which includes the HT-SB38 sound bar and the CP-SW38 active subwoofer. This system is designed to enhance the audio experience for flat panel TVs (LED, LCD, and Plasma) and offers various connectivity options and features.
Function Description
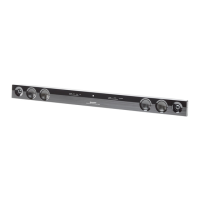
The HT-SB38 system provides an immersive audio experience for your home theater. It features a sound bar with left and right channel speakers, an active subwoofer for enhanced bass, and multiple input options including HDMI, optical, and analog audio. The system supports Bluetooth connectivity, allowing wireless audio streaming from compatible devices, and also includes NFC for quick, one-touch pairing. It is capable of 3D sound processing, creating a widening effect on the sound in the ambient space, and supports Dolby Audio for a rich, theatrical sound experience. The system also includes a USB terminal for playing MP3/WMA files from mass storage devices.
Usage Features
Power Control:
The system can be powered on or off using the ON/STANDBY button on the sound bar or the remote control. When first plugged in, the unit enters standby mode (ECO mode off), indicated by a red light on the sound bar. To enter low power consumption mode (ECO mode on), press and hold the ON/STANDBY button until the sound bar turns off. The system can also automatically power on if it detects an audio signal from an input source (AUDIO IN, OPTICAL IN) or when a Bluetooth connection is established. An Auto Power Off Control (APC) feature allows the sound bar to automatically turn off after a preset time if no signal or connection is detected (for Audio In, HDMI, Optical In, or USB functions).
Volume Control:
Volume can be adjusted using the VOLUME + and VOLUME – buttons on the sound bar or the VOL. + and VOL. - buttons on the remote control. If the sound bar is turned off and on with the volume set to 20 or higher, the volume will start at a lower level and gradually fade in to the last set level. The MUTE button on the remote control temporarily mutes the volume; pressing it again restores the volume. Muting is canceled if the sound bar is turned off and back on.
The INPUT button on the sound bar or remote control allows you to cycle through available input sources: HDMI 1, HDMI 2, TV ARC, OPTICAL, BLUETOOTH, and AUDIO IN. The selected input source will be displayed on the sound bar.
Sound Modes:
The SOUND MODE button on the sound bar or remote control allows you to select various sound modes to optimize the audio for different content:
- CINEMA: For cinema sound effects.
- MUSIC: For standard sound effects.
- GAME: For game sound effects.
- SPORT: For sport broadcasting.
- NEWS: For news.
- NIGHT: For night listening.
- BYPASS: For a flat sound effect.
3D Sound Mode:
The system offers 3D sound processing to create an immersive audio experience regardless of the sound source type (stereo or multichannel). There are three 3D audio settings:
- 3D AUDIO 1: Emphasizes 3D sound.
- 3D AUDIO 2: Maintains 3D sound and improves vocal clarity.
- 3D AUDIO 0: Turns off 3D sound effect.
Bass and Treble Control (Remote Control Only):
- Bass Control: Press the BASS/TREBLE button to select bass. Within 5 seconds, use the VOL. (+ or -) or ∧/∨ buttons to adjust the bass level.
- Treble Control: Press the BASS/TREBLE button repeatedly to select treble. Within 5 seconds, use the VOL. (+ or -) or ∧/∨ buttons to adjust the treble level.
Subwoofer Level Control (Remote Control Only):
To increase or decrease the subwoofer level, select SW LEVEL from the remote control menu and adjust using the VOL. (+ or -) or ∧/∨ buttons. If sound from the speaker is distorted, decrease the subwoofer level. Changing the subwoofer level also changes the output level of the subwoofer.
AV SYNC Level Control (Remote Control Only):
To increase or decrease the AV sync level, select AV SYNC from the remote control menu and adjust using the VOL. (+ or -) or ∧/∨ buttons.
Speaker Output Selection (HDMI Connection, Remote Control Only):
Press the TV SB button on the remote control to toggle sound output between "TV SPEAKER" and "SOUND BAR SPEAKER" on the display.
Bluetooth Connectivity:
The HT-SB38 supports Bluetooth wireless technology for short-range audio streaming from devices like smartphones or computers. It operates within a range of about 32 feet (10 meters).
- Pairing: The sound bar and subwoofer are pre-linked at the factory. If the link is not established, press and hold the PAIRING button on the sound bar or remote control for more than 3 seconds, then plug in the AC power cord of the subwoofer within 3 minutes. The indicator will blink violet during pairing and turn red upon successful pairing.
- Pairing with other Bluetooth devices: Press the ON/STANDBY button, select the Bluetooth function, then press the PAIRING button. Place devices within 3 feet (1 meter) for pairing. Select "HT-SB38 SHARP" from the source list; enter "0000" if a passcode is required. The pairing indicator will light up blue upon successful pairing. The unit can be paired with up to 20 devices.
- Disconnecting: Disconnect the Bluetooth connection on the audio source device, turn off the Bluetooth stereo audio source device, or turn off the unit.
NFC (Near Field Communication):
NFC simplifies Bluetooth pairing by allowing quick, one-touch connection. Simply tap your NFC-enabled device (Android 4.1 or higher) to the NFC detection area on the sound bar or the supplied NFC tag. A pop-up window will appear on your device asking to proceed with the Bluetooth connection; select . Playback will start automatically. To disconnect, tap your device to the NFC detection area again.
USB Playback:
The USB terminal allows playback of MP3/WMA files from USB mass storage devices.
- Select the USB function on the sound bar or remote control ("USB" appears on the display).
- Playback will start automatically; otherwise, press the ►/II button.
- Select desired files using the < or > buttons.
- Track Up/Down: Press the < or > buttons in playback or pause mode.
- Fast Forward/Reverse: Press and hold the < or > buttons in playback mode; release to resume. This is invalid for variable bitrate files.
- Repeat Play: Press the button repeatedly to select "REPEAT ONE" (for one track), "REPEAT ALL" (for all tracks), or "NORMAL" (to cancel).
- Random Play: Press the button repeatedly to select "RANDOM" (for all tracks in random order) or "NORMAL" (to cancel).
- Removing USB device: Pause playback with the button, then unplug the USB memory device.
HDMI Connection:
The system supports HDMI with Audio Return Channel (ARC) for simplified audio connections with compatible TVs. Use High Speed HDMI™ cables for ARC functionality. The system can be operated (power on/off or volume up/down) via a TV or similar component that supports HDMI CEC (Consumer Electronics Control), such as SHARP's AQUOS LINK. To enjoy 3D images or 4K content, connect the system to a 3D-compatible TV and components using High Speed HDMI cables.
Other Audio Connections:
For non-HDMI connections, the system offers optical digital input and analog audio input (AUDIO IN). Connect your TV, DVD player, or other audio sources using an optical digital cable or an audio cable.
Installation:
The sound bar can be placed on a table/floor or wall-mounted. For wall mounting, use appropriate screws (not supplied) and the provided pattern paper to mark screw points. Ensure the wall strength is sufficient. Safety wires (not supplied) can be used to prevent the sound bar from falling, whether wall-mounted or placed on a shelf/table.
Remote Control:
The wireless display remote control uses Bluetooth for communication with the sound bar, allowing control from any direction within 32 feet (10 meters). It also uses infrared to control SHARP TVs. The remote control is pre-linked to the sound bar. If the link is lost, select PAIRING from the remote control menu. The remote control requires two "AA" batteries. A battery indicator shows the remaining level. The remote control can also be powered via a Micro USB cable (not supplied) connected to its DC IN terminal, which disconnects the batteries.
- Press the MENU button.
- Use the ∧ or ∨ buttons to select a menu, then press the > button.
- Use the ∧ or ∨ buttons to select an option.
- Press the < button to return to the previous menu.
Maintenance Features
Cleaning the Cabinet:
Periodically wipe the cabinet with a soft cloth. Do not use chemicals like gasoline or paint thinner, as they can damage the cabinet finish. Avoid applying oil to the inside of components to prevent malfunctions.
Condensation:
If condensation occurs inside the cabinet or on the remote control due to sudden temperature changes or high humidity, leave the power on for about 1 hour until normal playback is possible. Wipe off any condensation on the remote control transmitter with a soft cloth before use.
Troubleshooting and Factory Reset:
If the product malfunctions due to strong external interference (mechanical shock, static electricity, abnormal supply voltage, lightning) or incorrect operation:
- Set the sound bar to standby mode and turn the power on again.
- If not restored, unplug and plug in the sound bar again, then turn the power on.
- Factory Reset: To clear all data stored in memory:
- Disconnect all output and input cables.
- Press the ON/STANDBY button to enter standby mode.
- While pressing the SOUND MODE button, press and hold the ON/STANDBY button until "RESET" appears.
- Press the ON/STANDBY button again (PAIRING indicator will turn red).
Error Indicators:
If operations fail, an error indicator (blinking red) on the sound bar signifies that the protection circuit is activated. If this message persists after unplugging/plugging in the speaker or setting to standby mode, contact your local dealer.
General Precautions:
- Maintain at least 4" (10 cm) of free space around the equipment for proper ventilation.
- Use the unit on a firm, level surface free from vibration.
- Keep the unit away from direct sunlight, strong magnetic fields, excessive dust, humidity, and electrical equipment that generates noise.
- Do not place anything on top of the unit.
- Do not expose the unit to moisture or extreme temperatures (41°F - 95°F / 5°C - 35°C).
- Unplug the unit during lightning storms or if unused for long periods.
- Refer all servicing to qualified service personnel.
- Hold the AC power plug by the head when removing it from the AC outlet to prevent damage to internal wires.
- The AC power plug is a disconnect device and should always be readily operable.
- Do not remove the outer cover to avoid electric shock; refer internal service to a SHARP service facility.
- Only use the supplied AC/DC adaptor; using others may cause electric shock or fire.
- The voltage used must match the unit's specifications.
- Keep the subwoofer away from water and moisture.
- Ensure the area around the sound bar and subwoofer is clear of obstacles for optimal listening.