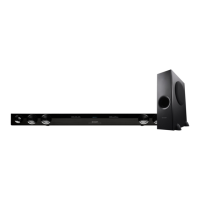
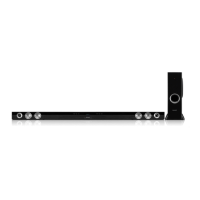
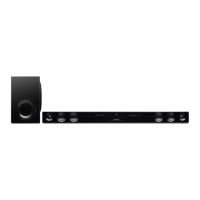
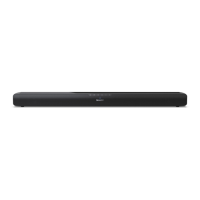
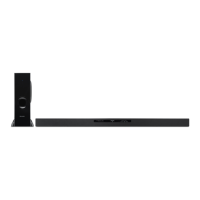
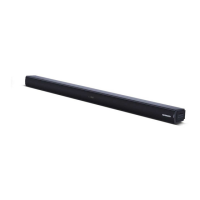
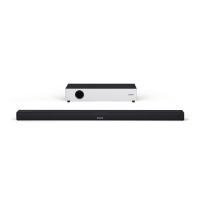
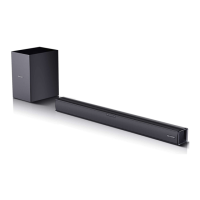
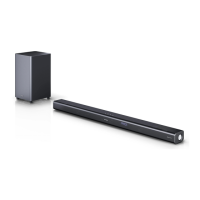
This document describes the SHARP HT-SB40 Sound Bar Home Theater System, which consists of the HT-SB40 sound bar and the CP-SW40 active subwoofer. This system is designed to enhance the audio experience for flat panel TVs (LED, LCD, and plasma).
Function Description
The HT-SB40 system provides an immersive audio experience, supporting various sound modes and digital audio formats. It features S+ 3D technology to create a 3D sound effect regardless of the source type, simulating a wider soundstage. The system incorporates decoders for Dolby Digital and DTS systems, allowing users to enjoy realistic sound effects. It also supports PCM (Pulse Code Modulation) for playback of digital signals from sources like CD or DVD.
The sound bar can be connected to a TV via HDMI, including support for Audio Return Channel (ARC) for simplified audio routing. It also offers HDMI IN terminals for connecting other components like DVD/Blu-ray players or digital tuners. For TVs without ARC, or for other audio sources, the system provides optical digital input and analog audio input.
The wireless subwoofer automatically links with the sound bar, providing flexible placement options. The system includes an Auto Power Off Control (APC) feature, which automatically turns off the sound bar if no signal is detected for a preset time, helping to conserve energy.
Usage Features
Power Control:
The system can be turned on or off using the ON/STAND-BY button on the sound bar or the remote control. The subwoofer indicator turns blue when powered on and red in stand-by mode. The system can also automatically power on if a connected TV or component supporting HDMI CEC is turned on.
Volume Control:
Volume can be adjusted using the VOLUME + and - buttons on the sound bar or the remote control. A volume auto fade-in feature ensures that if the sound bar is turned off and on with the volume set high, it starts at a moderate level (40) and then fades to the last set level.
Muting:
The volume can be temporarily muted by pressing the MUTE button on the remote control. Pressing it again restores the volume. Muting is canceled if the sound bar is turned off and back on.
Sound Modes:
The system offers several sound modes to optimize the audio for different content:
- CINEMA: For cinema sound effects.
- MUSIC: For standard sound effects.
- GAME: For game sound effects.
- SPORT: For sport broadcasting.
- NEWS: For news.
- NIGHT: For night listening.
- BYPASS: For flat sound effects.
These modes can be selected using the SOUND MODE button on the sound bar or the dedicated sound mode buttons on the remote control.
3D Audio:
The 3D AUDIO button on the remote control allows selection of different 3D sound effects:
- 3D AUDIO 1: Emphasizes 3D sound.
- 3D AUDIO 2: Maintains 3D sound and improves vocal clarity.
- 3D AUDIO OFF: Disables the 3D sound effect.
Bass and Treble Control:
Bass and Treble levels can be adjusted when the system is in BYPASS mode. Press the BASS or TREBLE button, then use the VOL (+ or -) buttons within 5 seconds to make adjustments.
Subwoofer Level Control:
The subwoofer level can be increased or decreased using the SW LEVEL buttons on the remote control. This allows users to fine-tune the bass output to their preference. If sound from the speaker is distorted, it is advisable to decrease the subwoofer level.
Input Source Selection:
The SOURCE button on the sound bar or remote control allows users to cycle through available input sources (HDMI 1, HDMI 2, TV ARC, OPTICAL, AUDIO IN). The TV ARC button on the remote control directly selects the TV ARC input.
AV SYNC Level Control:
The AV SYNC level can be adjusted using the AV SYNC + and - buttons on the remote control to synchronize audio and video.
Speaker Output Selection (HDMI Connection):
When connected via HDMI, users can toggle sound output between the sound bar and the TV speakers by pressing and holding the MUTE button on the remote control until "TV SPEAKER" or "SB SPEAKER" appears on the display.
Display Brightness Control:
The DIMMER button on the remote control adjusts the brightness of the sound bar's display, offering options for dim, dimmer, and off (bright).
Remote Control Operation:
The remote control operates within a range of 8 to 20 feet (0.2 to 6 meters) and within a 15-degree angle. It can also operate some SHARP TVs, allowing control over TV power, channel switching, and volume.
Subwoofer Pairing:
If the wireless link between the sound bar and subwoofer is not established automatically, manual pairing can be initiated by pressing and holding the PAIRING button on both the sound bar and subwoofer for more than 3 seconds within a 2-minute window.
Mounting Options:
The sound bar can be mounted on a wall using appropriate screws (not supplied) and wall mount plugs, or placed on a table/shelf. Safety wires (not supplied) can be used for falling prevention when wall-mounted.
Maintenance Features
Cleaning the Cabinet:
The cabinet should be periodically wiped with a soft, dry cloth. It is important to avoid using chemicals like gasoline or paint thinner, as these can damage the cabinet finish. Also, avoid applying oil to internal components to prevent malfunctions.
Troubleshooting:
The manual provides a comprehensive troubleshooting chart to help users resolve common issues such as no sound, unbalanced subwoofer sound, sudden power off, noise during playback, unresponsive buttons, power not turning on, 3D image display problems, background noise with RCA connection, and wireless connection issues.
Factory Reset:
To perform a factory reset and clear all stored memory, disconnect all output and input cables. Enter stand-by mode, then press and hold the ON/STAND-BY button while pressing the SOUND MODE button until "RESET" appears. This operation is not applicable during demonstration mode off or low power consumption mode (ECO (CEC OFF)).
Condensation:
In case of condensation due to sudden temperature changes or high humidity, leave the power on until normal playback is possible (about 1 hour). Wipe off any condensation on the remote control transmitter with a soft cloth before use.
Battery Replacement:
The remote control uses one "AA" size battery. Batteries should be inserted according to the polarity indicated in the compartment. Remove batteries if the sound bar will not be used for a long period to prevent leakage. Do not use rechargeable batteries.
General Precautions:
- Ensure the equipment is well-ventilated with at least 4 inches (10 cm) of free space around it.
- Keep the unit away from direct sunlight, strong magnetic fields, excessive dust, humidity, and electronic/electrical noise sources.
- Do not place anything on top of the unit.
- Avoid exposure to moisture or extreme temperatures (above 140°F/60°C or extremely low temperatures).
- In case of malfunction, disconnect and replug the AC power cord.
- Unplug the unit during lightning storms or when unused for long periods.
- Refer all servicing to qualified personnel.
- Hold the AC power plug by the head when removing it from the outlet to prevent damage to internal wires.
- The AC power plug is a disconnect device and should always be readily operable.
- Do not remove the outer cover to avoid electric shock; refer internal service to a SHARP service facility.
- Use the unit only within 41°F - 95°F (5°C - 35°C).
- SHARP is not responsible for damage due to improper use.
- Ensure the voltage used matches the unit's specifications to prevent fire or accidents.
- In case of repair, bring the entire system to the service center.
- Avoid exposure to high volume levels for extended periods.