4
Preparations
Prepare the Remote Control
The provided Remote Control allows the unit to
be operated from a distance.
• Even if the Remote Control is operated within the e ective range of 6m,
remote control operation may be impossible if there are any obstacles
between the unit and the remote control.
• If the Remote Control is operated near other products which generate
infrared rays, or if other remote control devices using infra-red rays are
used near the unit, it may operate incorrectly. Conversely, the other
products may operate incorrectly.
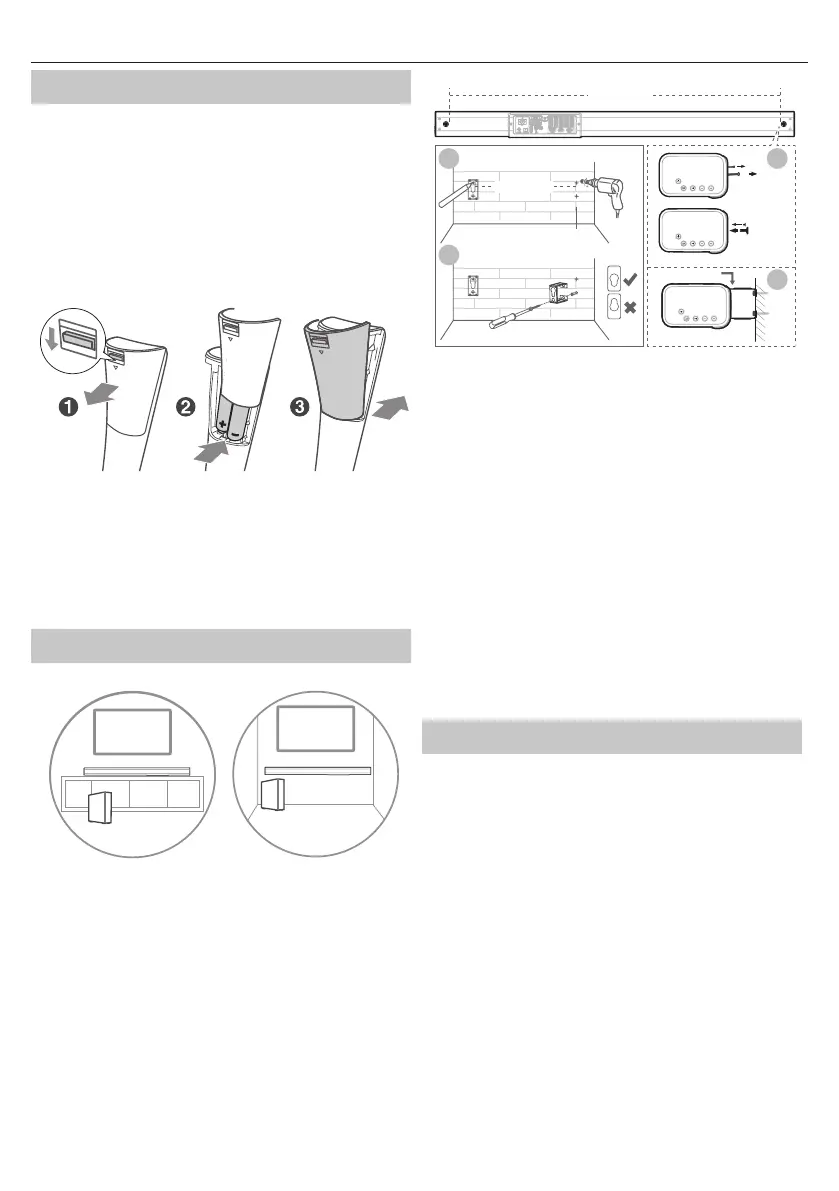
Replace the Remote Control Battery
1. Press and slide the back cover to open the battery compartment of the
remote control.
2. Insert two AAA size batteries (included). Make sure the (+) and (–) ends
of the batteries match the (+) and (–) ends indicated in the battery
compartment.
3. Close the battery compartment cover.
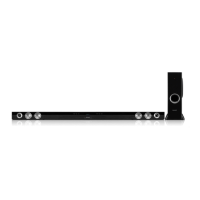
Placement and Mounting
A B
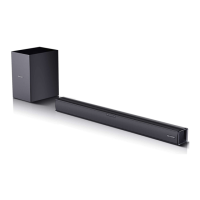
Placement
A If your TV is placed on a table, you can place the unit on the table
directly in front of the TV stand, centered with the TV screen.
B If your TV is attached to a wall, you can mount the unit on the wall
directly below the TV screen.
893 mm
Remove
the screws
Install the wall
mounting screws
Ø5.5~6mm
32mm
1 3
4
2
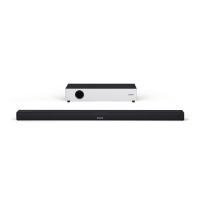
Wall Mounting (if using option-B)
• Installation must be carried out by quali ed personnel only. Incorrect
assembly can result in severe personal injury and property damage (if
you intend to install this product yourself, you must check for installa-
tions such as electrical wiring and plumbing that may be buried inside
the wall). It is the installer’s responsibility to verify that the wall will safely
support the total load of the unit and wall brackets.
• Additional tools (not included) are required for the installation.
• Do not overtighten screws.
• Keep this instruction manual for future reference.
• Use an electronic stud nder to check the wall type before drilling and
mounting.
1. Drill 4 parallel holes (Ø 5.5-6 mm each according to wall type) in the
wall. The distance between the holes should be 893 mm.
2. Firmly x 1 dowel into each hole in the wall if necessary. Tighten the
wall mount brackets on the wall with screws and screwdriver (not
included). Make sure that they are securely installed.
3. Remove the screws at the back of the unit. Install the wall mounting
screws into the back of the unit.
4. Lift the unit onto the wall mount brackets and slot into place.
Connections
Dolby Atmos®
Dolby Atmos gives you amazing experience you have never heard before
by overhead sound, and all the richness, clarity, and power of Dolby sound.
For using Dolby Atmos®
Dolby Atmos® is available only in HDMI mode. For the details of the
connection, please refer to “HDMI Connection”.
1. To use Dolby Atmos® in HDMI 1 / HDMI 2 / HDMI ARC mode, your TV has
to support Dolby Atmos®.
2. Make sure that “No Encoding“ is selected for bitstream in the audio
output of the connected external device (e.g. Blu-ray DVD player, TV
etc.).
3. While entering Dolby Atmos / Dolby Digital / PCM format, the soundbar
will show DOLBY ATMOS / DOLBY AUDIO / PCM AUDIO.
4. While the soundbar is using Dolby Atmos audio, you can only adjust
the bass level of the subwoofer.
HDMI Connection
Some 4K HDR TVs require the HDMI input or picture settings to be set for
HDR content reception. For further setup details on HDR display, please
refer to the instruction manual of your TV.