12
LC-22AD1E
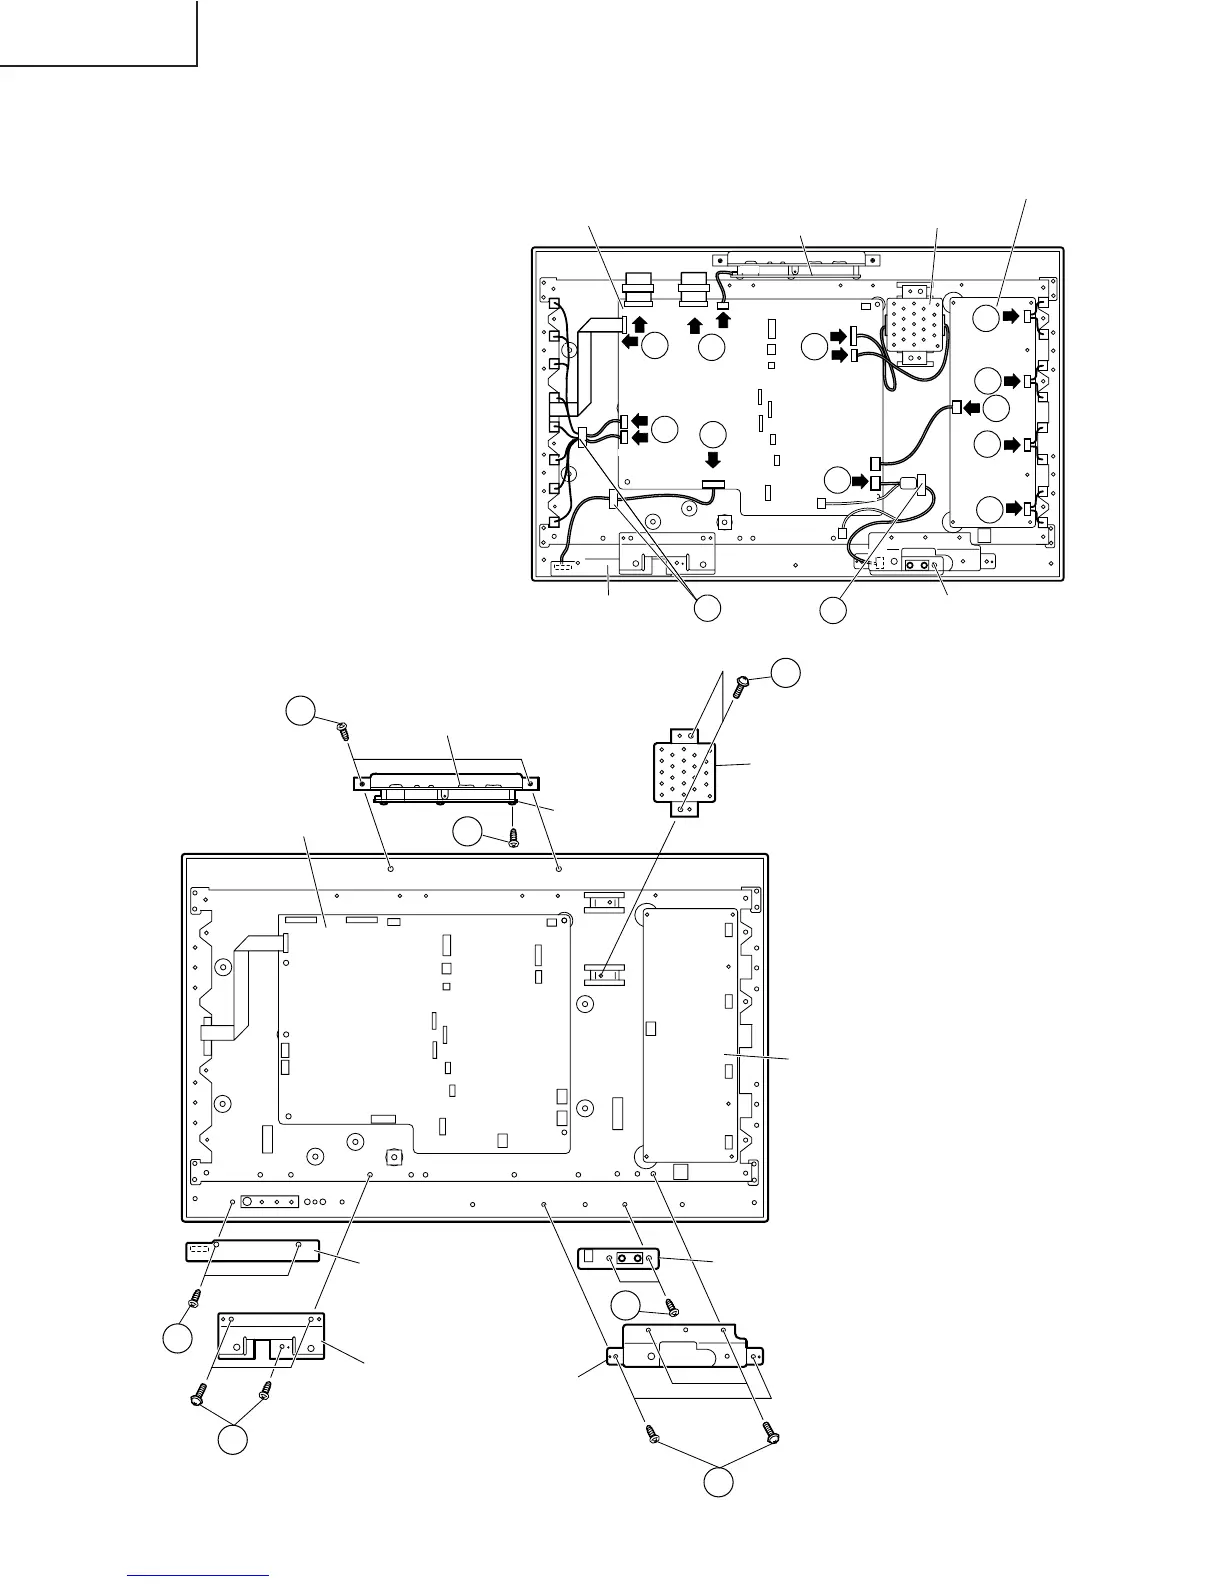
16. Open the wire holder and disconnect the
connection cord.
17. Disconnect each connector from each PWB.
18. Remove the 2 top cover ass’y fixing
screws to take out the top cover ass’y
(OPERATION PWB).
19. Remove the 2 OPERATION PWB fixing
screws from the top cover ass’y to detach
the OPERATION PWB.
20. Remove the 2 1BIT-AMP UNIT fixing
screws to detach the 1 BIT-AMP UNIT.
21. Remove the 3 speaker fixing angle (R) fixing
screws to detach the speaker fixing angle
(R).
22. Remove the 2 R/C, LED PWB fixing screws
to detach the R/C, LED PWB.
23. Remove the 4 speaker fixing angle (L) fixing
screws to detach the speaker fixing angle
(L).
24. Remove the 2 speaker terminal PWB fixing
screws to detach the speaker terminal PWB.
18
22
21
19
20
23
24
Speaker Fixing
Angle (R)
Speaker Fixing
Angle (L)
R/C, LED PWB SP-JACK PWB
INVERTER PWB
MAIN PWB
Top Cover Ass'y
OPERATION
PWB
1BIT-AMP UNIT