LC-32D41U/LC-32M41U/LC-40C32U
5 – 4
2.3. Monitor microprocessor software version upgrade
NOTE: If “Monitor version” in the process menu is “2.00M”, the monitor microprocessor software can not be rewritten (because IC2002 has been
replaced with the mask type).
Get ready the same items as listed in the “Main software version upgrade”.
Create the SD card for monitor microprocessor software version upgrade in the same manner as explained in the “Main software version upgrade”.
Copy the binary image file M150Mxxx.SDC (named temporarily) for monitor microprocessor software version upgrade to the SD card drive.
1. Shut off the AC power to the unit (i.e. unplug the AC cord).
2. Insert the SD card for version upgrade (prepared as above) into the service socket located lower side from center at terminals, above S-VIDEO
terminal in the rear of the unit, in a way that the cut corner of the SD card comes at the upper side.
NOTE: If the SD card is inserted in a wrong way, the card will go deep inside the unit beyond retrieval. Take due care to insert the SD card correctly.
3. Turn on the AC power (i.e. plug in the AC cord).
CAUTION: The moment this operation is done, the upgrading of the monitor microprocessor software starts. While the upgrade is ongoing,
never power off the unit. Otherwise the upgrade will fail and the system may have a serious damage beyond recovery (inability
to start).
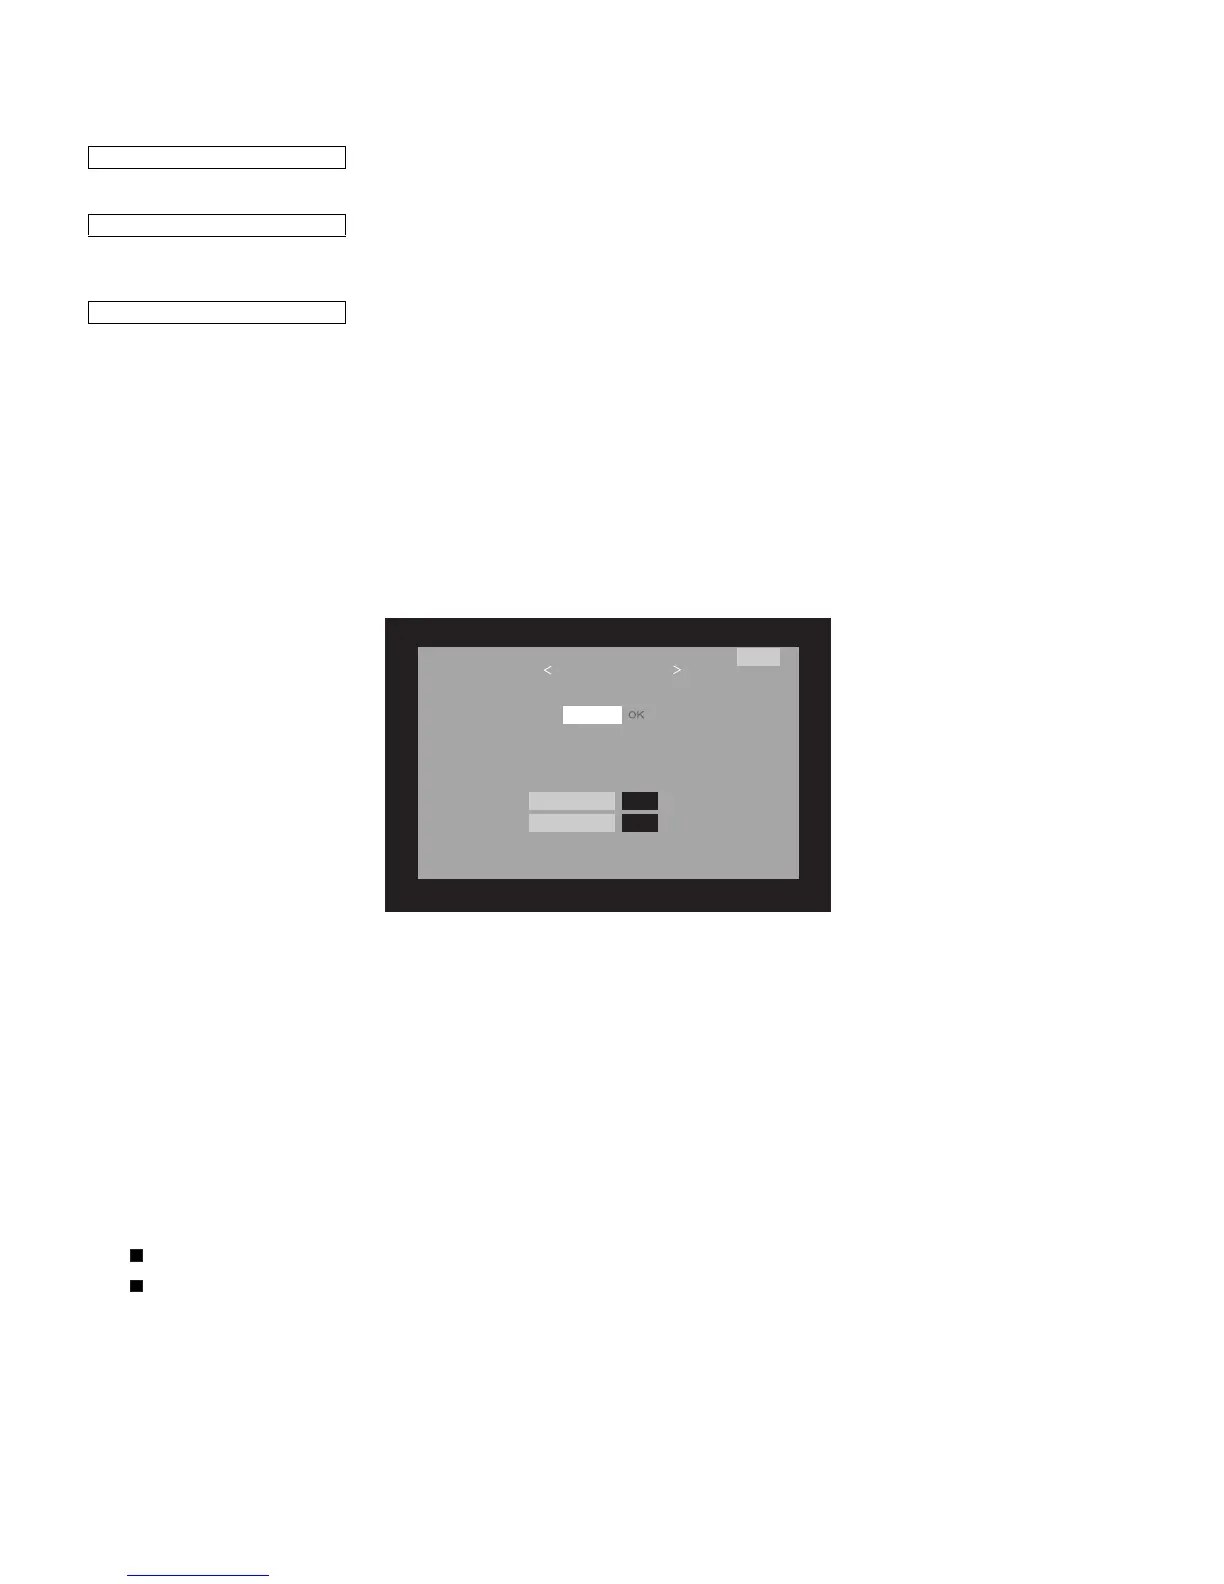
4. After the unit startup, the system upgrade screen as shown below appears within 10-30 seconds.
5. A failure in the process will trigger the upgrade failure screen. The word “NG” changes to red for the item failed.
NOTE: In the event of a failure, repeat the upgrading process. If the process repeatedly fails, it is likely that the hardware is troubled.
6. Upon completion of the whole process, the upgrade success screen as shown below appears. You can check the new software version on this
screen. The version information appears after the upgrade is complete.
7. Shut off the AC power to the unit (unplug the AC cord), and remove the SD card for version upgrade.
8. Now the software version upgrade is complete.
NOTE: When you are done with the software version upgrade, start the set, go to the top page of the adjustment process screen and check the mon-
itor microprocessor software version information.
2.4. Video signal adjustment procedure
1) Image adjustment
1. Device check
Before adjustment, make sure that the adjusting device and signal source are set for the Sharp LCD US.
Signal generator level adjustment check (Adjustment to the specified level)
Get ready before you begin
Preparation
How to upgrade the software
• Composite signal : 0.714Vp-p ± 0.02Vp-p (Pedestal to white level)
• 15K component signal : Y level : 0.714Vp-p ± 0.02Vp-p (Pedestal to white level)
PB, PR level : 0.7Vp-p ± 0.02Vp-p
• 33K component signal : Y level : 0.7Vp-p ± 0.02Vp-p (Pedestal to white level)
PB, PR level : 0.7Vp-p ± 0.02Vp-p
• DVI-I (Analog RGB) signal : RGB level : 0.7Vp-p ± 0.02Vp-p (Pedestal to white level)
MONITOR UPGRADE
Program
NG
12%
1.00OLD Version
NEW Version 1.02
M150